
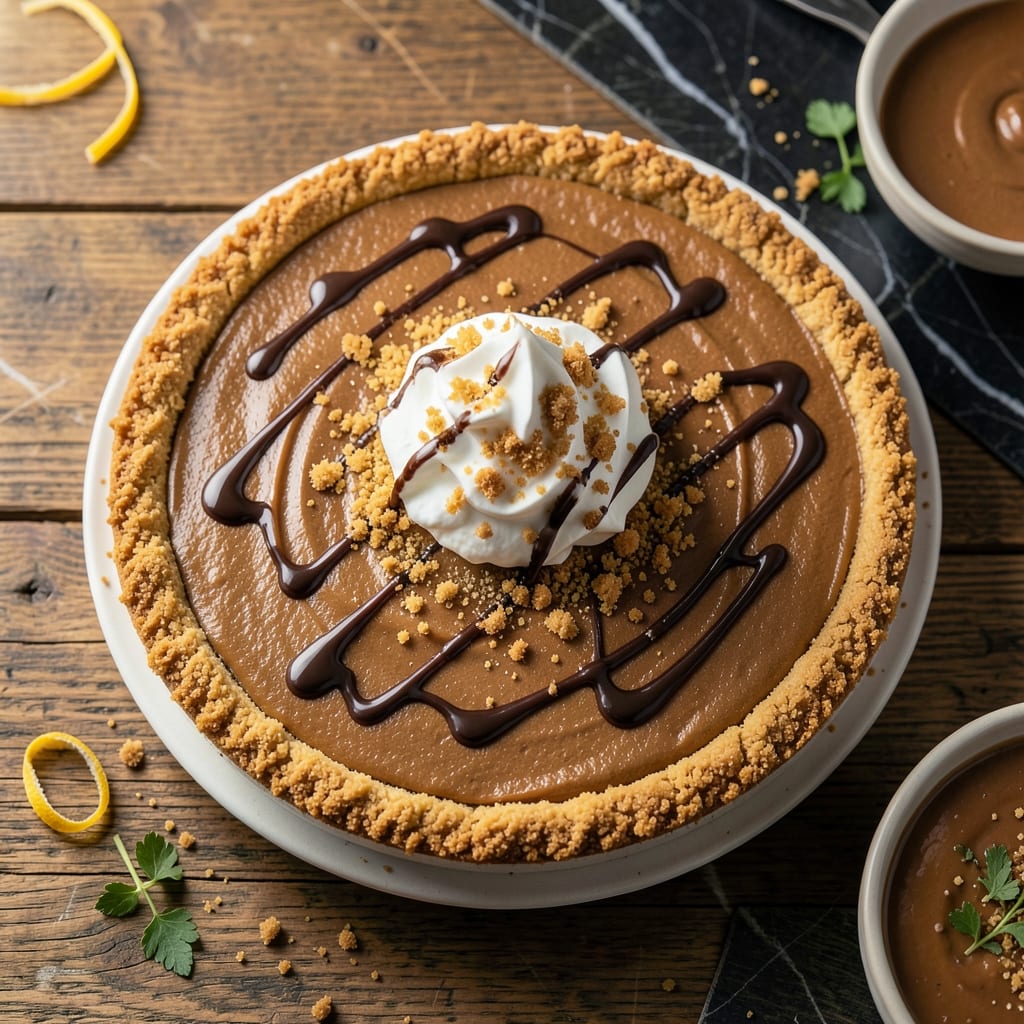
There’s a reason this no-bake pie has been a diner favorite for decades. The buttery graham crust pairs perfectly with a silky peanut butter filling that’s rich yet light, requiring no oven time at all.
I’ve tested this method across different kitchens, and it holds up every time. The filling sets beautifully in the fridge, creating a firm but creamy texture that slicing cleanly without falling apart.
What you get is a dessert that’s as impressive as it is effortless—smooth, nutty, and perfectly balanced with just a hint of sweetness. David always steals the first slice before it’s fully chilled.
Serve it straight from the fridge for the best texture. Here’s how to make it.
Ingredients for Peanut Butter Pie Recipe with Graham Cracker Crust
Simple pantry staples transform into this creamy, dreamy no-bake dessert everyone loves.
| Ingredient | Amount | Notes |
|---|---|---|
| Graham Cracker Crumbs 🍪 | 1 ½ cups | Fine crumbs, about 12 full sheets |
| Unsalted Butter 🧈 | ½ cup | Melted for crust binding |
| Granulated Sugar 🍚 | ¼ cup | For crust sweetness |
| Creamy Peanut Butter 🥜 | 1 cup | Natural or commercial, well-stirred |
| Cream Cheese 🧀 | 8 oz | Full-fat, softened to room temperature |
| Powdered Sugar 🍬 | 1 cup | Sifted for smooth texture |
| Vanilla Extract 🌿 | 1 tsp | Pure extract for best flavor |
| Heavy Whipping Cream 🥛 | 1 cup | Chilled for whipping |
| Salt 🧂 | ¼ tsp | Fine sea salt or table salt |
| Whipped Topping 🍦 | 1 cup | Optional for garnish |
| Chopped Peanuts 🥜 | ¼ cup | For garnish and texture |
The graham crackers need to be crushed fine—food processor gets you there fastest, but a rolling pin and ziplock bag works too (just don’t pulverize them into dust). For the butter, unsalted is key so you control the salt level. I grab mine from Trader Joe’s when I want that rich, yellow color. The peanut butter should be shelf-stable, not the natural kind that separates completely (unless you’re okay with stirring forever).
No cream cheese? Mascarpone at equal amount gives a similar tang. Swap the heavy cream for coconut cream (chilled overnight) if you want a dairy-free option. The sugar can be reduced by a quarter if you prefer less sweetness, but don’t skip it entirely—the crust needs that caramelization. For the whipped topping, Cool Whip works in a pinch (thawed first).
This keeps 3-4 days in the fridge, covered. Freeze for up to 2 months (thaw overnight in fridge). The crust softens as it sits, so slice within a day for the cleanest pieces.
Why You’ll Love This Recipe
- No-Bake Bliss: I just mix the graham crumbs with melted butter, press, and chill—no oven required.
- Rich & Creamy: The peanut butter and cream cheese layer is so smooth, it melts in your mouth.
- Crowd Pleaser: Honestly, it disappears at every potluck, even with picky eaters.
- Leftovers? Ha.: Between us, there never are any—but if there were, they’d keep for days.
Step-by-Step Instructions for Peanut Butter Pie with Graham Cracker Crust
This no-bake method is simple, foolproof, and delivers a creamy, dreamy pie every single time.
Step 1: Make and Chill the Graham Cracker Crust
In a medium bowl, combine all 1.5 cups Graham Cracker Crumbs, 0.25 cup Granulated Sugar, and the 0.5 cup Unsalted Butter melted over low heat. Stir until the mixture looks like wet sand and holds together when pressed between your fingers.
Press the crumb mixture firmly into a 9-inch pie dish, working it up the sides evenly with a measuring cup or the back of a spoon. I press down hard to create a compact base—this prevents crumbly slices later. Chill in the refrigerator for 15 minutes while you prepare the filling. The crust should feel firm when ready.
Step 2: Beat Cream Cheese, Peanut Butter, and Sweeteners
In a large bowl, beat the 8 oz Cream Cheese with an electric mixer on medium speed until smooth and creamy with no lumps. Scrape down the sides of the bowl as needed—this ensures everything blends evenly.
Add the 1 cup Creamy Peanut Butter, 1 cup Powdered Sugar, 1 tsp Vanilla Extract, and 0.25 tsp Salt. Beat on medium speed for 2-3 minutes until the mixture is completely smooth and slightly fluffy. You’ll know it’s ready when it lightens in color and leaves ribbons when the beaters are lifted.
Step 3: Fold in Whipped Cream for Silky Texture
In a separate chilled bowl, whip the 1 cup Heavy Whipping Cream with an electric mixer on high speed until stiff peaks form. This takes about 2-3 minutes—watch for the cream to hold its shape when the beaters are lifted, with tips that stand straight up.
Gently fold the whipped cream into the peanut butter mixture with a silicone spatula using a J-shaped motion. Turn the bowl as you fold to incorporate everything evenly without deflating the cream. The filling should be light, airy, and spreadable like a thick mousse.
Step 4: Assemble and Chill the Pie
Spoon the peanut butter filling into the chilled crust and spread it evenly with an offset spatula or the back of a spoon. The filling should dome slightly in the center. Tap the pie dish gently on the counter to remove any air pockets.
Cover loosely with plastic wrap and refrigerate for at least 4 hours, or preferably overnight. This chilling time is crucial—it allows the filling to set completely so you can slice clean portions. The pie is ready when the filling holds its shape and a knife inserted near the center comes out clean.
Step 5: Garnish and Serve
Just before serving, top the pie with 1 cup Whipped Topping, spreading it evenly over the surface. Sprinkle the 0.25 cup Chopped Peanuts over the top for a satisfying crunch and visual appeal. I like to press them lightly into the whipped topping so they stay in place.
Slice with a sharp knife dipped in hot water for clean cuts. Serve immediately for the best texture—the crust stays crisp while the filling remains silky smooth. This pie keeps well in the refrigerator for up to 3 days if covered tightly.
Pro Tips For Making Peanut Butter Pie Recipe With Graham Cracker Crust
- Pre-bake the crust: Blind-bake the graham cracker crust for 8-10 minutes at 350°F before filling—this keeps it crisp instead of soggy under the peanut butter layer.
- Soften the cream cheese: Let the cream cheese sit at room temperature for at least 30 minutes before mixing, or you’ll end up with lumpy filling no matter how hard you stir.
- Skip the natural PB: Use regular creamy peanut butter, not the natural kind—the oil separation in natural versions makes the filling greasy and hard to set.
- Chill overnight: I learned this the hard way—this pie needs at least 4 hours (but ideally overnight) in the fridge to firm up enough to slice cleanly.
Essential Equipment for This Recipe
Pie Dish
A 9-inch glass pie dish works best for even chilling and clean slicing. I use my Pyrex dish from Nana Mae’s diner—it’s seen 30 years of pies and still looks new. Avoid metal pans as they can make the crust too crisp.
Mixing Tools
An electric mixer is essential for smooth filling. I prefer my KitchenAid stand mixer with the whisk attachment, but a hand mixer works too. For folding whipped cream, a silicone spatula prevents deflating the mixture.
Chilling Equipment
Your refrigerator must have space for the pie to chill undisturbed. I clear a shelf in advance for the 4-hour minimum setting time. A pie carrier helps transport it to potlucks without mess.
Crust Press
For compacting the graham crust, a flat-bottomed measuring cup works perfectly. I also keep a rolling pin handy for crushing graham crackers if I’m not using my food processor. Press firmly for clean slices later. 💪
Serving Essentials
A sharp chef’s knife dipped in hot water makes clean cuts. I run mine under hot tap water between slices. A pie server helps lift slices without breaking the crust.
Garnishing Tools
An offset spatula spreads whipped topping smoothly. For the peanut topping, I use a small cutting board and chef’s knife to chop ¼ cup peanuts evenly. Keep a damp towel nearby to wipe sticky utensils. ✨
Nutrition Facts
Frequently Asked Questions
Can I use natural peanut butter instead?
Yes, but stir it well to incorporate the oil first. The texture may be slightly less smooth than commercial brands.
How do I prevent a soggy crust?
Press the crumbs firmly into the pan and chill for 15 minutes before adding filling. This creates a barrier against moisture.
Can this pie be frozen?
Freeze uncovered for 1 hour, then wrap tightly. Thaw overnight in the fridge before serving.
What if my filling doesn’t set?
Chill for at least 4 hours or overnight. If still soft, the whipped cream may not have been stiff enough.

- Pina Colada Dip Recipe Red Lobster: Tropical Creaminess With Toasted Coconut - October 12, 2026
- Pickled Sweet Cherry Peppers Recipe Canning: Tangy Heat for Pantry Staples - October 12, 2026
- Peppercorn Sauce Recipe Vegan: Rich Umami Depth Without Cream - October 12, 2026