
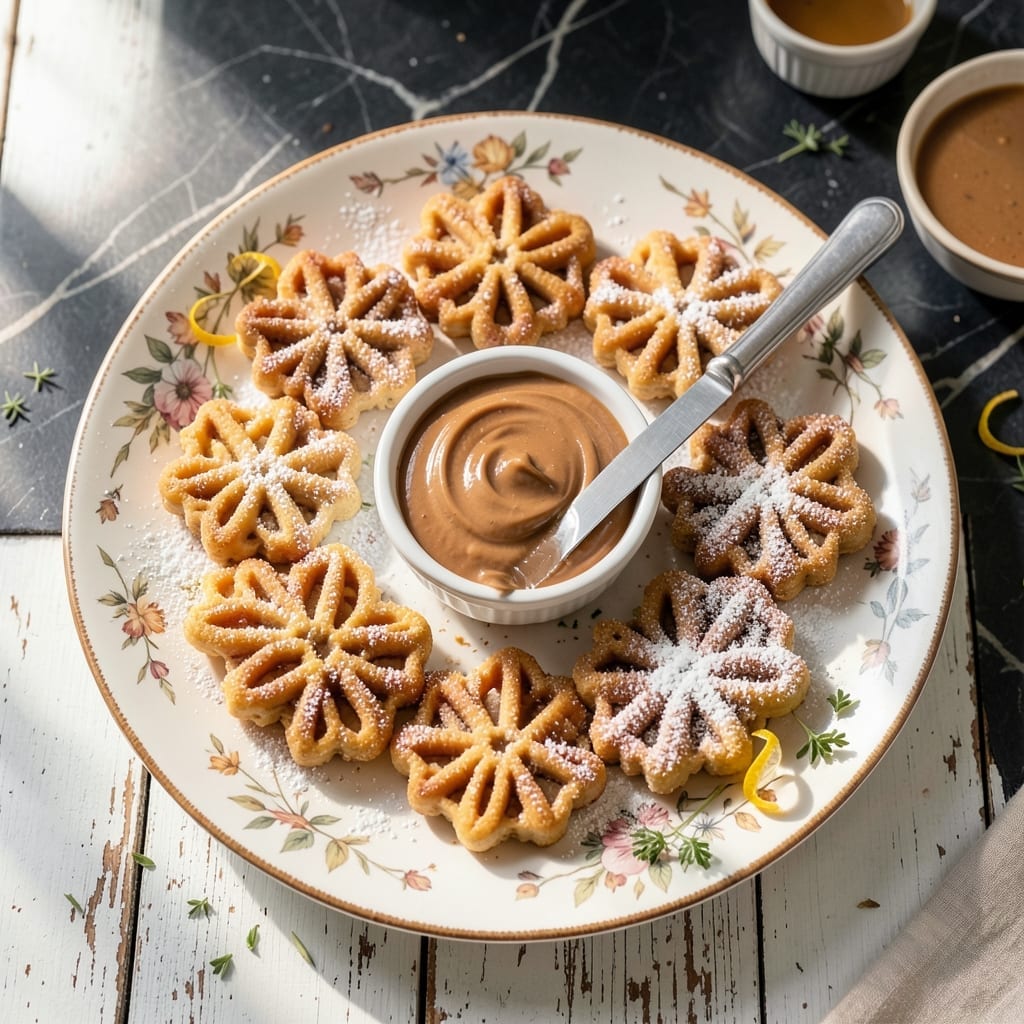
There’s something special about warm, crispy pizzelle fresh off the iron, and this peanut butter version takes it to another level. The rich, nutty flavor pairs perfectly with the delicate waffle texture, making it a standout treat for any occasion.
I developed this recipe after years of testing to get the batter just right—thick enough to hold the pattern but thin enough to create those signature lacy edges. The peanut butter adds depth without overpowering the classic pizzelle taste.
Each bite delivers a satisfying crunch followed by a melt-in-your-mouth finish. The cookies stay crispy for days if stored properly, making them ideal for gifting or enjoying with coffee.
This method ensures consistent results every time, with golden-brown cookies that release easily from the iron. Here’s how to make them.
Ingredients for Peanut Butter Pizzelle
Warm crispy cookies start with these simple pantry staples and peanut butter.
| Ingredient | Amount | Notes |
|---|---|---|
| All-Purpose Flour 🌾 | 2 cups | Sifted for smooth batter |
| Granulated Sugar 🍚 | ¾ cup | Fine grain for even mixing |
| Creamy Peanut Butter 🥜 | ½ cup | Natural or commercial |
| Unsalted Butter 🧈 | ½ cup | Melted and cooled |
| Large Eggs 🥚 | 3 whole | Room temperature preferred |
| Vanilla Extract 🌿 | 1 tsp | Pure extract for best flavor |
| Baking Powder 🧂 | 1 tsp | Ensures proper rise |
| Salt 🧂 | ¼ tsp | Fine sea salt or table salt |
| Anise Seeds 🌿 | 1 tsp | Traditional pizzelle flavor |
| Vegetable Oil 🫒 | 2 tbsp | For greasing the iron |
The peanut butter is key here—Jif or Skippy work perfectly, but natural peanut butter adds a richer depth. King Arthur Flour is my go-to for all-purpose, but any brand works as long as it’s fresh. The anise seeds are traditional for pizzelle, but if you’re not a fan, they can be omitted without affecting texture. Butter should be unsalted so you control the salt content.
No anise seeds? Vanilla or almond extract at half the amount works as a substitute. Short on granulated sugar? Light brown sugar adds a caramel note. If you don’t have a pizzelle iron, a waffle cone maker can work in a pinch (but the pattern won’t be as intricate). The butter can be swapped for coconut oil if you need a dairy-free option.
Store in an airtight container at room temperature for up to 2 weeks. For longer storage, freeze for up to 3 months. The cookies will stay crispy if kept dry—avoid any humidity.
Why You’ll Love This Recipe
- One-Bowl Wonder: I mix everything in a single bowl—flour, sugar, eggs, and that creamy peanut butter melts right in with the butter. No fuss, no extra dishes.
- Nutty Heaven: The peanut butter gives these pizzelle a rich, toasty depth that’s way more interesting than plain vanilla. Honestly, it’s the reason I keep making them.
- Holiday Staple: These are my go-to for cookie swaps and gift boxes. Between us, they disappear faster than anything else on the tray.
- Freezer Friendly: I double the batch, bake, cool, and freeze. Pulling out a few for last-minute guests or a late-night craving? Pure satisfaction.
Step-by-Step Instructions for Peanut Butter Pizzelle
Here’s the method to achieve perfectly crisp, golden-brown waffle cookies every time.
Step 1: Prepare the Batter
In a large mixing bowl, whisk together the 3 whole Large Eggs and the 0.75 cup Granulated Sugar until the mixture is pale and slightly thickened. I use a hand mixer for this step to ensure the eggs and sugar are thoroughly combined and slightly aerated.
Add the 0.5 cup Creamy Peanut Butter, 0.5 cup Unsalted Butter (melted and cooled), and 1 tsp Vanilla Extract. Mix on low speed until the mixture is smooth and uniform. The peanut butter should be fully incorporated, with no streaks remaining.
In a separate bowl, sift together the 2 cups All-Purpose Flour, 1 tsp Baking Powder, 0.25 tsp Salt, and 1 tsp Anise Seeds. Gradually add the dry ingredients to the wet mixture, stirring just until combined. The batter will be thick but pourable—don’t overmix, or the cookies will be tough.
Step 2: Heat the Pizzelle Iron
Preheat your pizzelle iron according to the manufacturer’s instructions. Most irons take about 5-7 minutes to reach the proper temperature. You’ll know it’s ready when the iron is hot to the touch and a drop of water sizzles and evaporates immediately upon contact.
Lightly brush both sides of the iron with 2 tbsp Vegetable Oil using a pastry brush. This prevents the cookies from sticking and helps them release cleanly. I like to re-grease the iron after every 3-4 batches to maintain a non-stick surface.
Step 3: Cook the Pizzelle to Crispy Perfection
Spoon about 1 tablespoon of batter onto each patterned plate of the iron. Close the lid and cook for 30-45 seconds, or until the cookies are deep golden brown and the edges are crisp. The exact time depends on your iron’s temperature and the thickness of your batter.
Here’s the thing—you want to err on the side of slightly darker rather than lighter. Lighter cookies will be soft and chewy, but the key to achieving that classic crisp texture is letting them cook until they’re well-browned. The peanut butter adds richness, so the extra color won’t taste burnt.
Carefully remove the cookies with a fork and transfer them to a wire rack to cool completely. They’ll crisp up further as they cool, so resist the urge to taste them right away.
Step 4: Cool and Store for Maximum Crispness
Let the pizzelle cool completely on the wire rack, about 10-15 minutes. This step is crucial—if you stack them while still warm, they’ll trap steam and lose their crispness. Spread them out in a single layer so air can circulate around each cookie.
Once cooled, store the pizzelle in an airtight container at room temperature. If you’re making them ahead, layer the cookies between sheets of parchment paper to prevent them from sticking together. They’ll keep their crisp texture for up to 1 week if stored properly.
Pro Tips For Making Peanut Butter Pizzelle
- Heat the Iron: Preheat your pizzelle iron for at least 5 minutes—any shorter and the first batch will stick. I learned this the hard way after scraping ruined cookies off the plates.
- Soften the Butter: Use room-temperature butter and peanut butter for a smooth, lump-free batter. Cold butter leaves streaks that clog the iron’s pattern.
- Skip Overmixing: Stir the batter just until combined—overmixing develops gluten in the flour, making the pizzelle tough instead of tender.
- Test One First: Cook a single pizzelle first to check doneness time—peanut butter can make them brown faster than classic recipes. Adjust heat if needed.
Essential Equipment for Great peanut butter pizzelle
Pizzelle Iron
The most important tool is a quality pizzelle iron. I recommend the CucinaPro Pizzelle Press—it heats evenly and has non-stick plates that release cookies easily. Avoid cheap models that may burn the batter or create uneven patterns. 🔥
Mixing Tools
A hand mixer is ideal for combining the batter, as it aerates the eggs and sugar for a lighter texture. I use my KitchenAid with the whisk attachment. A sturdy mixing bowl with a spout makes pouring batter onto the iron much cleaner.
Batter Prep
A fine-mesh sieve ensures your dry ingredients are lump-free. I also keep a rubber spatula on hand to scrape every last bit of batter from the bowl. A cookie scoop or tablespoon measure helps portion the batter consistently.
Cooling Setup
Use a wire cooling rack to allow air circulation around the cookies as they crisp up. I place mine on a sheet pan to catch any drips. Avoid cooling directly on a plate, as trapped steam will make them soggy.
Greasing Supplies
A pastry brush is essential for evenly coating the iron with vegetable oil. I prefer a silicone brush because it withstands high heat and doesn’t shed bristles. Keep the oil nearby for quick reapplication between batches.
These tools make the process smooth and ensure your cookies turn out perfectly crisp every time.
Nutrition Facts
Frequently Asked Questions
Why does my batter stick to the iron?
Insufficient oil or low heat is usually the culprit. Always preheat for 5-7 minutes and brush with vegetable oil between batches. Too much batter can also cause sticking—use just 1 tablespoon per pattern.
Can I make these without anise seeds?
Omit them or swap for 1/2 tsp vanilla or almond extract. The peanut butter flavor shines through either way. The texture won’t be affected, just the aroma.
How do I get extra crispy cookies?
Cook until deep golden brown and cool completely on a rack. Stacking warm cookies traps steam, making them soft. Store in an airtight container with parchment between layers.
Can I freeze the dough?
Yes! Portion batter into a sealed container and freeze for up to 1 month. Thaw in the fridge overnight before using. Avoid refreezing after thawing.

- Bread Recipe KitchenAid Mixer: Foolproof Loaf With Perfect Rise - September 28, 2026
- BBQ Oysters Recipe Grill: Smoky Garlic Butter Bliss - September 28, 2026
- Crock Pot Mac and Cheese Recipe Paula Deen: Ultra Creamy Southern-Style Comfort - September 28, 2026