
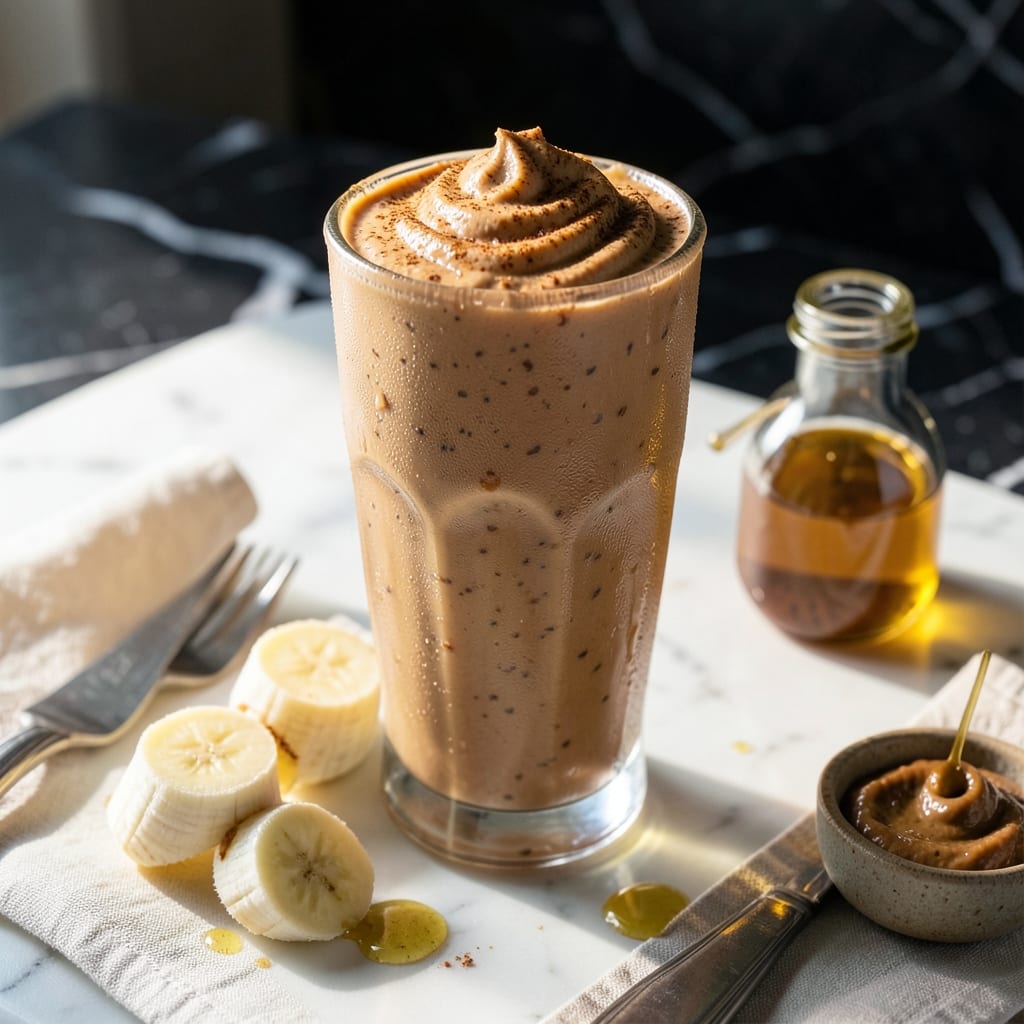
I’ve perfected a creamy peanut butter shake that skips the ice cream without sacrificing richness. The secret? A frozen banana base that blends into a velvety, milkshake-like texture with just the right amount of natural sweetness.
This method relies on simple ingredients—peanut butter, milk, and a touch of vanilla—to create a thick, satisfying shake. The frozen banana replaces ice cream, delivering the same luscious consistency while keeping it lighter and naturally sweetened.
What you get is a creamy, dreamy shake with deep peanut butter flavor and a smooth, drinkable texture. It’s the perfect treat when you crave something indulgent but want to keep it wholesome.
Blend it up in minutes and enjoy a shake that tastes like dessert but feels like a smart choice.
Ingredients for Peanut Butter Shake Recipe Without Ice Cream
Frozen banana and peanut butter blend into a rich, creamy shake that tastes like dessert.
| Ingredient | Amount | Notes |
|---|---|---|
| Frozen Banana 🍌 | 2 whole | Peeled, sliced before freezing |
| Creamy Peanut Butter 🥜 | ½ cup | Natural or regular variety |
| Whole Milk 🥛 | 1 ½ cups | Cold for best texture |
| Vanilla Extract 🌿 | 1 tsp | Pure extract preferred |
| Honey 🍯 | 2 tbsp | Adjust to taste preference |
| Ground Cinnamon 🌶️ | ¼ tsp | Optional for warmth |
| Ice Cubes ❄️ | 6 pieces | For extra chill if needed |
| Sea Salt 🧂 | 0.125 tsp | Enhances peanut flavor |
The bananas are everything here. Freeze them overnight—the riper they are before freezing, the sweeter your shake. I grab mine from Whole Foods or any grocery store with good turnover. The peanut butter should be creamy for smooth blending, but crunchy works if you like texture. Jif or Skippy are reliable, but natural peanut butter adds a nice depth if you stir it well first.
No honey? Maple syrup or agave at the same amount works fine. Want it thicker? Add half a banana. Prefer it thinner? Splash in extra milk. The vanilla is subtle but important—don’t skip it. If you’re using unsweetened peanut butter, you might want an extra tablespoon of honey to balance the bitterness.
Blend and serve immediately for the best texture. Keeps in the fridge for 1 day, but it’s really best fresh. The banana may separate slightly, so give it a quick stir before drinking.
Why You’ll Love This Recipe
- Blender Only: I just dump frozen banana, peanut butter, milk, vanilla, and honey into the blender—no scooping ice cream or prepping extra bowls.
- Creamy PB Dream: The frozen banana gives it this thick, milkshake texture while the peanut butter and honey make it taste like dessert for breakfast.
- Kid-Approved Snack: Honestly, my kids think it’s a treat, but I feel good giving it to them after school or as a quick breakfast.
- Pantry Staples: Between us, I always have these ingredients on hand, so it’s my go-to when I need something fast and satisfying.
Step-by-Step Instructions for Peanut Butter Shake Without Ice Cream
Here’s the method that turns simple ingredients into a velvety, satisfying treat.
Step 1: Prepare the Frozen Banana Base
Add the 2 whole Frozen Banana to your blender first. I always use bananas that were peeled, sliced, and frozen for at least 4 hours—this is crucial for achieving that thick, creamy texture without ice cream. The frozen slices should be solid but still sliceable with a knife.
If your bananas are rock hard straight from the freezer, let them sit on the counter for 2-3 minutes before blending. This small window of time softens them just enough to prevent your blender from straining, while still maintaining the chill needed for that perfect shake consistency.
Step 2: Build the Creamy Foundation
Measure in the 0.5 cup Creamy Peanut Butter, 1.5 cups Whole Milk, and 1 tsp Vanilla Extract. I prefer to add the peanut butter in one clump on top of the bananas—this helps the blender blades catch all the ingredients at once. Use a spatula to scrape every last bit of peanut butter from your measuring cup; that extra ½ tablespoon can make a noticeable difference in flavor intensity.
The milk should be cold straight from the refrigerator. As it hits the frozen banana, you’ll start to see the mixture transform from chunks to a smooth base. The vanilla extract adds depth, but don’t overpour—1 teaspoon is the sweet spot for complementing without overpowering the peanut butter.
Step 3: Sweeten and Season to Taste
Drizzle in the 2 tbsp Honey and add the 0.125 tsp Sea Salt. The salt might seem like an afterthought, but it’s essential—it amplifies the peanut flavor and balances the sweetness of the honey and banana. I like to add the honey slowly while the blender is running on low, allowing it to incorporate evenly rather than settling at the bottom.
Now add the 0.25 tsp Ground Cinnamon. This is optional, but I highly recommend it. The warmth of cinnamon pairs beautifully with peanut butter, adding a subtle complexity that takes this shake from good to extraordinary. You’ll smell the cinnamon immediately as it blends in.
Step 4: Achieve the Perfect Consistency
Blend all ingredients on high for 30-45 seconds, or until completely smooth. Stop the blender and check the texture. If it’s too thick to pour easily, add 1-2 of the 6 pieces Ice Cubes and blend again. The ice cubes help thin the shake slightly while keeping it cold, but don’t add them all at once—it’s easier to add more than to fix an overly thin shake.
You’re aiming for a texture that coats the back of a spoon but still flows freely. The color should be a uniform pale beige with no visible banana chunks or peanut butter streaks. If you see any separation, give it another 10-15 second pulse to bring everything together.
Real talk: If your blender struggles, pause and scrape down the sides with a spatula. This prevents the motor from overheating and ensures all ingredients get incorporated.
Step 5: Serve and Enjoy Immediately
Pour the shake into chilled glasses. The serving should be thick enough that you need to use a spoon to get every last bit from the glass. If you prefer an even colder shake, you can add the remaining ice cubes to the glass, but I find it’s usually perfect straight from the blender.
Serve immediately for the best texture. As it sits, the shake will naturally separate slightly, so give it a quick stir before drinking if you’ve let it wait. The flavor should be a perfect balance of peanut butter richness, banana sweetness, and a hint of vanilla warmth with each sip.
Pro Tips For Making Peanut Butter Shake Recipe Without Ice Cream
- Freeze Bananas First: Use bananas that have been frozen for at least 4 hours—they’ll be solid enough to give your shake that thick, creamy texture without ice cream.
- Warm the Peanut Butter: Microwave the peanut butter for 15-20 seconds before adding it to the blender; it blends smoother and avoids those stubborn clumps.
- Skip the Overfilling: I learned this the hard way—fill your blender no more than halfway to avoid a messy explosion when blending.
- Add Milk Gradually: Start with ½ cup of milk, blend, then add more as needed; it’s easier to thin it out than to fix a runny shake.
Perfect Pairings for This peanut butter shake recipe without ice cream
Breakfast Pairings
This shake pairs beautifully with a stack of whole wheat pancakes drizzled with maple syrup. The nuttiness of the shake complements the warm, fluffy pancakes perfectly. I like to add a sprinkle of chopped peanuts on top for extra crunch. 🥞
Dessert Complements
Serve alongside a slice of chocolate cake for an indulgent dessert combo. The creamy peanut butter flavor cuts through the richness of the cake, creating a balanced treat. I recommend adding a scoop of vanilla ice cream on the side for contrast.
Healthy Additions
For a lighter option, pair with a bowl of fresh berries like strawberries or blueberries. The tartness of the berries balances the sweetness of the shake. Add a handful of granola for texture and extra protein.
Savory Balance
If you prefer a savory contrast, try serving with a peanut butter and jelly sandwich on whole grain bread. The classic combo enhances the shake’s flavors. I use strawberry jam for a sweet-tart kick.
Snack Pairings
This shake also works great with salty snacks like pretzels or popcorn. The sweet and salty contrast is addictive. I often enjoy mine with a handful of roasted peanuts for extra crunch.
Beverage Pairings
For a complete meal, serve with a cup of hot coffee or iced tea. The warmth of coffee or the refreshment of tea complements the shake’s creaminess. I prefer a cold brew to keep the chill going. ✨
Nutrition Facts
Frequently Asked Questions
Can I use a fresh banana instead of frozen?
No, frozen bananas are essential for that thick, creamy texture. Fresh bananas will make your shake thin and watery. Freeze ripe bananas for at least 4 hours before blending for best results.
What can I substitute for honey?
You can use maple syrup, agave, or even pitted dates as alternatives. Each adds a different flavor nuance, so adjust the amount to your taste preference.
How do I make this shake dairy-free?
Simply swap whole milk for almond milk, oat milk, or any other plant-based milk. The shake will still be creamy, though the flavor may vary slightly depending on your choice.
Why does my shake turn out grainy?
This usually happens if the banana isn’t fully frozen or if your blender isn’t powerful enough. Try blending longer or adding a splash more milk to help smooth it out.

- Pina Colada Dip Recipe Red Lobster: Tropical Creaminess With Toasted Coconut - October 12, 2026
- Pickled Sweet Cherry Peppers Recipe Canning: Tangy Heat for Pantry Staples - October 12, 2026
- Peppercorn Sauce Recipe Vegan: Rich Umami Depth Without Cream - October 12, 2026