
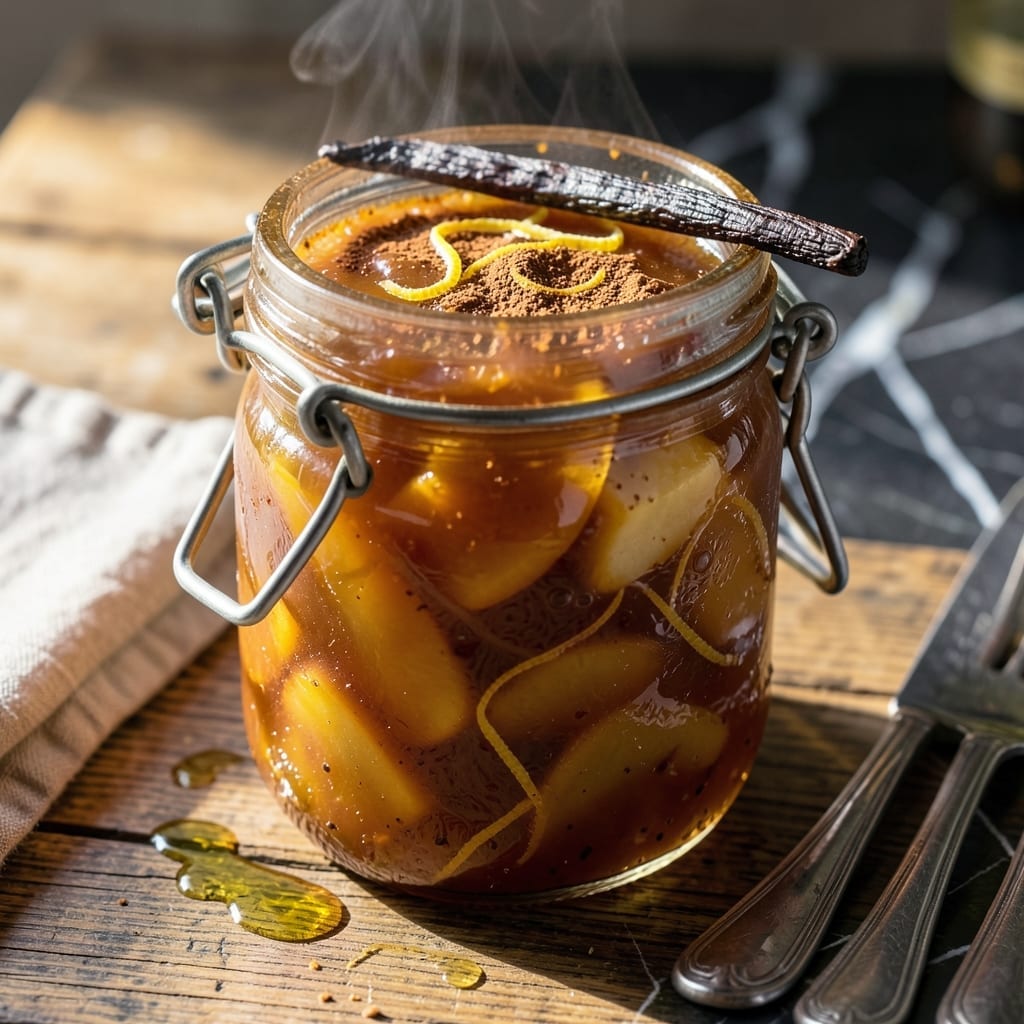
Homemade pear jam doesn’t need pectin to achieve a thick, luscious texture. This method relies on natural fruit sugars and a slow simmer to create a perfectly set spread every time.
I developed this recipe after finding my grandmother’s vague notes—no measurements, just instincts. Through trial and error, I’ve refined it into a foolproof process that anyone can follow.
The pears break down into a glossy, golden jam with a balance of sweetness and natural fruit flavor. No artificial thickeners, just patience and the right technique.
Store this in airtight jars, and it will keep for weeks in the fridge or months in the pantry. Ideal for toast, pastries, or gift-giving.
Ingredients for Pear Jam Recipe Without Pectin
Natural pectin from ripe pears and slow cooking create this thick, glossy fruit spread.
| Ingredient | Amount | Notes |
|---|---|---|
| Ripe Pears 🍐 | 2 ½ lb | Bartlett or Anjou preferred, peeled and diced |
| Granulated Sugar 🍚 | 1 ½ cups | White or raw cane sugar works |
| Lemon Juice 🍋 | 2 tbsp | Freshly squeezed for brightness |
| Lemon Zest 🍋 | 1 tsp | Finely grated from organic lemons |
| Vanilla Bean 🌿 | ½ whole | Split and scraped, or 1 tsp extract |
| Ground Cinnamon 🌿 | ¼ tsp | Optional for warm spice notes |
| Water 💧 | ¼ cup | Helps dissolve sugar initially |
The pears are everything here. Bartlett or Anjou have the right sugar content and soften beautifully. Pick slightly overripe ones—they break down faster and sweeten more. I grab mine from local orchards in late summer when they’re at peak flavor, but good grocery store pears work too (just let them ripen on the counter first). Avoid Asian pears—they stay too firm.
Out of ripe pears? Peaches or nectarines swap in nicely at a 1:1 ratio. No vanilla bean? Use pure vanilla extract at 1 tsp. Want more spice? Add a pinch of ground ginger or cardamom. The lemon juice isn’t optional—it balances the sweetness and helps with preservation. If you’re using Meyer lemons, add an extra teaspoon of zest for that floral kick.
Sealed jars keep at room temperature for 6-12 months. Once opened, store in the fridge for up to 3 weeks. The flavor deepens as it sits. Perfect for gifting—just tie a ribbon around the jar and add a cute label (don’t forget the date).
Why You’ll Love This Recipe
- No-Fuss Cooking: I just dump chopped pears, sugar, and a splash of lemon juice in a pot—no pectin, no stress.
- Vanilla-Infused Brightness: The lemon zest and scraped vanilla bean turn sweet pears into something ridiculously good.
- Spread or Gift: I slather it on toast one day, then jar it with a ribbon for my neighbor the next.
- Pantry Hero: A big batch costs pennies with ripe pears on sale, and it keeps for months in my cupboard.
Step-by-Step Instructions for Pear Jam Without Pectin
This method relies on natural pectin in ripe fruit and careful evaporation to achieve the perfect spreadable consistency.
Step 1: Prepare the Pears and Aromatics
Peel, core, and dice the 2.5 lb ripe pears into even ½-inch pieces. Uniform sizing ensures even cooking and consistent texture in your finished jam. The pears should yield about 5-6 cups of diced fruit.
Split the 0.5 whole vanilla bean lengthwise and scrape out the seeds with the back of a knife. Combine these seeds with the pod, 1 tsp lemon zest, 2 tbsp lemon juice, and 0.25 tsp ground cinnamon in a small bowl. This aromatic blend will infuse the jam with complex flavor.
Step 2: Combine Ingredients and Begin Cooking
In a wide, heavy-bottomed pot (a Dutch oven works well), combine the diced pears, 1.5 cups granulated sugar, 0.25 cup water, and the prepared aromatics. Stir thoroughly to ensure the sugar begins to dissolve in the liquid.
Place the pot over medium-high heat and bring to a gentle boil, stirring frequently. The sugar will fully dissolve as the mixture heats, creating a syrupy base. You’ll notice the pears start to release their juices after 3-5 minutes.
Step 3: Simmer and Reduce to Jam Consistency
Once boiling, reduce heat to medium-low to maintain a steady, active simmer. Cook for 45-60 minutes, stirring every 5-7 minutes to prevent sticking. The mixture will gradually thicken as the natural pectin in the pears activates and the liquid evaporates.
Test for doneness using the spoon method: dip a cold metal spoon into the jam and tilt it. When the jam sheets off the spoon in a slow, thick ribbon rather than dripping rapidly, it’s ready. The surface should also appear slightly glossy, and the fruit pieces will look translucent.
Step 4: Remove Vanilla Pod and Finalize Texture
Once the jam reaches the desired consistency, remove the pot from heat. Fish out the vanilla bean pod and discard it—the seeds have already infused their flavor. Give the jam a final stir to distribute the seeds evenly throughout the mixture.
The jam will thicken slightly more as it cools. If you prefer a smoother texture, you can use a potato masher to gently crush some of the pear pieces at this stage. For a chunkier jam, leave the fruit as is.
Step 5: Jar and Store Properly
Ladle the hot jam into clean, sterilized jars, leaving ¼-inch headspace at the top. Seal with lids while still hot to create a proper vacuum seal. As the jam cools, you’ll hear the satisfying “pop” of the lids sealing.
Allow the jam to cool completely at room temperature before storing. Once cooled, this naturally thick pear spread will keep in the refrigerator for up to 3 weeks, or can be processed in a water bath for longer shelf storage. The flavor deepens after 24 hours, making it worth the wait.
Pro Tips For Making Pear Jam Recipe Without Pectin
- Cook Low and Slow: Keep the heat at medium-low and let the pears simmer for 45-60 minutes—rushing with high heat burns the sugar before the fruit breaks down.
- Use Very Ripe Pears: Pick pears that yield to gentle pressure; underripe ones stay hard and need extra cooking time, which dulls the flavor.
- Test for Doneness: Place a spoonful on a chilled plate—if it wrinkles when pushed with a finger, it’s ready; if not, keep reducing.
- Add Lemon Zest Early: Toss the zest in with the pears and sugar at the start so its oils infuse fully during cooking, rather than adding it at the end.
Regional Styles of These Flavors
New England Tradition
In coastal New England, pear jam often includes a pinch of sea salt and maple syrup instead of white sugar. The briny air and local maple farms inspire this subtle twist. I love how the maple adds depth without overpowering the pears.
Southern Comfort Style
Down South, they’ll often add ½ tsp ground ginger and ¼ tsp nutmeg for warmth. The jam pairs beautifully with buttermilk biscuits. This version reminds me of my grandmother’s kitchen—spiced just enough to feel cozy. 💪
Pacific Northwest
Here, honey replaces sugar, and thyme or rosemary infuses the jam with earthy notes. The region’s abundance of wild herbs and local honey makes this a natural fit. It’s a favorite at farmers markets.
French Countryside
A splash of Pear Williams brandy or Calvados adds sophistication. The alcohol cooks off, leaving a rich, layered flavor. I use 1-2 tbsp at the end of cooking for a subtle but elegant touch. 🍐
Midwest Simplicity
Stick to the basics: pears, sugar, lemon, and nothing else. The Midwest values straightforward, reliable recipes. This version is perfect for canning and gifting, just like the ones I’d find at church potlucks.
Nutrition Facts
Frequently Asked Questions
How long does it take to thicken?
Expect 45-60 minutes of simmering. The natural sugars and pectin in ripe pears will gradually thicken the mixture as the liquid evaporates. Stir every 5-7 minutes to prevent sticking.
Can I use less sugar?
Reducing sugar may affect the set and preservation. Sugar helps draw out the fruit’s natural pectin and balances acidity. For best results, use the full 1.5 cups as written.
How do I know when it’s done?
Test with a cold spoon: dip it in and tilt. The jam is ready when it sheets off slowly in a thick ribbon. It will thicken more as it cools.
What if my jam is too runny?
Return it to the pot and simmer for an additional 10-15 minutes. If still loose, add a splash of lemon juice and cook a bit longer. Patience is key!

- Pina Colada Dip Recipe Red Lobster: Tropical Creaminess With Toasted Coconut - October 12, 2026
- Pickled Sweet Cherry Peppers Recipe Canning: Tangy Heat for Pantry Staples - October 12, 2026
- Peppercorn Sauce Recipe Vegan: Rich Umami Depth Without Cream - October 12, 2026