
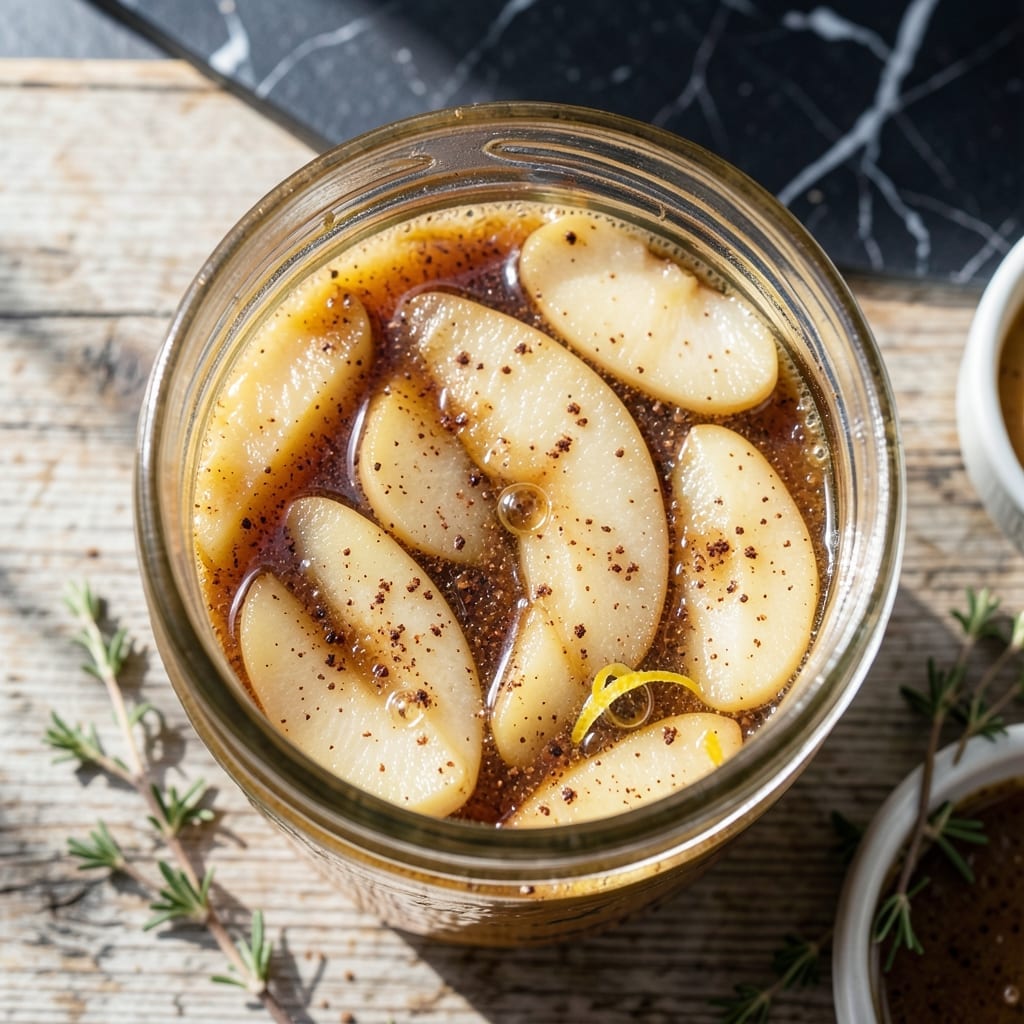
Preserving summer’s best pears in jars means you can enjoy their sweetness year-round. This filling delivers restaurant-quality flavor, perfect for pies, pastries, or straight from the jar.
The process is simple yet precise, ensuring safety and taste. Pears are gently cooked with spices and sugar to create a thick, luscious filling that holds its texture during canning.
Each jar captures the essence of fresh pears, enhanced with warm cinnamon and a touch of lemon. The result is a versatile filling that elevates desserts with minimal effort.
Store these jars in your pantry, and you’ll have the taste of summer ready whenever inspiration strikes.
Ingredients for Pear Pie Filling Recipe for Canning
Nine ingredients transform pears into a jarred filling ready for pies or pastries.
| Ingredient | Amount | Notes |
|---|---|---|
| Bartlett Pears 🍐 | 6 lb | Firm, slightly underripe preferred |
| Granulated Sugar 🍚 | 4 cups | Adjust to taste preference |
| Brown Sugar 🟤 | 1 cup | Light or dark variety |
| Clear Jel 🧂 | ¾ cup | Thickening agent, not interchangeable |
| Lemon Juice 🍋 | ½ cup | Freshly squeezed, bottled works |
| Ground Cinnamon 🌿 | 2 tsp | Freshly ground preferred |
| Ground Nutmeg 🌰 | ½ tsp | Freshly grated for best flavor |
| Salt 🧂 | ½ tsp | Kosher or sea salt |
| Water 💧 | 2 ½ cups | For cooking pears |
Pears are the star here—Bartletts break down just right for filling. Grab them firm and slightly underripe (they soften during cooking). Farmers markets often have the best selection late summer. Clear Jel is non-negotiable for canning safety—Ball or Bernardin brands are reliable. Don’t swap cornstarch or flour, they won’t hold up the same way.
No Bartletts? Anjou or Bosc work too, but may need a touch more sugar. Short on brown sugar? All granulated plus a tablespoon of molasses per cup gets you close. Fresh lemon juice is ideal, but bottled is fine (just check for additives). The spices can be adjusted—add a pinch of allspice or cloves if you like warmth.
Filling keeps 12-18 months in sealed jars (unopened). Once opened, use within 2-3 weeks or freeze for 6 months. Perfect for pies, turnovers, or spooning over ice cream (the vegan kind, of course).
Why You’ll Love This Recipe
- No Fuss Canning: I just wash, chop, and simmer—the Clear Jel thickens it perfectly without babysitting the pot.
- Sweet-Tart Magic: The Bartlett pears soak up that brown sugar and lemon juice for a filling that’s rich but still bright.
- Pie in Minutes: I can open a jar and have dessert ready faster than preheating my oven.
- Pantry Gold: Honestly, having shelf-stable pie filling means I’m always ready for unexpected guests or last-minute cravings.
Step-by-Step Instructions for Pear Pie Filling for Canning
Transform fresh pears into shelf-stable pie filling with this straightforward canning process.
Step 1: Prepare and Blanch the Pears
Peel, core, and slice the 6 lb Bartlett Pears into uniform ½-inch slices. I keep a bowl of water with a little lemon juice nearby to toss the slices into—this prevents browning while you work.
In a large pot, bring the 2.5 cups Water to a boil. Add the pear slices in batches and blanch for 1-2 minutes until just tender but still firm. Drain and keep warm. This step softens the pears slightly while preserving their shape for the final product.
Step 2: Create the Sugar and Spice Syrup
In a separate large pot, combine the 4 cups Granulated Sugar, 1 cup Brown Sugar, 0.75 cup Clear Jel, 2 tsp Ground Cinnamon, 0.5 tsp Ground Nutmeg, and 0.5 tsp Salt. Whisk these dry ingredients together thoroughly to prevent clumping.
Gradually stir in the 0.5 cup Lemon Juice and the same 2.5 cups Water used for blanching. Cook over medium-high heat, stirring constantly, until the mixture thickens and comes to a full boil. This should take about 5-7 minutes—you’ll notice it becoming glossy and slightly translucent.
Step 3: Combine Pears and Syrup
Carefully fold the drained pear slices into the hot syrup. Stir gently but thoroughly to ensure all pieces are well coated. The pears should be suspended in the thickened syrup, not settled at the bottom.
Return the mixture to a boil, then reduce heat to medium. Simmer for 5 minutes, stirring occasionally. Watch for the filling to reach a consistency where it mounds slightly on a spoon. This ensures proper thickening for canning.
Step 4: Fill and Process the Jars
Ladle the hot filling into clean, hot canning jars, leaving 1-inch headspace. Remove any air bubbles by running a clean knife around the inside of each jar. Wipe the rims with a damp cloth to ensure a good seal.
Process the jars in a water bath canner for 30 minutes (adjust for altitude if needed). Start timing when the water returns to a full boil. After processing, let the jars cool undisturbed for 12-24 hours. You’ll hear that satisfying “pop” as the lids seal.
Step 5: Store and Verify the Seal
After cooling, check the seals by pressing on the center of each lid. If it doesn’t pop back, the jar is properly sealed. Store sealed jars in a cool, dark place for up to 12-18 months.
Any unsealed jars should be refrigerated and used within 1 week or reprocessed with a new lid. The filling will thicken further as it cools, becoming the perfect consistency for pies, pastries, or even as a topping for ice cream.
Pro Tips For Making Pear Pie Filling Recipe For Canning
- Precook the Pears: Par-cook the pears for 2-3 minutes in boiling water before canning to soften them just enough—this keeps them from turning mushy in the jars but still tender when baked later.
- Use Ripe Bartletts: Pick pears that are firm but starting to yellow; overripe ones break down too much, and underripe ones stay hard no matter how long you process them.
- Dissolve Clear Jel First: Mix Clear Jel with the sugars and lemon juice before adding pears to prevent clumping—I learned this the hard way after stirring lumps for 10 minutes.
- Fill Jars While Hot: Ladle the filling into jars immediately after cooking to maintain the right consistency; waiting even 5 minutes can make it thicken too much in the jar.
Storing and Reheating Leftovers
Pantry Storage
Once cooled and sealed, store your jars in a cool, dark pantry away from direct sunlight. The ideal temperature range is 50-70°F. I keep mine on a shelf in my basement where the temperature stays consistent. Properly sealed jars will maintain quality for 12-18 months. ❄️
Refrigerator Storage
After opening a jar, transfer any unused filling to an airtight container and refrigerate. It will keep for 2-3 weeks in the fridge. I often use small glass containers for easy portioning. The filling may thicken slightly in the fridge, which is perfect for pie-making.
Freezing Option
For longer storage of opened jars, portion the filling into freezer-safe containers, leaving ½-inch headspace. It freezes well for up to 6 months. I recommend using quart-sized freezer bags laid flat to save space. Thaw overnight in the fridge before using.
Reheating for Pies
When ready to use, gently reheat the filling in a saucepan over medium-low heat for 5-7 minutes, stirring occasionally. Add 1-2 tbsp water if it seems too thick. This revives the fresh-made texture. 🔥
Using in Recipes
The filling works beautifully straight from the jar for pies, turnovers, or thumbprint cookies. For a quick dessert, spoon it warm over vanilla ice cream. I love using it in hand pies for a portable treat. The possibilities are endless with this versatile preserved filling.
Nutrition Facts
Frequently Asked Questions
Why use Clear Jel instead of cornstarch?
Clear Jel is specially formulated for canning and maintains thickness during processing and storage. Cornstarch breaks down over time and can create a thin, watery filling.
Can I adjust the sugar amount?
Yes, you can reduce sugar by up to 25% without affecting safety. Keep in mind pears naturally sweeten as they cook, so taste before final adjustments.
How do I prevent pears from turning brown?
Toss sliced pears in water with 1 tbsp lemon juice per 1 cup water immediately after cutting. This acid bath prevents enzymatic browning until cooking.
What if my jars didn’t seal properly?
Refrigerate unsealed jars and use within 1 week, or reprocess with new lids. Never store unsealed canned goods at room temperature.

- Potato Candy Recipe 1933: Vintage Peanut Butter Roll Delight - October 30, 2026
- Potato Chip Cookie Recipe With Pecans: Buttery Crunch Meets Nutty Richness - October 30, 2026
- Potato Patty Recipe No Egg: Crispy Edges Without the Binder - October 30, 2026