
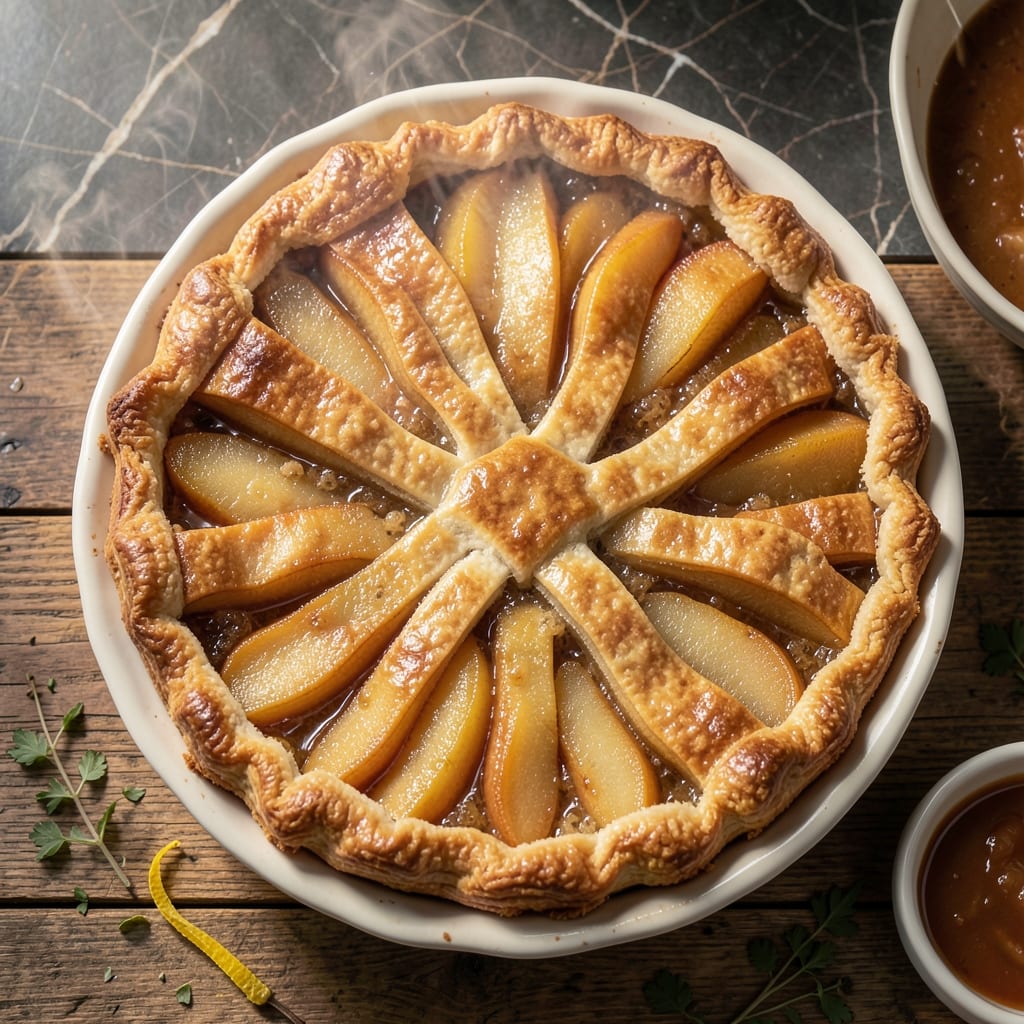
This pie delivers a flaky crust with a warm spiced filling that tastes like fall in every bite. Using canned pears makes it simple while keeping all the comfort of a homemade dessert.
The filling comes together quickly with just a few pantry staples. I’ve perfected the spice blend to complement the sweetness of the pears without overpowering them.
The crust stays tender and golden, with layers that separate beautifully when sliced. It’s the kind of pie that impresses without requiring hours in the kitchen.
Serve it warm with a scoop of vanilla ice cream for the perfect finish. This is comfort food at its best.
Ingredients for Pear Pie Recipe with Canned Pears
Pantry staples plus a couple cans of pears make this cozy dessert happen.
| Ingredient | Amount | Notes |
|---|---|---|
| All-Purpose Flour 🌾 | 2 ½ cups | Plus extra for dusting surface |
| Cold Unsalted Butter 🧈 | 1 cup | Cut into small cubes |
| Ice Water 💧 | ⅓ cup | Divided into tablespoons |
| Granulated Sugar 🍚 | ¾ cup | Divided for filling and crust |
| Salt 🧂 | ½ tsp | Fine grain preferred |
| Canned Pear Halves 🍐 | 2 cans | 15 oz each, drained and sliced |
| Light Brown Sugar 🟤 | ½ cup | Packed for filling |
| Ground Cinnamon 🌿 | 1 tsp | Freshly ground if possible |
| Ground Nutmeg 🌰 | ¼ tsp | Freshly grated preferred |
| Vanilla Extract 🌿 | 1 tsp | Pure extract recommended |
| Lemon Juice 🍋 | 1 tbsp | Freshly squeezed preferred |
| Cornstarch 🌾 | 2 tbsp | For thickening filling |
| Large Egg 🥚 | 1 whole | For egg wash on crust |
The pears are the star here. Use firm canned pear halves—Del Monte or Dole both work well. Drain and slice them yourself for better texture than pre-sliced. The butter needs to be ice cold for that flaky crust, so cube it first and chill while you prep everything else. For the flour, all-purpose is standard, but you can swap in pastry flour if you want an even lighter texture.
No canned pears? Fresh pears (Bosc or Anjou) work too—just peel and slice thin. Out of cornstarch? All-purpose flour at twice the amount thickens the filling. Brown sugar can be swapped for white in a pinch, but you’ll lose that caramel depth. The spices are flexible—add a pinch of cloves or allspice if you like. Vanilla is worth using the real stuff here.
The crust can be made 1-2 days ahead and refrigerated. Drain the pears thoroughly to avoid a soggy filling. Leftovers taste great for 3-4 days at room temp—cover loosely with foil. Best served warm though, so pop slices in the oven to reheat.
Why You’ll Love This Recipe
- No-Peel Perfection: I skip the tedious peeling and coring—canned pears are ready to go straight from the can to the crust.
- Buttery Crust Magic: Cold butter and ice water make the flakiest crust that shatters just right with every bite.
- Weeknight Hero: Between us, this pie comes together faster than ordering takeout, and my kids devour it.
- Budget-Friendly Dessert: One can of pears stretches into a whole pie, and I always have flour and butter on hand.
Step-by-Step Instructions for Pear Pie With Canned Pears
Here’s the method—simple steps, foolproof results, flaky crust guaranteed.
Step 1: Prepare the Pie Crust
In a large bowl, combine the 2.5 cups all-purpose flour and 0.5 tsp salt. Add the 1 cup cold unsalted butter (cut into small cubes) and work it into the flour with your fingers until the mixture resembles coarse crumbs with pea-sized butter pieces visible.
Sprinkle the 0.33 cup ice water over the mixture, 1 tablespoon at a time, gently stirring with a fork until the dough just comes together. Don’t overwork it—this is what makes the crust flaky. Divide the dough into two equal portions, shape into disks, wrap in plastic, and chill for 1 hour.
Step 2: Make the Spiced Pear Filling
Drain the 2 cans canned pear halves, then slice them into ½-inch chunks. In a large bowl, toss the pears with the 0.5 cup light brown sugar, 0.25 cup granulated sugar (reserving the rest for later), 2 tbsp cornstarch, 1 tsp ground cinnamon, 0.25 tsp ground nutmeg, 1 tsp vanilla extract, and 1 tbsp lemon juice.
Let the filling sit for 10-15 minutes—this gives the pears time to release their juices and the cornstarch time to start thickening. Stir once more before using to ensure everything is evenly coated.
Step 3: Assemble the Pie
On a lightly floured surface, roll out one disk of dough into a 12-inch circle and transfer it to a 9-inch pie dish. Trim the edges, leaving a slight overhang. Pour the pear filling into the crust, mounding it slightly in the center.
Roll out the second disk of dough and place it over the filling. Trim the edges and crimp them together with a fork or your fingers to seal. Cut 4-5 slits in the top crust to allow steam to escape. Brush the top with a beaten large egg and sprinkle with the remaining 0.5 cup granulated sugar for a sweet, golden finish.
Step 4: Bake to Perfection
Preheat your oven to 375°F. Place the pie on a baking sheet (to catch any drips) and bake for 45-50 minutes, or until the crust is deep golden brown and the filling is bubbling through the slits. If the edges brown too quickly, cover them with foil.
Let the pie cool for at least 2 hours before slicing—this allows the filling to set fully. The crust should be crisp and flaky, and the filling thick and fragrant with spices. Serve warm or at room temperature for the best texture.
Pro Tips For Making Pear Pie Recipe With Canned Pears
- Chill the Dough: After mixing the flour, butter, and ice water, pop the dough in the fridge for at least 30 minutes—I learned this the hard way when my crust shrank in the oven.
- Drain the Pears: Canned pears release a lot of syrup, so drain them well and pat dry with a paper towel to avoid a soggy pie filling.
- Blind Bake First: Pre-bake your bottom crust for 10 minutes at 375°F to prevent the wet filling from making it gummy—my first few pies were a sad, mushy mess.
- Use Cold Butter: Keep your butter ice-cold when cutting it into the flour; it makes flaky layers that melt in your mouth, not in your pan.
Creative Variations of This Recipe
Caramel Pear Delight
Swap the brown sugar for ¾ cup caramel sauce in the filling. Use Dulce de Leche for a richer flavor. This makes the pears extra gooey and decadent, perfect for a special occasion. 💛
Ginger Spiced Version
Add 1 tbsp fresh grated ginger and ½ tsp ground ginger to the filling. The fresh ginger brightens the flavors, while the ground ginger deepens the spice profile. I love this combo in fall.
Almond Crunch Topping
Sprinkle ½ cup sliced almonds over the top crust before baking. The almonds toast beautifully, adding a nutty crunch that contrasts with the soft pears. Brush with egg wash to help them stick.
Cheddar Cheese Crust
Add ½ cup shredded sharp cheddar to the flour mixture when making the dough. This creates a savory-sweet contrast that’s popular in the South. The cheese makes the crust extra tender and flaky.
Maple Bourbon Glaze
Drizzle the baked pie with a glaze of ¼ cup maple syrup and 2 tbsp bourbon after cooling. Heat the mixture in a saucepan for 2-3 minutes until slightly thickened. This adds a boozy, sweet finish. 🔥
Lattice Top Design
Cut the second dough disk into 1-inch strips and weave them into a lattice pattern over the filling. This creates a beautiful presentation and allows more of the filling to peek through. Seal the edges well to prevent leaks.
Nutrition Facts
Frequently Asked Questions
Do I need to drain the pears thoroughly?
Yes, draining is essential to prevent a soggy filling. Press the pears gently with paper towels to remove excess liquid before slicing. This helps the filling set properly during baking.
Can I use a store-bought crust instead?
Use 1 refrigerated pie crust for the bottom and top. This cuts prep time to 10 minutes while still delivering great results. Just follow the same baking instructions.
How do I keep the crust from getting soggy?
Sprinkle 1 tbsp cornstarch on the bottom crust before adding the filling. Also, bake on the lower oven rack for a crispier base. Let it cool fully before slicing.
What’s the best way to store leftovers?
Cover loosely with foil and keep at room temperature for up to 2 days. For longer storage, refrigerate for 4 days or freeze for 2 months. Reheat in the oven for best texture.

- Pina Colada Dip Recipe Red Lobster: Tropical Creaminess With Toasted Coconut - October 12, 2026
- Pickled Sweet Cherry Peppers Recipe Canning: Tangy Heat for Pantry Staples - October 12, 2026
- Peppercorn Sauce Recipe Vegan: Rich Umami Depth Without Cream - October 12, 2026