
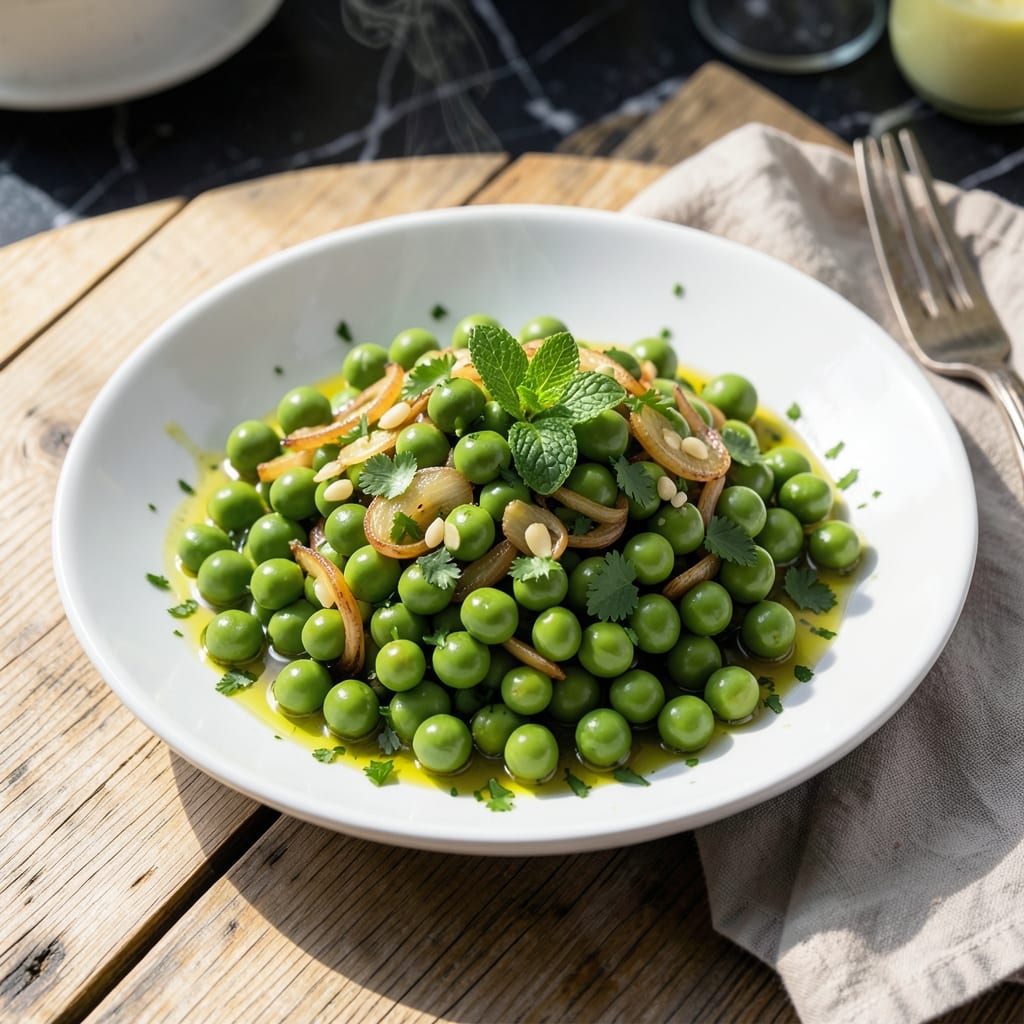
Fresh peas deserve more than a supporting role, and this vegan preparation proves it. A simple combination of garlic and herbs transforms humble peas into a vibrant side dish that steals the show.
I developed this method to maximize flavor while minimizing effort. The key is cooking the peas just until tender-crisp, then finishing them with aromatic garlic and a bright splash of lemon. This preserves their vibrant green color and natural sweetness.
What you get is a dish that’s as visually appealing as it is delicious. The peas stay tender and bright, while the garlic and herbs add layers of fresh, aromatic flavor without overpowering the main ingredient.
Perfect alongside roasted vegetables or as part of a plant-based spread. This is how to let peas shine.
Ingredients for Peas Recipe Vegan
Bright green peas meet garlic, herbs, and lemon for a simple but stunning dish.
| Ingredient | Amount | Notes |
|---|---|---|
| Fresh Green Peas 🌱 | 4 cups | Shell-on or pre-shelled |
| Garlic Cloves 🧄 | 4 cloves | Thinly sliced for aroma |
| Extra-Virgin Olive Oil 🫒 | 3 tbsp | For sautéing and finishing |
| Fresh Lemon Juice 🍋 | 2 tbsp | Freshly squeezed for brightness |
| Fresh Parsley 🌿 | ¼ cup | Finely chopped for garnish |
| Fresh Mint Leaves 🍃 | 2 tbsp | Chopped, optional but recommended |
| Sea Salt 🧂 | ½ tsp | Fine grain preferred |
| Freshly Ground Black Pepper 🌶️ | ¼ tsp | To taste |
| Vegetable Broth 🥕 | ¼ cup | Low-sodium preferred |
| Shallot 🧅 | 1 whole | Finely diced for depth |
| Lemon Zest 🍋 | 1 tsp | For extra citrus pop |
The peas are the star here—farmers market or frozen organic both work beautifully (just thaw first). Fresh is ideal if you can find them in spring. The garlic should be fresh and pungent—none of that pre-minced stuff in jars. I always grab my olive oil from Trader Joe’s or Whole Foods; their cold-pressed options have that peppery finish that really shines in simple dishes like this.
No fresh herbs? Dried parsley at half the amount works in a pinch, but fresh really makes the difference. Swap mint for basil if you prefer. Out of vegetable broth? Water plus a pinch of salt does the trick. The lemon is non-negotiable though—it brightens everything up. If you only have bottled juice, use half the amount since it’s more concentrated.
This tastes best fresh but holds up well. Store leftovers in an airtight container for up to 3 days in the fridge. Don’t freeze—peas get mushy. Reheat gently on the stove with a splash of water to revive the color and texture.
Why You’ll Love This Recipe
- Five-Minute Sauté: I can get this from fridge to table faster than the pasta finishes boiling.
- Bright and Zesty: That squeeze of lemon juice at the end makes the peas taste almost like springtime in your mouth.
- Works Anywhere: Honestly, it’s as good cold in a lunchbox as it is hot next to roasted potatoes.
- Pocket-Friendly Feast: A big bag of peas and a handful of pantry staples feed four without breaking the bank.
Step-by-Step Instructions for Peas With Garlic and Herbs
Here’s the method I use to make this vibrant dish pop with fresh flavors.
Step 1: Sauté Aromatics in Olive Oil
Heat the 3 tbsp Extra-Virgin Olive Oil in a large skillet over medium heat. Add the 1 whole Shallot and cook for 2-3 minutes until translucent and fragrant, stirring occasionally to prevent browning.
Add the 4 cloves Garlic Cloves and cook for another 1 minute until just golden at the edges. I like to keep the heat moderate here—garlic can burn in seconds if it gets too hot, and burnt garlic turns bitter. This base builds the foundation for all the bright flavors to come.
Step 2: Cook Peas Until Tender-Crisp
Increase heat to medium-high and add the 4 cups Fresh Green Peas to the skillet. Stir to coat them in the aromatic oil, then pour in the 0.25 cup Vegetable Broth. The liquid should sizzle and create a light steam.
Cover and cook for 4-5 minutes until the peas turn bright green and tender-crisp. I check them at 4 minutes—they should give slightly when pressed but still retain a bit of bite. If the pan looks dry, add a splash of water to deglaze and continue cooking.
Step 3: Brighten With Citrus and Herbs
Remove the skillet from heat and stir in the 2 tbsp Fresh Lemon Juice, 1 tsp Lemon Zest, 0.5 tsp Sea Salt, and 0.25 tsp Freshly Ground Black Pepper. The acid from the lemon will make the green peas pop visually and taste even fresher.
Fold in the 0.25 cup Fresh Parsley and 2 tbsp Fresh Mint Leaves. I chop the parsley finely but leave the mint in slightly larger pieces for a nice texture contrast. Taste and adjust seasoning if needed—sometimes I add a pinch more sea salt if the flavors need balancing.
Step 4: Rest and Serve Warm
Let the peas sit off heat for 2-3 minutes to allow the flavors to meld together. The mint and parsley will soften slightly from the residual heat, and the peas will absorb all the garlicky, citrusy goodness.
Serve immediately while still warm. The peas should glisten with the light olive oil sauce, and every bite should deliver that perfect balance of sweet peas, aromatic garlic, and bright lemon. This dish doesn’t need anything fancy—just good ingredients treated simply.
Pro Tips For Making Peas Recipe Vegan
- Blanch First: Toss fresh peas into boiling salted water for exactly 2 minutes, then shock in ice water—this keeps them bright green and crisp while removing any raw starchiness.
- Slice Garlic Thin: I learned this the hard way: mincing garlic can burn in olive oil, but thin slices cook evenly and infuse the oil without bitterness.
- Skip Overcooking: Peas turn from sweet to mushy fast; pull them off heat as soon as they’re tender but still pop when bitten—usually under 5 minutes total.
- Finish With Lemon: Add the lemon juice at the very end, not during cooking, to preserve its fresh, bright acidity that cuts through the oil and garlic.
Essential Equipment for This Recipe
Essential Skillet
I always reach for my 12-inch stainless steel skillet—it distributes heat evenly for consistent cooking. A heavy-bottomed pan prevents hot spots that could burn the garlic. All-Clad is my go-to brand for this, but any quality stainless steel will work beautifully. 💡
Wooden Spoon
A wooden spoon is perfect for stirring the peas without damaging your cookware. It won’t scratch non-stick surfaces and helps deglaze the pan naturally. I keep one dedicated to my skillet for just this kind of dish.
Chef’s Knife
Finely dicing the shallot and thinly slicing the garlic requires a sharp 8-inch chef’s knife. I use Wüsthof—it makes quick work of prep. A good knife changes everything when you’re working with fresh ingredients.
Microplane Zester
For the lemon zest, a Microplane is indispensable. It grates the rind into fine, fluffy strands that distribute evenly. I’ve tried other tools, but nothing matches its efficiency for citrus.
Cutting Board
A large wooden cutting board gives you plenty of space to prep all your ingredients at once. I love that I can chop herbs, shallots, and garlic all in one spot without cross-contamination. Keep it clean and well-oiled.
Measuring Spoons
Accurate measurements matter, even for simple dishes. I use magnetic measuring spoons that stay organized in my drawer. They make it easy to grab exactly ½ tsp Sea Salt or ¼ tsp Freshly Ground Black Pepper without guessing. ✨
Nutrition Facts
Frequently Asked Questions
Can I use frozen peas instead of fresh?
Thaw frozen peas first and pat dry. They’ll work perfectly in this recipe.
What if I don’t have fresh herbs?
Use dried parsley or mint at half the amount. Fresh herbs add brightness, but dried work in a pinch.
Can I make this ahead of time?
Store leftovers in an airtight container for up to 3 days. Reheat gently to preserve texture.
Why do the peas turn dull green?
Overcooking releases chlorophyll, dulling the color. Cook for only 3-4 minutes to keep them vibrant.

- Pina Colada Dip Recipe Red Lobster: Tropical Creaminess With Toasted Coconut - October 12, 2026
- Pickled Sweet Cherry Peppers Recipe Canning: Tangy Heat for Pantry Staples - October 12, 2026
- Peppercorn Sauce Recipe Vegan: Rich Umami Depth Without Cream - October 12, 2026