
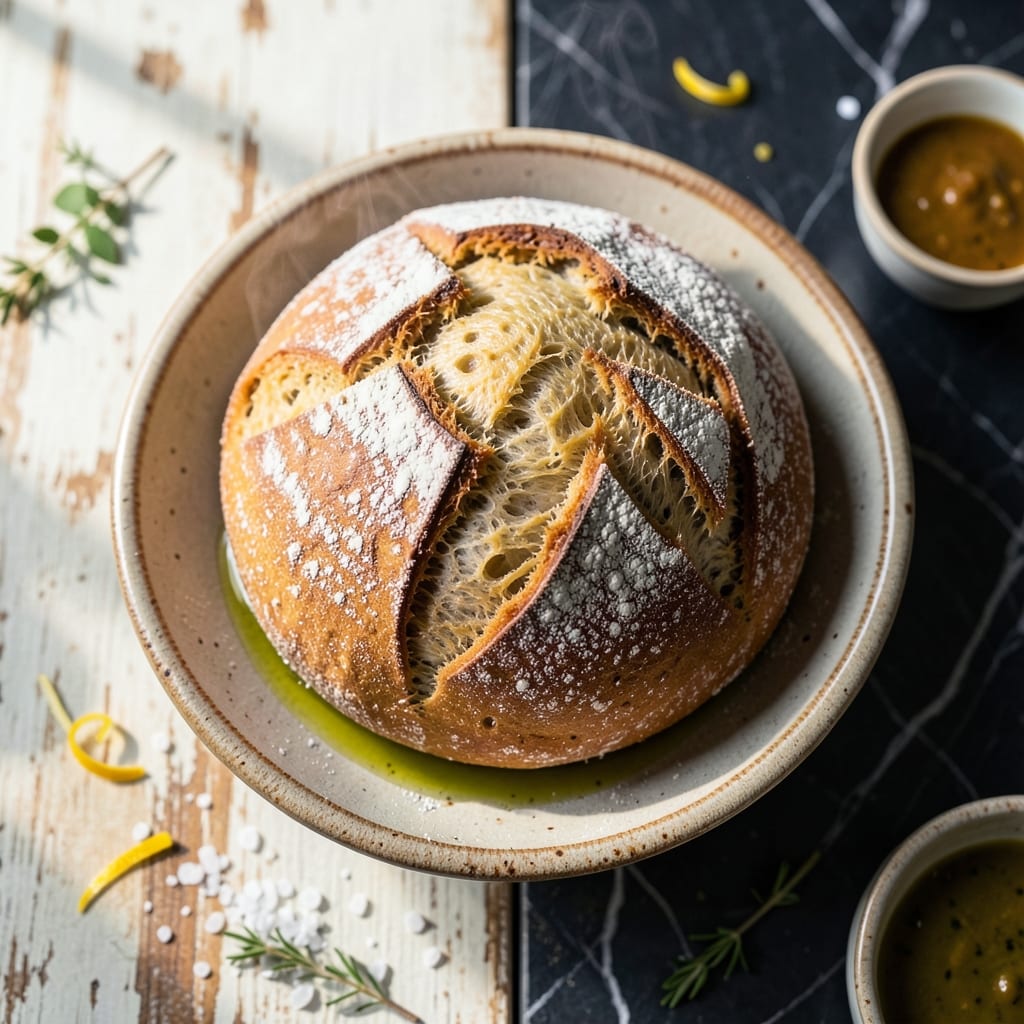
There’s something deeply satisfying about pulling a golden, crusty loaf of peasant bread from your own oven. This no-knead method delivers a rustic texture with minimal effort, using just 5 ingredients and time to let the dough develop flavor.
I perfected this recipe in my Austin kitchen, testing it across different ovens to ensure consistent results. The long fermentation creates that signature open crumb and a chewy interior that’s hard to resist.
The beauty lies in its simplicity—no fancy equipment, no complicated techniques. Just mix, wait, and bake. The result is a loaf that rivals any artisanal bakery, with a shatteringly crisp crust and a soft, airy center.
David, my official taste-tester, declared this his new favorite. It’s versatile enough for sandwiches, soups, or simply slathered with butter.
Ingredients for Peasant Bread Recipe with Yeast
Five simple ingredients. One bowl. The easiest crusty loaf you’ll ever make.
| Ingredient | Amount | Notes |
|---|---|---|
| Bread Flour 🌾 | 3 cups | All-purpose works in a pinch |
| Active Dry Yeast 🍞 | ¼ oz | One packet, 2 1/4 tsp |
| Sea Salt 🧂 | 2 tsp | Fine grain for even distribution |
| Water 💧 | 1 ½ cups | Warm, about 105-110°F |
| Olive Oil 🫒 | 1 tbsp | For greasing bowl and crust |
The flour is doing most of the work here—King Arthur or Bob’s Red Mill are my go-tos (both have that perfect protein content for a good chew). Yeast is yeast, but check the expiration date—old packets won’t rise right. I grab mine from Central Market in Austin when I’m restocking. Sea salt is better than iodized here (the flavor’s cleaner), but don’t stress if that’s all you’ve got.
No bread flour? All-purpose works fine—your crumb might be a touch less chewy, but it’ll still taste great. Out of yeast? This isn’t the recipe to experiment with sourdough starter (trust me). The water temp matters more than you’d think—too hot kills the yeast, too cold takes forever. Use a thermometer if you’re unsure (worth the $5 investment).
Dough keeps in the fridge for up to 3 days if you want to delay baking. Baked loaf? 2 days on the counter, 1 week wrapped tight. Freeze for 3 months if you’re meal prepping (slice first for easy toasting).
Why You’ll Love This Recipe
- No-Knead Magic: I toss the flour, yeast, salt, and water together, let it rest—no kneading, no fuss, and it still turns out perfect every time.
- Crispy Golden Crust: The olive oil gives it that irresistible crackle on the outside while keeping the inside soft and airy.
- Meals or Snacks: It’s just as good fresh out of the oven with dinner as it is toasted for breakfast the next morning.
- Pennywise Perfection: Bread flour, yeast, and basic pantry staples make a loaf that tastes like a bakery’s but costs pennies.
Step-by-Step Instructions for Peasant Bread With Yeast
This no-knead method delivers a rustic loaf with minimal effort and maximum flavor.
Step 1: Activate the Yeast and Mix the Dough
In a large mixing bowl, sprinkle the 0.25 oz Active Dry Yeast over the 1.5 cups Water that’s been warmed to 105-110°F. Let it sit for 5 minutes until the surface becomes foamy and bubbly—this confirms your yeast is alive and active.
Add the 3 cups Bread Flour and 2 tsp Sea Salt to the bowl. Using a wooden spoon, stir until the ingredients come together into a shaggy, sticky dough. Don’t worry about lumps; this rough texture is exactly what you want for a rustic crumb.
Step 2: First Rise Until Doubled in Size
Drizzle the 1 tbsp Olive Oil over the dough and use your hands to turn it in the bowl, coating all surfaces. This prevents sticking and adds a subtle richness to the crust. Cover the bowl with a damp kitchen towel or plastic wrap.
Let the dough rise in a warm, draft-free spot for 1 to 1.5 hours, or until it has nearly doubled in volume. You’ll know it’s ready when the dough springs back slowly when poked with a finger, leaving a slight indentation. This first rise develops the gluten structure naturally without kneading.
Step 3: Shape and Second Rise
Turn the risen dough onto a lightly floured surface. Gently shape it into a round loaf by folding the edges toward the center—this creates surface tension for a better rise. Avoid overworking the dough; the stickiness is intentional and contributes to the final texture.
Place the shaped dough seam-side down on a parchment-lined baking sheet. Cover loosely and let it rise again for 30 to 45 minutes until puffy. Preheat your oven to 425°F during this final rise so it’s ready to go when the bread is.
Step 4: Bake to Golden Perfection
Just before baking, use a sharp knife to score the top of the loaf with a shallow X or cross. This allows the bread to expand properly in the oven. Bake on the center rack for 30 to 35 minutes until the crust is deep golden brown and the loaf sounds hollow when tapped on the bottom.
For an extra-crispy crust, place a small baking dish filled with 1 cup of water on the lower oven rack when you start baking. The steam created during the first half of baking gives the bread its characteristic artisan crust.
Step 5: Cool Completely Before Slicing
Transfer the baked loaf to a wire rack and let it cool for at least 1 hour before slicing. I know it’s tempting to dig in right away, but cooling allows the interior structure to set properly, preventing a gummy texture.
The bread should have a thick, crackly crust and an open, airy crumb with irregular holes throughout. Serve warm or at room temperature with butter, olive oil, or your favorite spread. This loaf stays fresh for up to 3 days wrapped in a kitchen towel.
Pro Tips For Making Peasant Bread Recipe With Yeast
- Warm the Water: Use water around 110°F—hot enough to activate the yeast but not so hot it kills it. I learned this the hard way after a few loaves refused to rise.
- Salt the Flour: Mix the sea salt into the flour before adding wet ingredients. This ensures even distribution and prevents a salty bite in one spot.
- Skip Rushed Proofing: Resist the urge to speed up the first rise—give it at least 1-2 hours, or until doubled. Rushing this step gives you dense bread, not the airy crumb you want.
- Oil the Bowl: Coat your rising bowl with olive oil before adding the dough. It prevents sticking and makes transferring the dough for shaping a breeze.
Creative Variations of This Dish
Herb-Infused Loaf
Add 2 tbsp chopped fresh rosemary or 1 tbsp dried Italian seasoning to the dough during mixing. I love using rosemary from my Austin garden—it gives the bread a fragrant, earthy note that pairs perfectly with olive oil dips. David declared this his new favorite variation. 🌿
Cheesy Delight
Fold in 1 cup shredded sharp cheddar or ½ cup grated Parmesan during the final shaping. The cheese melts into pockets of gooey goodness, creating a bread that’s perfect for grilled cheese sandwiches. Use Central Market’s sharp cheddar for the best melt.
Sweet Cinnamon Swirl
After the first rise, roll the dough into a rectangle, sprinkle with ¼ cup brown sugar and 1 tbsp cinnamon, then roll it up like a jelly roll. Shape into a loaf and bake as usual. This makes a wonderful breakfast bread, especially with a drizzle of honey.
Olive and Sun-Dried Tomato
Mix in ½ cup pitted Kalamata olives and ¼ cup chopped sun-dried tomatoes during the final shaping. The briny olives and sweet tomatoes add a Mediterranean flair. I source mine from the Austin farmers markets for peak freshness.
Garlic and Onion
Add 1 tbsp minced garlic and 2 tbsp caramelized onions to the dough. The aromatic flavors infuse the bread, making it ideal for serving with soups or stews. Sauté the onions low and slow for the best sweetness.
Whole Grain Boost
Replace 1 cup of bread flour with whole wheat flour or spelt flour. This adds a nutty depth and extra fiber while keeping the rustic texture. I often use Bob’s Red Mill whole wheat for consistency. 🥖
Nutrition Facts
Frequently Asked Questions
Can I use all-purpose flour instead of bread flour?
While bread flour gives a chewier texture, all-purpose works perfectly fine. The crumb might be slightly less elastic, but it’ll still taste delicious.
Why is my dough not rising?
Check your yeast expiration date first. If that’s fine, the water might have been too hot or cold. Yeast needs 105-110°F water to activate properly.
How do I get a crispier crust?
Place a baking dish with 1 cup water on the oven’s lower rack while baking. The steam creates a professional bakery-style crust.
Can I make this in a Dutch oven?
Yes! Preheat your Dutch oven at 425°F, then bake covered for 20 minutes and uncovered for 10-15 minutes. This traps steam for an even better crust.

- Pina Colada Dip Recipe Red Lobster: Tropical Creaminess With Toasted Coconut - October 12, 2026
- Pickled Sweet Cherry Peppers Recipe Canning: Tangy Heat for Pantry Staples - October 12, 2026
- Peppercorn Sauce Recipe Vegan: Rich Umami Depth Without Cream - October 12, 2026