
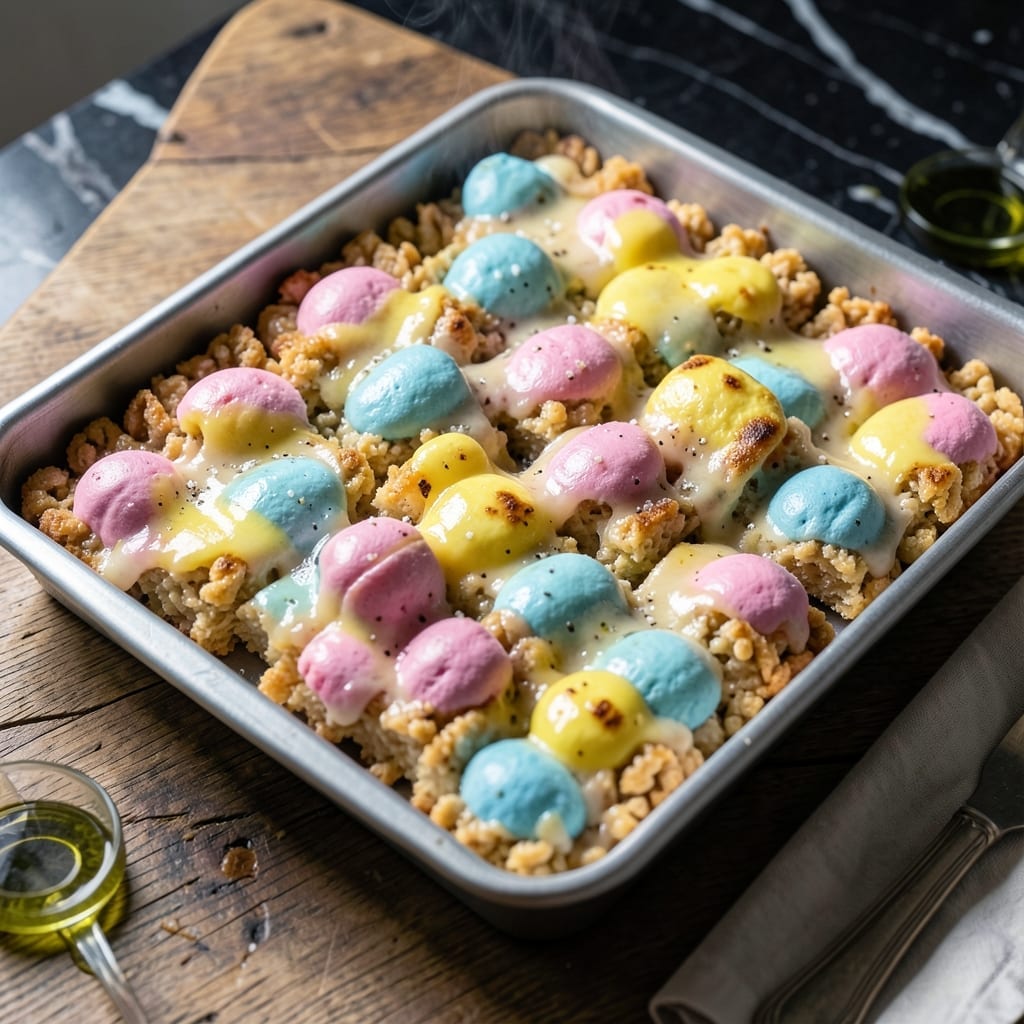
This oven-baked version transforms classic rice krispie treats into something even more irresistible. The heat creates a perfectly even marshmallow coating that binds every piece of cereal without any sticky mess.
Using Peeps instead of traditional marshmallows adds a pastel hue and subtle vanilla sweetness. The process takes just 15 minutes from start to finish, with the oven doing most of the work.
You’ll end up with gooey, crisp-edged squares that hold their shape beautifully. Each bite delivers that signature crunch with an extra layer of marshmallow richness.
The method eliminates stovetop stirring and produces consistent results every time. This approach works for any holiday color scheme or special occasion.
Ingredients for Peeps Rice Krispie Treats Recipe Oven
Six ingredients transform cereal into irresistible oven-baked treats with perfect marshmallow coating.
| Ingredient | Amount | Notes |
|---|---|---|
| Peeps Marshmallows 🍬 | 40 pieces | Pastel colors preferred for hue |
| Rice Krispies Cereal 🥣 | 6 cups | Fresh for best crunch |
| Unsalted Butter 🧈 | ½ cup | Melted for binding |
| Vanilla Extract 💧 | 1 tsp | Pure for depth of flavor |
| Salt 🧂 | ¼ tsp | Fine grain for even distribution |
| Non-Stick Cooking Spray 🫒 | 1 can | For coating pan and tools |
The Peeps are key here—Peeps brand gives that signature pastel hue and subtle vanilla note. Target or Walmart carry them seasonally, but Amazon has them year-round. For the cereal, Kellogg’s Rice Krispies are the gold standard, though store brands work in a pinch. Fresh cereal matters—stale stuff won’t give you that snap.
No Peeps? Regular marshmallows at a 1:1 ratio work, but you’ll lose the color. Want extra flavor? Add half a teaspoon of almond extract alongside the vanilla. The butter can be salted if that’s what you have, but omit the added salt. For a vegan version, swap in coconut oil and vegan marshmallows.
These keep 3-4 days in an airtight container at room temperature. Press plastic wrap directly on the surface to maintain that gooey texture. They freeze well too—up to 2 months if wrapped tightly.
Why You’ll Love This Recipe
- One Pot Wonder: I melt the butter and Peeps right in the oven—no stovetop, no extra bowls, just easy cleanup.
- Sweet Spring Surprise: The Peeps melt into gooey, pastel perfection that makes every bite taste like Easter morning.
- Holiday Hero: I bring these to potlucks and they’re always the first to disappear—kids and adults alike.
- Budget Friendly: A bag of Peeps and a box of cereal make two dozen treats for pennies. Honestly, it’s my cheap thrill.
Step-by-Step Instructions for Peeps Rice Krispie Treats
This method ensures perfectly gooey treats with vibrant color and ideal texture every time.
Step 1: Prepare the Pan and Melt the Butter
Coat a 9×13-inch baking dish thoroughly with the non-stick cooking spray, including the sides. I prefer using a metal pan for its heat conductivity, which helps maintain the treats’ structure as they set.
In a large saucepan over low heat, melt the 0.5 cup unsalted butter completely. Watch for the edges to stop foaming—this indicates the water has evaporated and the butter is fully melted. Remove from heat immediately to prevent browning, which could affect the final color of your treats.
Step 2: Incorporate Marshmallows and Flavorings
Add all 40 pieces Peeps Marshmallows to the melted butter. Return the saucepan to low heat and stir constantly with a silicone spatula until the marshmallows are fully melted—this should take 3-5 minutes.
The mixture will transform from a lumpy mass to a smooth, glossy liquid. At this point, stir in the 1 tsp vanilla extract and 0.25 tsp salt. The vanilla enhances the marshmallow’s sweetness while the salt balances the overall flavor profile. Continue stirring for 30 seconds to ensure even distribution.
Step 3: Combine with Cereal for Perfect Texture
Working quickly, add all 6 cups Rice Krispies Cereal to the marshmallow mixture. Use a folding motion to coat every piece evenly—this preserves the cereal’s crisp texture while ensuring complete coverage.
You’ll notice the cereal begins to soften slightly as it absorbs the warm marshmallow mixture. Stop mixing as soon as you see no more dry cereal at the bottom of the pan. Overmixing at this stage can lead to dense, compact treats rather than the desired airy texture.
Step 4: Press and Set in the Prepared Pan
Transfer the mixture to your prepared baking dish. Using the silicone spatula or your hands (lightly coated with additional non-stick cooking spray), press the mixture evenly into the pan.
Apply gentle but firm pressure to create a uniform layer—don’t compact it too tightly or the treats will be hard. For the best presentation, use the spatula to smooth the top surface. Allow the treats to set at room temperature for 30-45 minutes until firm to the touch.
The Peeps will give your treats a pastel hue that’s particularly vibrant when using fresh, high-quality cereal. The setting time is crucial for clean cutting.
Pro Tips For Making Peeps Rice Krispie Treats Recipe Oven
- Melt Butter Low: Use low heat when melting the butter and Peeps—high heat will scorch the sugar in the marshmallows, leaving a bitter taste. I learned this the hard way after ruining a batch with impatient, high flames.
- Fresh Peeps Only: Skip the stale Peeps; their hardened sugar won’t melt smoothly into the butter. Fresh ones blend seamlessly and give that vibrant, gooey texture you want.
- Press Lightly: When pressing the mixture into the pan, resist the urge to compact it tightly—this makes the treats dense and hard. A gentle press keeps them light and crispy.
- Add Vanilla Last: Stir in the vanilla extract after removing the marshmallow mixture from heat. The alcohol can evaporate if added too early, dulling the flavor. A splash at the end makes a real difference.
Perfect Pairings for This Recipe
Beverage Pairings
Cold milk is the classic choice—I always keep a glass ready to balance the sweetness. The creamy texture complements the crunchy treats perfectly. For a grown-up twist, try vanilla chai tea with its warm spices. 💛
Dessert Combinations
Serve these with fresh strawberries or sliced apples for a refreshing contrast. The tartness cuts through the marshmallow richness beautifully. I love pairing them with lemon bars for a citrusy kick.
Holiday Pairings
For Easter, arrange the pastel treats alongside chocolate-covered eggs on a platter. The color coordination makes for a stunning presentation. At Christmas, pair with peppermint bark for a festive duo.
Ice Cream Toppings
Crumbled treats make an incredible topping for vanilla ice cream. The warm-cold contrast is divine. I also sprinkle them over chocolate pudding for added texture and sweetness.
Press crumbs onto the edges of ice cream sandwiches for a fun, crunchy coating. 🍦
Nutrition Facts
Frequently Asked Questions
Can I use regular marshmallows instead of Peeps?
Yes, substitute regular marshmallows at a 1:1 ratio. You’ll lose the pastel color, but the texture and taste remain the same. For best results, use fresh marshmallows for optimal melt.
How do I prevent the treats from sticking to the pan?
Generously coat your 9×13-inch baking dish with non-stick spray, including the sides. Press plastic wrap on the surface before setting to prevent sticking.
Why are my treats too hard or dense?
Overmixing or pressing too firmly causes this. Use a folding motion to combine ingredients and press gently into the pan. Allow 30-45 minutes to set.
Can I add mix-ins like chocolate chips?
Fold in 1 cup of mini chocolate chips or sprinkles after mixing the cereal. Stir just enough to distribute evenly.

- Pina Colada Dip Recipe Red Lobster: Tropical Creaminess With Toasted Coconut - October 12, 2026
- Pickled Sweet Cherry Peppers Recipe Canning: Tangy Heat for Pantry Staples - October 12, 2026
- Peppercorn Sauce Recipe Vegan: Rich Umami Depth Without Cream - October 12, 2026