
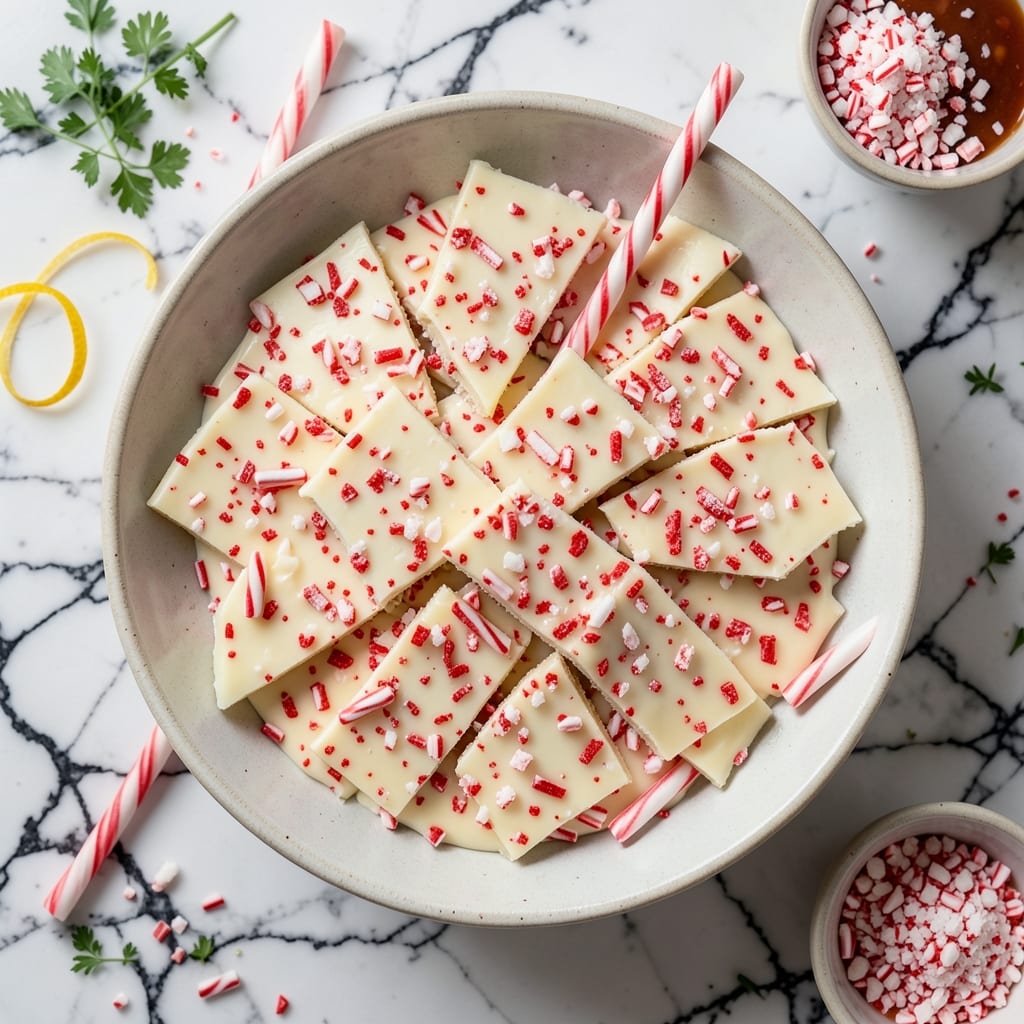
This peppermint bark delivers holiday flavor without relying on extract—crushed candy canes provide the signature taste. The white chocolate base creates a smooth, creamy foundation that perfectly complements the crisp candy pieces.
The secret lies in using high-quality white chocolate and finely crushed candy canes for even distribution. A quick 15-minute chill sets the layers, creating that satisfying snap when you break off a piece.
You’ll get a creamy white chocolate layer studded with vibrant red candy bits, offering a crunchy contrast in every bite. The result is festive, gift-worthy, and undeniably delicious.
Perfect for holiday gifting or dessert trays. This method ensures consistent results with minimal effort.
Ingredients for Peppermint Bark Recipe Without Peppermint Extract
A short list of quality ingredients delivers that iconic holiday crunch and creaminess.
| Ingredient | Amount | Notes |
|---|---|---|
| High-Quality White Chocolate ⬜ | 24 oz | Chopped into even pieces |
| Candy Canes 🍬 | 12 whole | Finely crushed for even distribution |
| Heavy Cream 🥛 | ¼ cup | For smoothing white chocolate |
| Vanilla Extract 🌿 | 1 tsp | Pure extract preferred |
| Unsalted Butter 🧈 | 1 tbsp | For glossy finish |
| Salt 🧂 | 0.125 tsp | Fine sea salt preferred |
| Red Food Coloring 🎨 | 2 drops | Optional for vibrant candy bits |
The white chocolate is non-negotiable here. Ghirardelli or Guittard melt the smoothest—avoid chips with added coatings. I grab mine in bulk at Costco during the holidays (they sell huge blocks perfect for this). Candy canes should be fresh and brightly colored—stale ones lose their peppermint punch. Finely crush them in a food processor or between two sheets of parchment with a rolling pin (the old-fashioned way works great).
Need a shortcut? Pre-crushed candy canes from Williams Sonoma save time. Swap white chocolate for ivory-colored candy melts if you’re in a pinch (though the flavor won’t be as rich). Out of candy canes? Peppermint candies like Starlight Mints work too—just crush them the same way. The vanilla extract can be swapped for vanilla bean paste for a more luxurious touch.
Store in an airtight container between layers of parchment paper. Keeps at room temperature for 2 weeks, or freeze for 3 months. The layers soften slightly if stored in the fridge, so room temp is best for that satisfying snap.
Why You’ll Love This Recipe
- No-Fuss Melting: I just melt the white chocolate with a splash of heavy cream and butter—no fancy equipment, no peppermint extract to hunt down.
- Crunchy Sweetness: The crushed candy canes give that sharp peppermint pop against the smooth, creamy white chocolate. Honestly, it tastes like the holidays in every bite.
- Holiday Stash: I make a big batch and break it into chunks for teacher gifts, cookie swaps, or just because Tuesday needs a treat.
- Keeps Like a Dream: It stays fresh in the fridge for weeks, so I can stash it away and pull out a little luxury whenever the craving hits.
Step-by-Step Instructions for Peppermint Bark Without Peppermint Extract
This method delivers that classic holiday crunch and flavor using candy canes for natural peppermint taste.
Step 1: Prepare the Candy Cane Bits
Begin by finely crushing the 12 whole Candy Canes. I place them in a heavy-duty plastic bag and use a rolling pin to pulverize them into small, even pieces. The finer the crush, the more evenly the peppermint flavor will distribute throughout the bark.
For a festive touch, you can add the 2 drops Red Food Coloring to a small portion of the crushed candy canes before mixing them in. This creates vibrant red streaks in your finished bark. Set the crushed candy aside in a small bowl while you prepare the chocolate base.
Step 2: Melt the White Chocolate Base
In a microwave-safe bowl, combine the 24 oz High-Quality White Chocolate (chopped into even pieces) with the 0.25 cup Heavy Cream and 1 tbsp Unsalted Butter. Microwave in 30-second intervals, stirring between each, until about 75% melted.
Remove from the microwave and continue stirring until completely smooth. The residual heat will melt the remaining chocolate pieces. This gentle melting method prevents scorching and ensures a silky texture. Stir in the 1 tsp Vanilla Extract and 0.125 tsp Salt until fully incorporated.
Step 3: Incorporate the Candy Cane Pieces
Once the chocolate mixture is smooth and glossy, gently fold in most of the crushed candy canes, reserving about ¼ cup for topping. Stir just until evenly distributed—the candy should be visible throughout but not sinking to the bottom.
Here’s the thing—if you overmix at this stage, the candy canes will start to melt and lose their distinct crunch. The mixture should look speckled with red and white pieces. The reserved candy will create a beautiful, crunchy finish on top.
Step 4: Set and Finish the Bark
Pour the mixture onto a parchment-lined baking sheet, spreading it into an even layer about ¼-inch thick using an offset spatula. Immediately sprinkle the reserved crushed candy canes evenly over the top, pressing them lightly into the surface so they adhere.
Let the bark set at room temperature for 2-3 hours, or speed up the process by refrigerating for 30-45 minutes. You’ll know it’s ready when the edges look firm and the surface is no longer tacky to the touch.
Step 5: Break and Serve
Once fully set, lift the bark from the parchment and break it into irregular pieces. The natural cracks and breaks add to its rustic charm. Each piece should have a satisfying snap when broken, with visible candy cane specks throughout.
Store in an airtight container at room temperature for up to 1 week, or in the refrigerator for 2 weeks. The flavors actually improve after a day or two as the candy canes slightly soften and meld with the chocolate. Serve at room temperature for the best texture.
Pro Tips For Making Peppermint Bark Recipe Without Peppermint Extract
- Melt Low and Slow: Use a double boiler or microwave in 20-second bursts to melt the white chocolate—any higher heat will make it seize or turn grainy. I learned this the hard way after ruining a batch by rushing it over direct heat.
- Crush Candy Fine: Pulse candy canes in a food processor until they’re nearly powdered, not just chunky. Sounds weird, but it works: the finer the pieces, the better they stick to the chocolate and distribute that minty crunch.
- Skip the Water: Make sure all bowls and utensils are bone-dry before touching the chocolate. Even a drop of water can cause it to clump—after burning three batches, I finally figured out this was the culprit.
- Add Vanilla Last: Stir the vanilla extract into the melted chocolate at the very end, just before pouring. It preserves the flavor and prevents the alcohol in the extract from affecting the chocolate’s texture.
Serving Suggestions for This Dish
Gift Presentation
Break the bark into irregular pieces for a rustic, handmade look. Package in clear cellophane bags tied with red and green ribbon for a festive touch. I love using mini muffin liners inside gift boxes to keep pieces separate and presentable. 🎁
Dessert Board
Create a holiday dessert board with this bark as the star. Pair with dark chocolate truffles, gingerbread cookies, and dried fruit for variety. The white and red colors pop against a dark wooden board.
Hot Drink Pairing
Serve alongside hot cocoa or peppermint tea for dipping. The warm drink softens the bark slightly, enhancing the peppermint flavor. I always include a few pieces with my holiday coffee service. ☕
Cookie Exchange
This bark is perfect for cookie exchanges—it’s easy to make in large batches. Wrap 4-6 pieces in parchment paper and secure with a sticker. It travels well and stays fresh for days.
Ice Cream Topping
Crush leftover pieces and sprinkle over vanilla ice cream or peppermint stick ice cream for a festive sundae. The contrast of cold cream and crunchy bark is divine. Kids especially love this treat.
Holiday Buffet
Display on a tiered stand with other holiday sweets. The bright red and white colors make it a natural centerpiece. I place mine next to sugar cookies for a beautiful color contrast.
Nutrition Facts
Frequently Asked Questions
Can I use dark chocolate instead of white?
You can, but the classic peppermint bark flavor comes from white chocolate. Dark chocolate will overpower the candy cane taste. If you try it, use 70% cacao or less for best results.
How do I prevent the candy canes from melting?
Work quickly when mixing and avoid overstirring. Chill the bark immediately after spreading. The candy canes will soften slightly but maintain their crunch.
Can I make this ahead of time?
It keeps well for 1 week at room temperature or 2 weeks refrigerated. The flavors actually improve after a day or two as the candy canes meld with the chocolate.
Why did my bark turn out grainy?
This usually happens if the chocolate overheats or gets wet. Use high-quality white chocolate and melt it gently in 30-second intervals. Stir until smooth before adding mix-ins.

- Pina Colada Dip Recipe Red Lobster: Tropical Creaminess With Toasted Coconut - October 12, 2026
- Pickled Sweet Cherry Peppers Recipe Canning: Tangy Heat for Pantry Staples - October 12, 2026
- Peppercorn Sauce Recipe Vegan: Rich Umami Depth Without Cream - October 12, 2026