
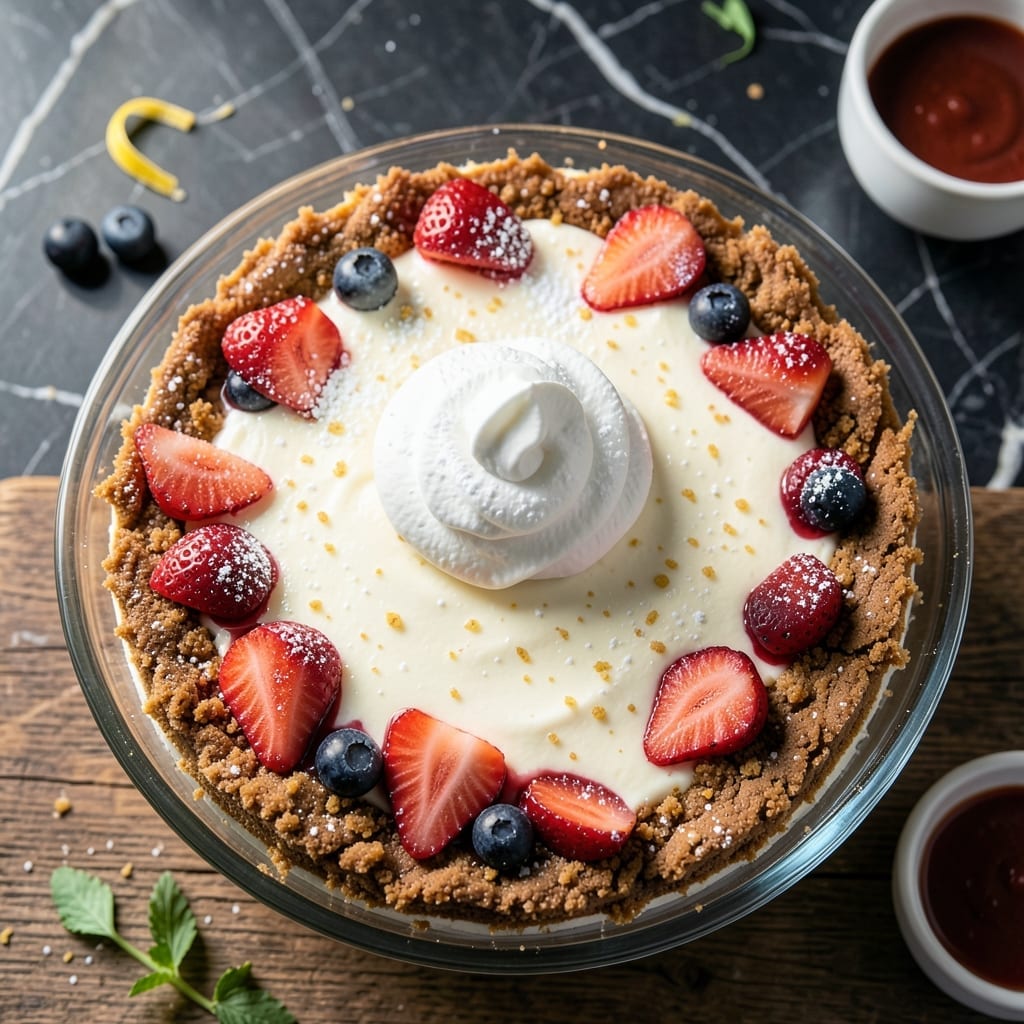
This no-bake method delivers the creamy texture of classic Philadelphia cheesecake without turning on the oven.
With just a few simple ingredients and 4 hours of chilling time, you’ll achieve that signature smooth, rich result every time.
Ingredients for Philadelphia Cheesecake Recipe No Bake
Full-fat dairy and simple pantry staples create this luscious, oven-free dessert base.
| Ingredient | Amount | Notes |
|---|---|---|
| Cream Cheese 🧀 | 16 oz | Full-fat Philadelphia brand preferred |
| Heavy Whipping Cream 🥛 | 1 cup | Cold, for optimal whipping |
| Granulated Sugar 🍚 | ¾ cup | Fine grain for smooth texture |
| Pure Vanilla Extract 🌿 | 1 tsp | High-quality for best flavor |
| Lemon Juice 🍋 | 1 tbsp | Freshly squeezed preferred |
| Graham Cracker Crumbs 🍪 | 1 ½ cups | For the crust base |
| Unsalted Butter 🧈 | 6 tbsp | Melted for crust binding |
| Confectioners Sugar 🍚 | ¼ cup | For dusting or garnish |
| Fresh Berries 🍓 | 1 cup | Optional, for topping |
| Unflavored Gelatin 💊 | 1 tsp | For setting, bloom in cold water |
| Cold Water 💧 | ¼ cup | For blooming gelatin |
The cream cheese must be full-fat Philadelphia brand—lower fat versions won’t set properly or deliver that signature velvety texture. Cold heavy cream whips better, so don’t skip chilling it first. For the crust, Honey Maid graham crackers are my go-to, but any brand works as long as they’re finely crushed. Avoid pre-made crumbs; they often contain preservatives that affect texture.
Need a substitution? Neufchâtel cheese (lower fat) can work but expect a softer set. Swap graham crackers for digestive biscuits or vanilla wafers—both add a slightly different but delicious twist. For a lighter option, Greek yogurt can replace half the cream cheese, though the texture will be less dense. Always use fresh lemon juice—bottled lacks the brightness this needs.
The filled cheesecake must chill for at least 4 hours (overnight is ideal). Store covered in the fridge for up to 5 days or freeze for 2 months. Thaw in the fridge overnight before serving. For clean slices, run a warm knife around the edge before cutting.
Why You’ll Love This Recipe
- No Oven Needed: I just mix, chill, and serve—no baking required, and my kitchen stays cool.
- Velvety Cream Cheese Bliss: The Philadelphia cream cheese and heavy cream blend into this impossibly smooth, rich texture that melts in your mouth.
- Party or Pajamas: I’ve served it at dinner parties and eaten half a pie in my pajamas watching TV. It works for both.
- Keeps for Days: Honestly, it tastes even better the next day—if it lasts that long—so I can make it ahead without stress.
Step-by-Step Instructions for No Bake Cheesecake
This professional method ensures a silky texture and perfect set every time.
Step 1: Prepare the Graham Cracker Crust Base
Combine the 1.5 cups Graham Cracker Crumbs with the 6 tbsp Unsalted Butter melted in a bowl. Stir until the mixture resembles wet sand and the crumbs are evenly coated with the butter.
Press this mixture firmly into the bottom of a 9-inch springform pan using a measuring cup or glass. I apply consistent pressure to create an even layer that will hold its shape when sliced. Chill in the refrigerator for 15 minutes to set while you prepare the filling.
Step 2: Bloom the Gelatin for Proper Setting
Sprinkle the 1 tsp Unflavored Gelatin evenly over the 0.25 cup Cold Water in a small bowl. Let it sit undisturbed for 5-7 minutes until the gelatin absorbs all the water and becomes thick and translucent.
This blooming step is crucial for achieving the right consistency in your no-bake cheesecake. The gelatin will dissolve completely when heated, creating a smooth texture that sets properly in the refrigerator without that grainy mouthfeel.
Step 3: Create the Creamy Cheesecake Filling
In a large mixing bowl, beat the 16 oz Cream Cheese with the 0.75 cup Granulated Sugar until smooth and creamy. Add the 1 tsp Pure Vanilla Extract and 1 tbsp Lemon Juice, mixing until fully incorporated.
In a separate bowl, whip the 1 cup Heavy Whipping Cream to stiff peaks. Gently fold this into the cream cheese mixture. Microwave the bloomed gelatin for 10-15 seconds until just melted, then quickly fold it into the mixture until no streaks remain.
Step 4: Assemble and Chill the Cheesecake
Pour the filling over the chilled crust, spreading it evenly with a spatula. Tap the pan gently on the counter to remove any air bubbles for a perfectly smooth surface.
Refrigerate for at least 6 hours, preferably overnight, until firmly set. The surface should be matte rather than shiny when properly chilled. This extended chill time allows the gelatin to fully set and the flavors to meld beautifully.
Step 5: Garnish and Serve
Once set, run a thin knife around the edge of the pan before releasing the springform ring. This prevents cracking the surface. Dust the top lightly with the 0.25 cup Confectioners Sugar using a fine-mesh sieve.
Arrange the 1 cup Fresh Berries on top just before serving. The contrast of the tart berries with the creamy cheesecake is exceptional. Slice with a hot, wet knife for clean portions, wiping the blade between cuts for that professional presentation.
Pro Tips For Making Philadelphia Cheesecake Recipe No Bake
- Soften the Cream Cheese: Pull it out 2 hours before starting—room temp cream cheese blends smooth without lumps. I learned this the hard way after my first three cheesecakes looked like cottage cheese.
- Chill Overnight: Give it a full 8 hours in the fridge. Sounds tedious, but it sets properly and slices clean—no gooey mess.
- Skip Cold Heavy Cream: Use it straight from the fridge. Whipping cold heavy cream holds peaks better than room temp, which can turn your filling runny.
- Fold in Lemon Last: Add the lemon juice after the mixture thickens. It prevents curdling and keeps the texture silky. My grandmother swore by this, and she was right.
Health Benefits of This philadelphia cheesecake recipe no bake
Rich Protein Source
This creation provides a surprising 6-8 grams of protein per slice, thanks to the 16 oz cream cheese and 1 cup heavy cream. Protein helps keep you feeling full and supports muscle maintenance, making this a more satisfying dessert option. 💪
Calcium Boost
Dairy products are excellent calcium sources, and this dish delivers about 15% of your daily calcium needs per serving. The cream cheese and heavy cream contribute to strong bones and teeth, while the graham cracker crust adds a bit more.
Energy from Healthy Fats
The full-fat dairy provides healthy fats that your body uses for sustained energy. A slice contains about 25-30 grams of fat, primarily from the cream cheese and butter in the crust. These fats help your body absorb fat-soluble vitamins.
Vitamin A Content
You’ll get a good dose of vitamin A from the dairy in this recipe, with one serving providing about 10% of your daily requirement. Vitamin A supports vision health, immune function, and skin health. I notice my skin feels more radiant when I enjoy dairy-based desserts in moderation.
Quick Energy Carbs
The graham cracker crust and sugars provide 30-35 grams of carbohydrates per slice, giving you a quick energy boost. The combination of carbs and fats makes this a balanced treat that satisfies both immediate and long-term energy needs. ✨
Moderation Matters
While this dessert offers nutritional benefits, remember it’s also calorie-dense. A typical slice contains about 400-450 calories. Enjoy as part of a balanced diet, and consider smaller portions if you’re watching your calorie intake.
Frequently Asked Questions
Can I use low-fat cream cheese?
No, full-fat cream cheese is essential for proper texture and setting. Low-fat versions contain more water and won’t create that signature creamy, firm consistency. Stick with 16 oz full-fat Philadelphia for best results.
Why does my cheesecake weep liquid after chilling?
This usually happens if the gelatin wasn’t fully dissolved or the filling wasn’t chilled long enough. Ensure gelatin is completely melted before folding in, and chill for at least 6 hours (overnight is ideal).
Can I make this without gelatin?
Yes, but the texture will be softer. Whipped cream alone can stabilize it for 2-3 days, but for firmer slices that last up to 5 days, gelatin is recommended.
Nutrition Facts

- BBQ Sausage Recipe Oven: Smoky Depth Without the Grill - September 28, 2026
- BBQ Chicken Bowl Recipe Rice: Smoky Sweetness Over Fluffy Grains - September 28, 2026
- Beef Cutlet Recipe Ideas: Crispy Breaded Patties With Bold Seasonings - September 28, 2026