
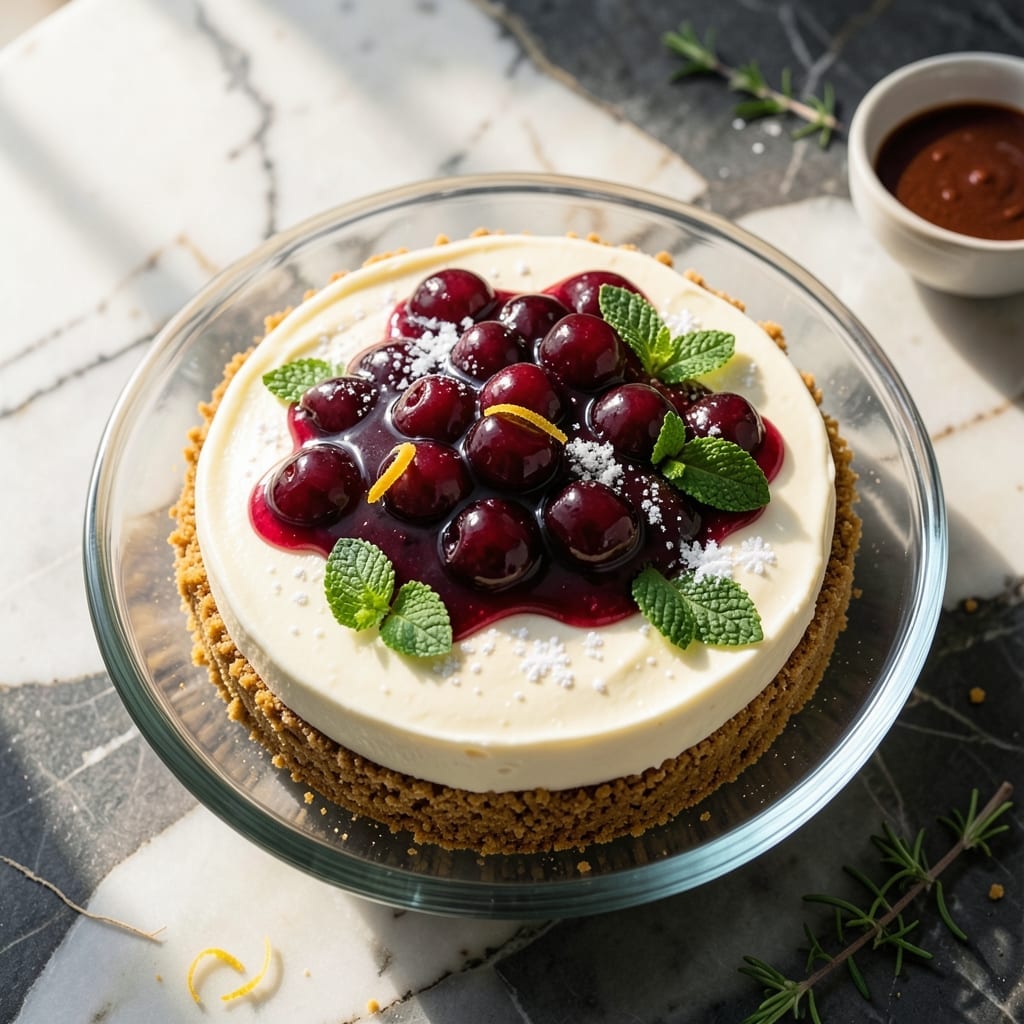
This no-bake cheesecake delivers creamy perfection with minimal effort and maximum flavor. The Philadelphia cream cheese base sets up firm yet silky, creating that classic cheesecake texture everyone loves.
What makes this version special is the sweet cherry swirl that adds bursts of fruit flavor without overpowering the rich, velvety base. The graham cracker crust provides that perfect crunch to contrast the smooth filling above.
The entire dessert comes together in under 30 minutes of active prep. Then it just needs time in the fridge to set completely. The result is a professional-quality dessert that looks as impressive as it tastes.
Serve chilled with extra cherry topping or fresh berries for an elegant finish to any meal.
Ingredients for Philadelphia Cherry Cheesecake Recipe No Bake
A few pantry staples and cream cheese deliver that iconic silky texture with fruity swirls.
| Ingredient | Amount | Notes |
|---|---|---|
| Graham Cracker Crumbs 🍪 | 2 cups | About 18 full crackers crushed |
| Granulated Sugar 🍚 | ¼ cup | Divided for crust and filling |
| Unsalted Butter 🧈 | ½ cup | Melted for crust binding |
| Philadelphia Cream Cheese 🧀 | 24 oz | Full-fat, at room temperature |
| Powdered Sugar 🍚 | 1 cup | Sifted for smooth filling |
| Vanilla Extract 🌿 | 1 tsp | Pure extract preferred |
| Heavy Whipping Cream 🥛 | 1 cup | Cold, for whipped topping |
| Canned Cherry Pie Filling 🍒 | 1 can | 21 oz size, or fresh cherries |
| Lemon Juice 🍋 | 1 tbsp | Freshly squeezed for balance |
| Salt 🧂 | ¼ tsp | Fine sea salt preferred |
The cream cheese is non-negotiable here—Philadelphia brand gives that signature richness and smooth texture. Full-fat is essential (trust me on this). Most grocery stores carry it in 8 oz blocks—grab three for this recipe. For the graham crackers, Honey Maid or store-brand both work fine. The butter should be unsalted so you control the salt level yourself.
No graham crackers? Digestive biscuits or vanilla wafers crush up just as well. Out of cherry pie filling? Fresh or frozen cherries simmered with a bit of sugar and cornstarch work beautifully. The whipped cream can be swapped for Cool Whip if you’re short on time. Just don’t skip the vanilla—it rounds out the sweetness perfectly.
This keeps beautifully in the fridge for up to 5 days (if it lasts that long). Store it covered tightly so it doesn’t pick up other flavors. The crust softens over time, so for best texture, serve within 3 days. Freezing isn’t recommended—it changes the cream cheese texture.
Why You’ll Love This Recipe
- No Oven Needed: I don’t even have to turn on the oven—just mix, chill, and serve.
- Creamy Dream: The Philadelphia cream cheese gives it that ultra-smooth texture I crave.
- Party Ready: It’s my go-to for potlucks because everyone loves that cherry topping.
- Leftovers? Yes Please: Honestly, it tastes even better the next day straight from the fridge.
Step-by-Step Instructions for Philadelphia Cherry Cheesecake No Bake
This method ensures a silky texture and perfect layers without turning on the oven.
Step 1: Prepare the Graham Cracker Crust
Combine the 2 cups Graham Cracker Crumbs with 0.25 cup Granulated Sugar and 0.5 cup Unsalted Butter that has been melted. Stir until the mixture resembles wet sand and the crumbs are evenly coated.
Press the mixture firmly into the bottom of a 9-inch springform pan using the back of a measuring cup or glass. The crust should be compact and level. Chill in the refrigerator for 15 minutes to set completely before adding the filling—this prevents the layers from blending together.
Step 2: Whip the Cream Cheese Filling
In a large bowl, beat the 24 oz Philadelphia Cream Cheese until completely smooth. Add the 1 cup Powdered Sugar, 1 tsp Vanilla Extract, 1 tbsp Lemon Juice, and 0.25 tsp Salt. Mix on medium speed for 2-3 minutes until light and creamy with no lumps remaining.
The filling should be thick but spreadable. Scrape down the sides of the bowl frequently to ensure even mixing. This step is crucial for that signature creamy texture the recipe promises.
Step 3: Assemble and Chill the Cheesecake Base
Spread the cream cheese mixture evenly over the chilled crust using a spatula. Smooth the top so it’s flat—this creates a clean base for the cherry layer. Return the pan to the refrigerator and chill for at least 4 hours, or up to overnight.
This long chill time allows the filling to set properly. If you rush it, the layers may not hold their shape when sliced. The surface should be firm to the touch when fully set.
Step 4: Add the Cherry Topping
Once the cheesecake base is fully chilled, spoon the 1 can Canned Cherry Pie Filling evenly over the top. Use the back of the spoon to gently spread it to the edges, being careful not to press too hard and disturb the layer below.
For a swirled effect, reserve ½ cup of the pie filling and warm it slightly. Drizzle it in concentric circles over the cheesecake, then use a knife to create gentle swirls. Return to the refrigerator for at least 1 hour to set the topping.
Step 5: Whip the Cream and Serve
In a chilled bowl, whip the 1 cup Heavy Whipping Cream until stiff peaks form. Spread or pipe the whipped cream over the cherry layer just before serving. This keeps it fresh and prevents it from weeping into the cheesecake.
Slice with a hot, wet knife for clean portions. Each serving should showcase the distinct layers: the crisp graham crust, creamy filling, sweet cherry topping, and light whipped cream. Serve immediately for the best texture.
Pro Tips For Making Philadelphia Cherry Cheesecake Recipe No Bake
- Soften the Cream Cheese: Pull the Philadelphia Cream Cheese out of the fridge at least 2 hours before starting—I learned this the hard way after ending up with lumpy filling from rushing it.
- Press the Crust Hard: Use the bottom of a glass to really pack down the Graham Cracker Crumbs and butter mixture in the pan; a loose crust turns to crumbs when you slice it.
- Chill Longer Than You Think: Give it a full 6 hours or overnight in the fridge—this isn’t just resting, it’s what turns the filling from pudding to cheesecake.
- Skip Cold Butter: Melt the Unsalted Butter before mixing with the crumbs—cold butter leaves dry spots and the crust won’t hold together as well.
Best Sauces and Condiments for This philadelphia cherry cheesecake recipe no bake
Classic Cherry Sauce
For a homemade touch, simmer 2 cups frozen cherries with ¼ cup sugar and 1 tbsp lemon juice until thickened (about 10 minutes). The natural pectin in cherries creates a glossy sauce that drizzles beautifully over each slice. 🍒
Chocolate Drizzle
Melt ½ cup semi-sweet chocolate chips with 2 tbsp heavy cream for a rich, velvety topping. I use Ghirardelli for consistent quality. Drizzle in zigzag patterns over the whipped cream layer for an elegant presentation.
Caramel Swirl
Warm ½ cup store-bought caramel sauce with 1 tsp vanilla extract and drizzle generously. The buttery caramel pairs surprisingly well with the tart cherries, adding depth to every bite.
Whipped Cream Variations
Add 1 tsp almond extract to your whipped cream for a subtle nutty note. Or fold in ½ cup crushed graham crackers for texture. These small tweaks elevate the standard topping without overpowering the cheesecake.
Citrus Zest Garnish
Sprinkle lemon or orange zest over the finished dessert for a bright, fresh contrast. Use a microplane to get fine, fluffy zest that distributes evenly. This adds color and a pop of flavor that cuts through the richness. ✨
Berry Coulis
Blend 1 cup mixed berries with 2 tbsp powdered sugar and strain for a smooth coulis. This vibrant purple sauce looks stunning against the creamy white cheesecake and complements the cherry topping perfectly.
Nutrition Facts
Frequently Asked Questions
Can I use a different type of crust?
Try vanilla wafer or digestive biscuit crumbs for a slightly sweeter base. Press them with melted butter just like the graham crackers.
How long does it need to chill?
The base requires at least 4 hours in the fridge, but overnight is ideal. The cherry layer needs an additional 1 hour to set properly.
Can I make this ahead of time?
Yes! This keeps well for up to 5 days covered in the fridge. Add the whipped cream topping just before serving for the best texture.
What if my filling is lumpy?
Ensure cream cheese is at room temperature before mixing. Beat on medium speed for 2-3 minutes and scrape the bowl often for a smooth result.

- Pina Colada Dip Recipe Red Lobster: Tropical Creaminess With Toasted Coconut - October 12, 2026
- Pickled Sweet Cherry Peppers Recipe Canning: Tangy Heat for Pantry Staples - October 12, 2026
- Peppercorn Sauce Recipe Vegan: Rich Umami Depth Without Cream - October 12, 2026