
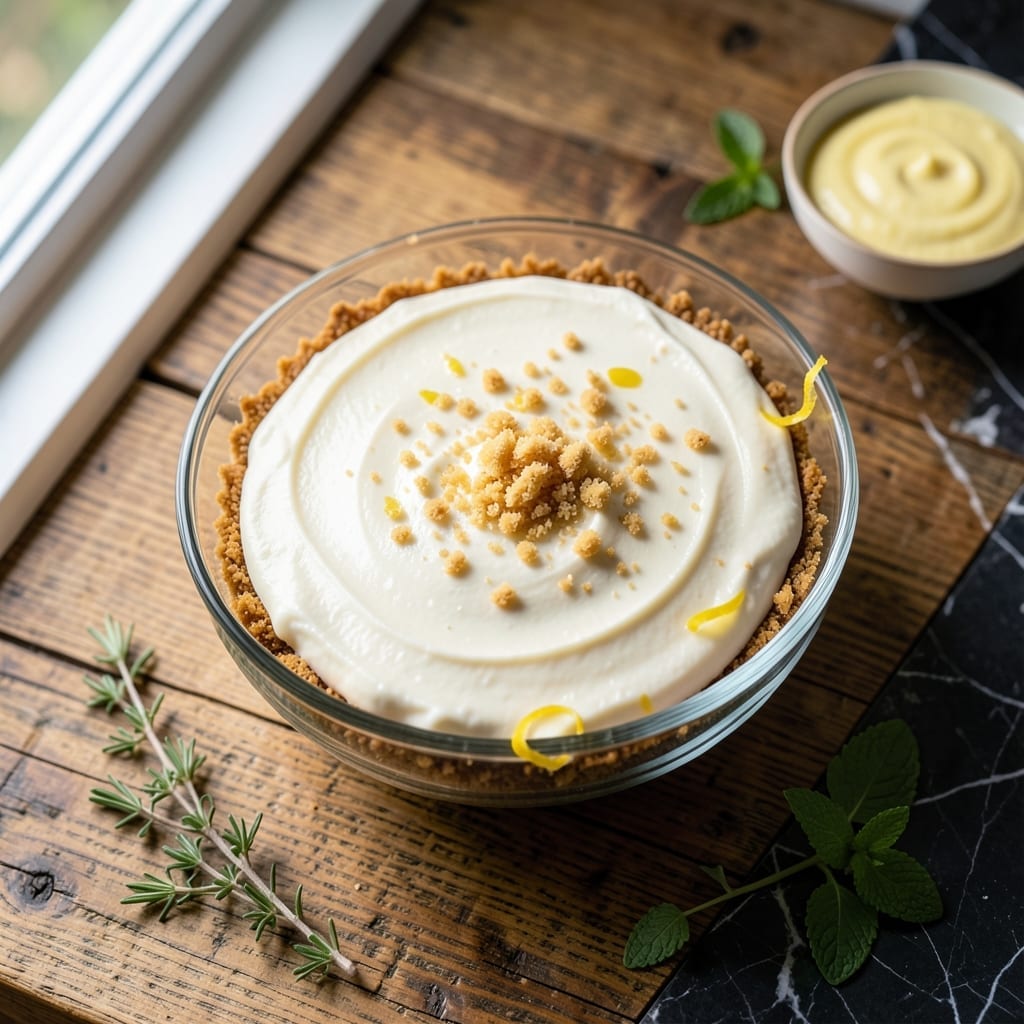
This no-bake cheesecake delivers a velvety texture with a bright citrus kick that sets it apart from traditional versions. The combination of Philadelphia cream cheese and fresh lemon juice creates a perfectly balanced dessert that’s both rich and refreshing.
The beauty of this recipe lies in its simplicity—no oven required, just a foolproof method that comes together in minutes. A buttery graham cracker crust provides the ideal base, while the tangy, creamy filling sets up firm in the fridge.
What emerges is a dessert with a smooth, luscious filling and a zesty tang that cuts through the richness. The lemon juice doesn’t just add flavor; it enhances the cheesecake’s natural creaminess.
Serve chilled with fresh berries or a drizzle of fruit compote for a finishing touch that elevates every bite.
Ingredients for Philadelphia Cream Cheese No Bake Cheesecake Recipe Lemon Juice
Simple ingredients create a velvety, citrus-kissed dessert with foolproof results. No oven needed.
| Ingredient | Amount | Notes |
|---|---|---|
| Graham Cracker Crumbs 🍪 | 1 ½ cups | Fine crumbs preferred |
| Unsalted Butter 🧈 | ½ cup | Melted for crust |
| Philadelphia Cream Cheese 🧀 | 24 oz | Full-fat, softened to room temperature |
| Granulated Sugar 🍚 | 1 cup | Fine white sugar |
| Fresh Lemon Juice 🍋 | ¼ cup | Freshly squeezed for brightness |
| Vanilla Extract 💧 | 1 tsp | Pure extract recommended |
| Heavy Whipping Cream 🥛 | 1 cup | Cold for best whipping results |
| Powdered Sugar 🍚 | ¼ cup | For dusting or garnish |
| Salt 🧂 | ¼ tsp | Fine sea salt |
| Fresh Berries 🍓 | 2 cups | For serving, optional |
| Lemon Zest 🍋 | 1 tbsp | Finely grated for extra citrus |
The cream cheese is non-negotiable here—Philadelphia brand has the right fat content and consistency for that signature velvety texture. Most grocery stores carry it in 8 oz blocks; you’ll need three. Make sure it’s fully softened (leave it out for 1-2 hours) or you’ll end up with lumps. For the graham crackers, Honey Maid or store-brand works fine. Pulse them in a food processor for the finest crumbs.
No fresh lemons? Bottled lemon juice at half the amount works in a pinch, but fresh is brighter. Out of heavy cream? Whole milk with a splash of corn syrup can substitute, though the texture won’t be as stable. For a nutty twist, swap graham crackers for Digestive biscuits. Vanilla can be skipped, but the citrus flavor really benefits from its depth.
This keeps beautifully in the fridge for up to 5 days—cover tightly with plastic wrap. Freeze for 1 month (thaw overnight in the fridge). The crust softens over time, so slice and serve within a few hours for the best texture. Leftovers? Perfect with coffee the next morning.
Why You’ll Love This Recipe
- No Oven Needed: I just mix, chill, and serve—no baking, no stress, just creamy goodness.
- Bright Zing: That fresh lemon juice cuts through the rich Philadelphia cream cheese for a tangy kick I crave.
- Party Ready: I bring this to potlucks and it’s always the first to disappear.
- Keeps Well: Honestly, it tastes even better the next day after the flavors meld in the fridge.
Step-by-Step Instructions for Philadelphia Cream Cheese No Bake Cheesecake
This method ensures a creamy texture with bright citrus notes every time.
Step 1: Prepare the Graham Cracker Crust
Combine 1.5 cups Graham Cracker Crumbs with 0.5 cup Unsalted Butter melted in a medium bowl. Stir until the crumbs are evenly moistened and resemble wet sand—this ensures the crust will hold together when pressed.
Transfer the mixture to a 9-inch springform pan and press firmly into the bottom using a measuring cup or glass. The crust should be compact and level. Chill in the refrigerator for 15 minutes to set while you prepare the filling—this prevents it from crumbling when sliced later.
Step 2: Beat the Cream Cheese Filling
In a large bowl, beat 24 oz Philadelphia Cream Cheese (softened to room temperature) with 1 cup Granulated Sugar on medium speed until smooth and creamy, about 2-3 minutes. Scrape down the sides of the bowl as needed to ensure even mixing.
Add 0.25 cup Fresh Lemon Juice, 1 tsp Vanilla Extract, and 0.25 tsp Salt. Beat for another 1-2 minutes until fully incorporated. The mixture should be silky with no lumps—this is the base of your velvety texture. The lemon juice adds that signature zesty tang.
Step 3: Fold in Whipped Cream
In a separate bowl, whip 1 cup Heavy Whipping Cream (cold) until stiff peaks form. This takes about 3-4 minutes on high speed. Be careful not to over-whip, or the cream will turn grainy. Stiff peaks should hold their shape when the whisk is lifted.
Gently fold the whipped cream into the cream cheese mixture using a spatula. Use a light hand and fold just until no streaks remain—this keeps the filling airy. Overmixing will deflate the cream and result in a denser cheesecake. The filling should look smooth and slightly billowy.
Step 4: Assemble and Chill
Pour the filling over the chilled crust and smooth the top with an offset spatula. Tap the pan gently on the counter to remove any air bubbles. Cover with plastic wrap and refrigerate for at least 4 hours, or preferably overnight.
The chilling time is crucial—it allows the filling to set completely and develop its signature creamy texture. Rushing this step will result in a soft, unsliceable dessert. When properly chilled, the cheesecake should hold its shape when sliced.
Step 5: Garnish and Serve
Once set, release the springform pan and transfer the cheesecake to a serving plate. Top with 2 cups Fresh Berries and 1 tbsp Lemon Zest for a fresh, vibrant finish. For an extra touch, dust with 0.25 cup Powdered Sugar just before serving.
Slice with a hot, wet knife for clean edges. Each serving should have a firm yet creamy texture with a bright citrus kick from the lemon juice and zest. Serve immediately for the best experience.
Pro Tips For Making Philadelphia Cream Cheese No Bake Cheesecake Recipe Lemon Juice
- Soften the Cream Cheese: Pull the Philadelphia cream cheese out 2-3 hours before starting—room temperature blends smooth without lumps. I learned this the hard way after my first three attempts had stubborn streaks of cold cream cheese.
- Press the Crust Firmly: Pack the graham cracker crumbs and melted butter into the pan with the bottom of a glass. A loose crust falls apart when you slice it, and nobody wants a crumbly mess.
- Use Fresh Lemon Juice: Bottled lemon juice tastes flat and artificial. Freshly squeezed brightens the filling and cuts through the richness of the cream cheese.
- Chill Overnight: Resist the urge to dig in after just a few hours. Letting it set for a full 8 hours (or overnight) guarantees clean slices and that perfect creamy texture.
Troubleshooting This Recipe
Crust Not Setting
If your graham cracker crust crumbles when slicing, it likely didn’t chill long enough. Press the mixture firmly into the pan and refrigerate for the full 15 minutes before adding filling. Using melted unsalted butter helps bind the crumbs better than oil. 💡
Lumpy Filling
Lumps usually mean the cream cheese wasn’t softened enough. Always bring Philadelphia cream cheese to room temperature for 1-2 hours before mixing. If you’re in a hurry, cut it into small cubes to speed up the process.
Soft Cheesecake
If your dessert won’t hold its shape, it needs more chilling time. The minimum is 4 hours, but overnight in the fridge produces the best results. Avoid opening the fridge door frequently during this period.
Whipped Cream Issues
Grainy whipped cream often means over-whipping. Stop when stiff peaks form—about 3-4 minutes on high speed. Make sure your heavy whipping cream and bowl are well-chilled before starting.
Separation Problems
If the filling separates or looks curdled, the cream cheese might have been too cold. Always beat it until completely smooth before adding other ingredients. Folding in the whipped cream gently prevents deflating the mixture.
Weeping Top
Excess moisture on top usually indicates under-chilling. Cover the cheesecake with plastic wrap pressed directly onto the surface during refrigeration. This prevents a skin from forming and helps maintain that velvety texture. 🌟
Nutrition Facts
Frequently Asked Questions
Can I use a different type of cream cheese?
Stick with full-fat Philadelphia cream cheese for the best texture. Other brands may have different fat contents, which can affect the final consistency of your cheesecake.
Why is lemon juice important in this recipe?
It adds a bright, tangy flavor that balances the richness of the cream cheese. The acidity also helps stabilize the filling, ensuring it sets properly during chilling.
Can I make this cheesecake ahead of time?
Yes! It keeps well in the fridge for up to 5 days. For best results, cover it tightly with plastic wrap to prevent drying out.
What if my cheesecake doesn’t set?
It likely needs more chilling time. Ensure it refrigerates for at least 4 hours, preferably overnight. Avoid opening the fridge door frequently during this period.

- Pina Colada Dip Recipe Red Lobster: Tropical Creaminess With Toasted Coconut - October 12, 2026
- Pickled Sweet Cherry Peppers Recipe Canning: Tangy Heat for Pantry Staples - October 12, 2026
- Peppercorn Sauce Recipe Vegan: Rich Umami Depth Without Cream - October 12, 2026