
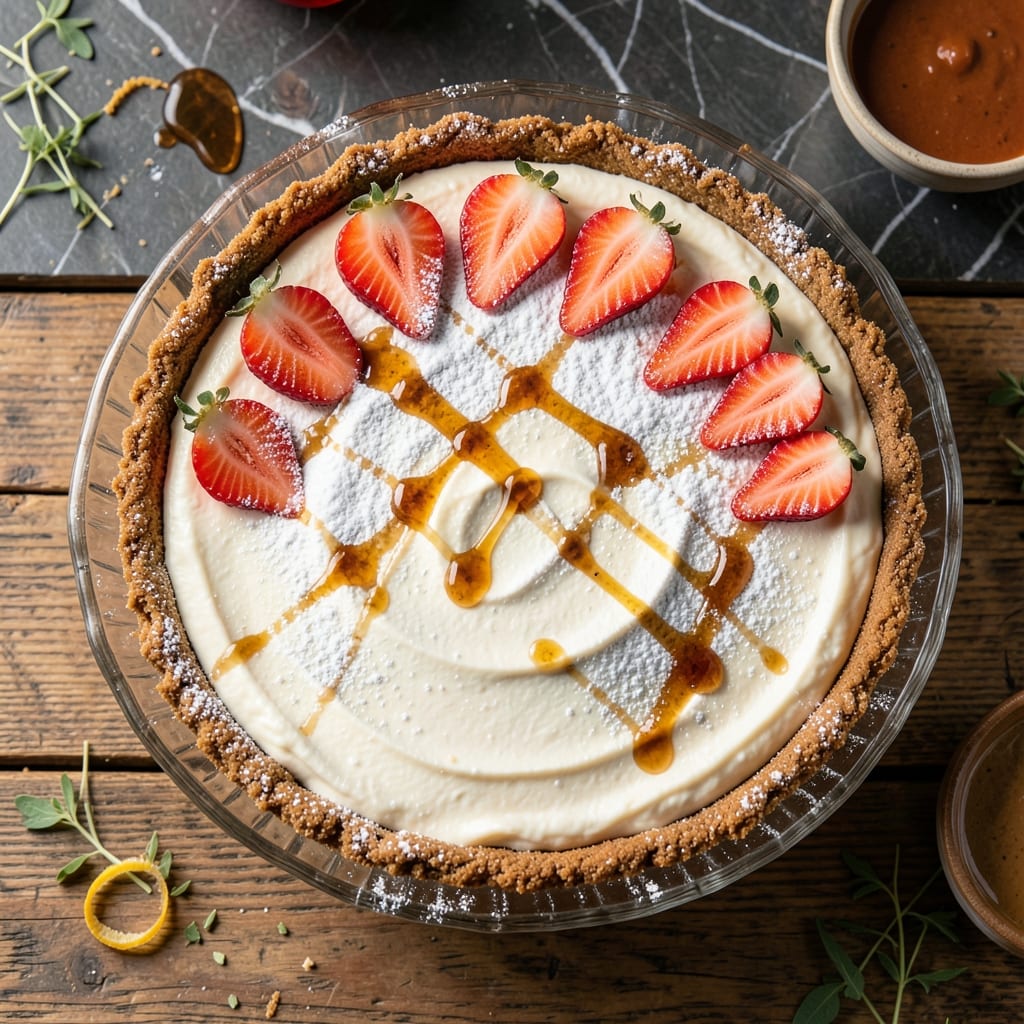
There’s something special about a no-bake dessert that delivers velvety smooth results without turning on the oven. This creation brings together a buttery graham cracker base with a luscious cream cheese filling that sets to perfect consistency in the fridge.
The beauty lies in its simplicity—no baking required, just a bit of mixing and patience. Philadelphia cream cheese forms the heart of the filling, blended with just the right sweetness and a hint of vanilla for depth.
Once chilled, the pie emerges with a firm yet creamy texture that slices beautifully. The graham crust adds a satisfying crunch, balancing the richness of the filling with its toasted, buttery notes.
Serve it plain or top with fresh fruit for a refreshing contrast. This is dessert made effortless.
Ingredients for Philadelphia Cream Cheese Pie Recipe No Bake
A buttery graham crust pairs with velvety cream cheese filling for this effortless no-bake dessert.
| Ingredient | Amount | Notes |
|---|---|---|
| Graham Cracker Crumbs 🍪 | 2 cups | About 18 full crackers processed |
| Unsalted Butter 🧈 | ½ cup | Melted for crust binding |
| Granulated Sugar 🍚 | ¼ cup | Divided for crust and filling |
| Philadelphia Cream Cheese 🧀 | 24 oz | Full-fat, softened at room temperature |
| Powdered Sugar 🍚 | 1 ¼ cups | Sifted for smooth texture |
| Pure Vanilla Extract 🌿 | 1 tsp | Not imitation vanilla |
| Heavy Whipping Cream 🥛 | 1 cup | Chilled for stiff peaks |
| Lemon Juice 🍋 | 1 tbsp | Freshly squeezed preferred |
| Salt 🧂 | ¼ tsp | Fine sea salt recommended |
| Fresh Strawberries 🍓 | 1 lb | Hulled and sliced for topping |
| Blueberries 🫐 | ½ cup | Optional for garnish |
| Kiwi 🥝 | 2 whole | Peeled and sliced for color |
The cream cheese quality is non-negotiable. Philadelphia brand delivers the smoothest texture—avoid low-fat versions as they won’t set properly. For graham crackers, Honey Maid or store-brand work equally well. Butter should be high-quality (I prefer Plugrá or Kerrygold), as the flavor shines through in the crust. The powdered sugar must be fresh and lump-free for a perfectly smooth filling.
Need to make this ahead? The crust can be prepared 1 day in advance and stored at room temperature. No graham crackers? Digestive biscuits or vanilla wafers work in a pinch—use the same weight. Heavy cream can be substituted with coconut cream for a dairy-free version (though texture may vary slightly). The vanilla extract is key—pure bourbon vanilla adds depth that imitation can’t match.
This pie keeps beautifully in the fridge for up to 5 days—cover tightly with plastic wrap. For longer storage, freeze for 1 month (thaw overnight in the fridge before serving). Toppings like fresh fruit should be added just before serving to prevent sogginess. The crust softens over time, so slice within 2 days for optimal texture.
Why You’ll Love This Recipe
- No Oven Needed: I love that this comes together with just a fridge and a mixing bowl—no baking required.
- Velvety Dream: The Philadelphia cream cheese blended with powdered sugar creates this melt-in-your-mouth texture that’s hard to resist.
- Crowd Pleaser: Perfect for potlucks, holidays, or just because—this pie disappears fast every time I make it.
- Budget Friendly: Graham crackers and cream cheese are affordable staples, so I can make this without breaking the bank.
Step-by-Step Instructions for Philadelphia Cream Cheese Pie No Bake
Precision in technique ensures the creamiest texture and most stable structure for this chilled dessert.
Step 1: Prepare the Graham Cracker Crust
Combine the 2 cups Graham Cracker Crumbs with the 0.25 cup Granulated Sugar and 0.5 cup Unsalted Butter melted in a medium bowl. The mixture should resemble wet sand and hold together when pressed between your fingers.
Press the crumb mixture firmly and evenly into the bottom and up the sides of a 9-inch pie dish. I use the bottom of a measuring cup to create a smooth, compact layer. This prevents crumbling when sliced later.
Chill the crust in the refrigerator for 15 minutes to set completely. The butter needs to solidify fully to create a stable base that won’t absorb moisture from the filling.
Step 2: Whip the Cream Cheese Filling Base
In a large mixing bowl, beat the 24 oz Philadelphia Cream Cheese on medium speed until completely smooth—about 2 minutes. Scrape the bowl frequently to ensure no lumps remain.
Gradually add the 1.25 cups Powdered Sugar, 1 tsp Pure Vanilla Extract, 1 tbsp Lemon Juice, and 0.25 tsp Salt. Beat for another 1-2 minutes until the mixture is light and fluffy. The acid from the lemon juice balances the sweetness while the salt enhances all flavors.
Step 3: Fold in the Whipped Cream
In a separate chilled bowl, whip the 1 cup Heavy Whipping Cream to stiff peaks. This means the cream holds its shape when the whisk is lifted, and the tip stands straight up. Be careful not to over-whip into butter.
Gently fold the whipped cream into the cream cheese mixture using a silicone spatula. Work in 3 additions, folding just until no white streaks remain. This maintains the air incorporated into the cream, resulting in a lighter texture.
Step 4: Assemble and Chill the Pie
Spoon the filling into the prepared graham cracker crust, spreading it evenly with an offset spatula. The top should be perfectly level with no air pockets.
Cover with plastic wrap, pressing it directly against the surface to prevent a skin from forming. Refrigerate for at least 4 hours, but preferably overnight. This extended chill time allows the filling to set completely and the flavors to meld.
Step 5: Garnish and Serve
Just before serving, arrange the 1 lb Fresh Strawberries (hulled and sliced), 0.5 cup Blueberries, and sliced 2 whole Kiwi in an attractive pattern on top. The contrast of colors makes for a stunning presentation.
Slice with a sharp knife dipped in hot water for clean cuts. Serve immediately while chilled. Each serving should showcase the creamy filling, crisp crust, and vibrant fruit topping in every bite.
Pro Tips For Making Philadelphia Cream Cheese Pie Recipe No Bake
- Chill the Base: Press the graham cracker crust into the pan and refrigerate for at least 30 minutes—this keeps it firm when you add the cream cheese layer.
- Soften the Cream Cheese: Pull the Philadelphia cream cheese out of the fridge 1-2 hours before mixing, or microwave in 10-second bursts at 50% power until just soft. Cold cream cheese leaves lumps no matter how hard you beat it.
- Skip the Overmixing: Once the powdered sugar is fully incorporated, stop mixing. Overworking the filling introduces air bubbles that make the pie surface look uneven after chilling.
- Use Full-Fat Only: Low-fat cream cheese makes a runny, grainy filling that won’t set properly. Full-fat Philadelphia is non-negotiable for that smooth, sliceable texture.
Pro Cooking Tips for Great philadelphia cream cheese pie recipe no bake
Cream Cheese Perfection
Always use full-fat Philadelphia cream cheese at room temperature—this ensures a lump-free, ultra-smooth filling. Cold cream cheese creates clumps that ruin the texture. I take mine out 1-2 hours before starting. 💡
Crust Stability
For a crust that slices cleanly, press the graham mixture firmly into the pie dish using a measuring cup. Chill for 15 minutes before adding filling. This prevents the buttery base from softening and mixing with the cream layer.
Whipped Cream Technique
Chill your bowl and beaters for 10 minutes before whipping the cream. Stop at stiff peaks—over-whipping turns it grainy. I use a KitchenAid stand mixer on medium-high speed for 2-3 minutes.
Filling Consistency
Fold whipped cream in 3 additions to maintain volume. The filling should look like thick, creamy frosting. If it seems thin, chill the bowl between additions. The final texture should hold its shape when spooned.
Chilling Time
Don’t rush the chill—4 hours minimum, but overnight is ideal. The filling sets best at 35-40°F. I often make mine the night before, so it’s ready for dessert the next day. ❄️
Slicing Trick
Dip your knife in hot water and wipe it clean between slices. This creates perfect, professional-looking pieces every time. Serve immediately after slicing for the best texture.
Nutrition Facts
Frequently Asked Questions
Can I use low-fat cream cheese?
No, full-fat is essential for proper texture. Low-fat versions contain more water and won’t set firmly, resulting in a runny filling. Stick with Philadelphia full-fat for best results.
Why does my pie weep liquid?
This happens if the cream cheese wasn’t cold enough or the pie wasn’t chilled long enough. Ensure all ingredients are properly chilled and allow at least 4 hours in the fridge.
Can I make this pie dairy-free?
Yes! Substitute with dairy-free cream cheese and coconut cream. Note that texture and flavor may vary slightly from the original. Check labels for vegan certification.
How far ahead can I prepare this?
The crust can be made 1 day ahead. The complete pie keeps well in the fridge for up to 5 days. For best texture, add fruit topping just before serving.

- Pina Colada Dip Recipe Red Lobster: Tropical Creaminess With Toasted Coconut - October 12, 2026
- Pickled Sweet Cherry Peppers Recipe Canning: Tangy Heat for Pantry Staples - October 12, 2026
- Peppercorn Sauce Recipe Vegan: Rich Umami Depth Without Cream - October 12, 2026