
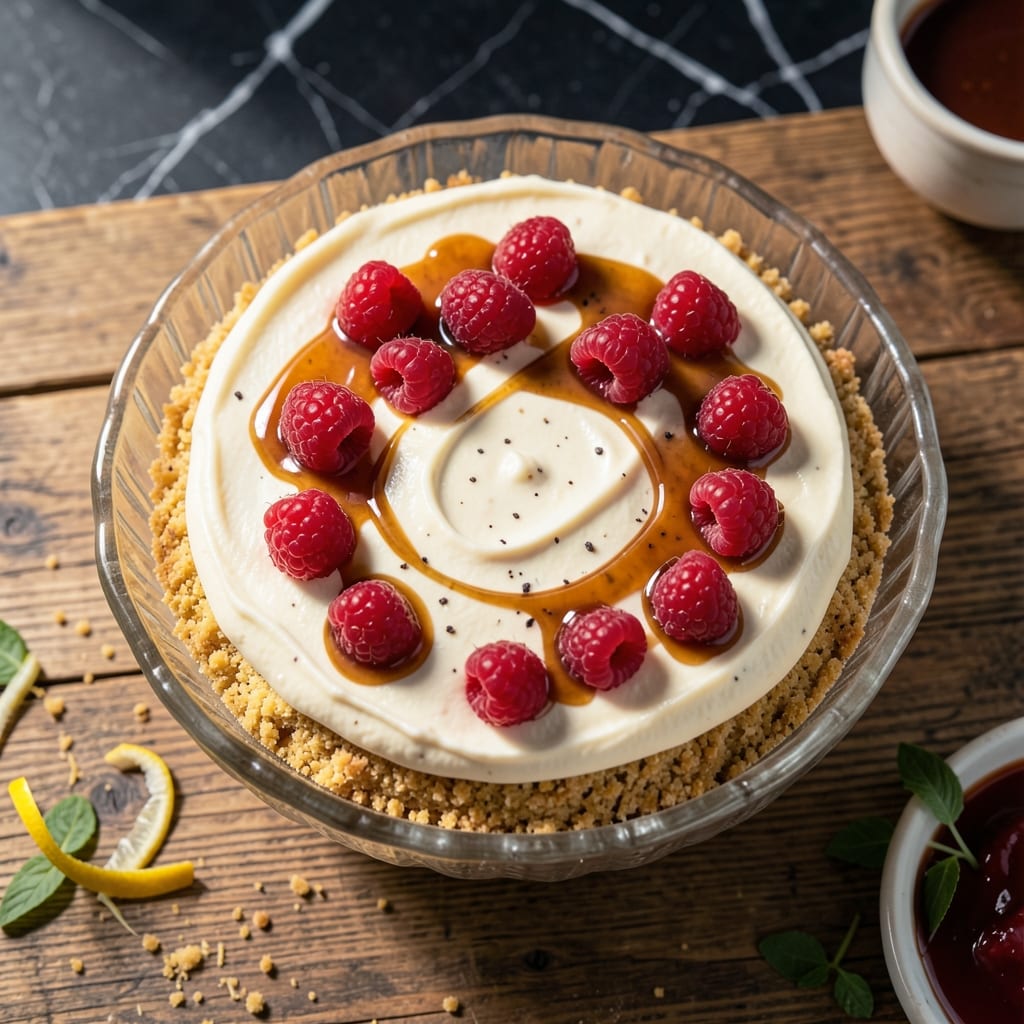
This no-bake cheesecake delivers creamy perfection with minimal effort, using classic Philadelphia cream cheese as its foundation. The vanilla wafer crust adds a buttery, crunchy contrast to the smooth filling.
I developed this recipe to maximize flavor while minimizing friction—no oven required. The filling comes together in minutes, then sets in the fridge for a cool, refreshing dessert.
Each slice offers layers of texture: crisp crust, velvety filling, and your choice of toppings. The beauty lies in its simplicity and adaptability.
Perfect for warm days or when you need a make-ahead treat. The result is always impressive, yet effortless.
Ingredients for Philadelphia No Bake Cheesecake Recipe Ideas
A handful of pantry staples and cream cheese transform into this dreamy layered dessert.
| Ingredient | Amount | Notes |
|---|---|---|
| Vanilla Wafers 🍪 | 2 cups | Crushed into fine crumbs |
| Unsalted Butter 🧈 | ½ cup | Melted for crust binding |
| Philadelphia Cream Cheese 🧀 | 32 oz | Full-fat, softened to room temperature |
| Granulated Sugar 🍚 | 1 ¼ cups | Divided between crust and filling |
| Pure Vanilla Extract 🌿 | 2 tsp | For depth of flavor |
| Heavy Whipping Cream 🥛 | 1 cup | Cold, for stabilizing filling |
| Lemon Juice 🍋 | 1 tbsp | Freshly squeezed for brightness |
| Salt 🧂 | ¼ tsp | Fine grain for balance |
| Sour Cream 🥣 | ½ cup | Full-fat for tangy richness |
| Fresh Strawberries 🍓 | 2 cups | Sliced, for topping |
| Blueberries 🫐 | 1 cup | Fresh or frozen, thawed |
The cream cheese is non-negotiable here—Philadelphia brand gives that signature texture and tang. Look for the full-fat blocks (not the spreadable kind) at any major grocery store. Vanilla wafers are usually in the cookie aisle; Nilla Wafers are the classic choice. Butter should be unsalted so you control the seasoning. For the best results, use room-temperature cream cheese (sit out for 1-2 hours before starting).
No vanilla wafers? Graham crackers or shortbread cookies work in a pinch (use the same volume). Heavy cream can be swapped for coconut cream if you need a dairy-free option. Fresh fruit toppings are flexible—raspberries, blackberries, or cherries all pair beautifully. If you’re short on time, skip the homemade topping and use store-bought fruit compote or a drizzle of caramel.
This keeps beautifully in the fridge for up to 5 days, covered tightly. The crust stays crisp if you press it firmly into the pan. For longer storage, freeze without toppings for up to 2 months—thaw overnight before serving. Always add fresh toppings right before serving to prevent sogginess.
Why You’ll Love This Recipe
- No Oven Needed: I just mix, chill, and serve—no baking, no fuss, and my kitchen stays cool.
- Velvety Cream Cheese: The Philadelphia cream cheese blended with vanilla extract gives that ultra-smooth, rich texture I can’t resist.
- Crowd Pleaser: I bring this to potlucks and it’s always the first to disappear—even the picky eaters go back for seconds.
- Makes Ahead: I love prepping it the night before; the flavors deepen, and I wake up to a ready-to-serve dessert.
Step-by-Step Instructions for Philadelphia No Bake Cheesecake
Here’s the method I use for layers that are rich, velvety, and perfectly balanced.
Step 1: Create the Vanilla Wafer Crust
Crush the 2 cups Vanilla Wafers into fine crumbs using a food processor or rolling pin. You want the texture to resemble coarse sand—this ensures the crust holds together well. Transfer the crumbs to a bowl and mix with the 0.5 cup Unsalted Butter that’s been melted and slightly cooled.
Press the mixture firmly into the bottom of a 9-inch springform pan using the back of a spoon or a flat-bottomed glass. I press up the sides about ½ inch to create a slight edge. Chill in the refrigerator for 20 minutes to set while you prepare the filling—this prevents the crust from crumbling when sliced.
Step 2: Whip the Cream Cheese Filling Base
In a large bowl, beat the 32 oz Philadelphia Cream Cheese with 1 cup Granulated Sugar (reserve the remaining ¼ cup for later) until smooth and creamy. Use an electric mixer on medium speed for about 2-3 minutes, scraping down the sides as needed. The mixture should be completely lump-free.
Add the 2 tsp Pure Vanilla Extract, 1 tbsp Lemon Juice, and 0.25 tsp Salt. Mix for another 30 seconds until fully incorporated. Here’s the thing—the lemon juice brightens the richness, so don’t skip it. The vanilla deepens the flavor, making it taste like it came from a bakery.
Step 3: Fold in the Cream and Sour Cream
In a separate bowl, whip the 1 cup Heavy Whipping Cream to stiff peaks. This takes about 3-4 minutes on high speed—watch for the cream to hold its shape when the whisk is lifted. Be careful not to over-whip into butter. Gently fold the whipped cream into the cream cheese mixture using a spatula until just combined.
Now fold in the 0.5 cup Sour Cream and the remaining ¼ cup Granulated Sugar. The sour cream adds a subtle tang that balances the sweetness perfectly. Mix until smooth but don’t overwork it—you want to maintain that airy texture for a light, creamy result.
Step 4: Assemble and Chill the Cheesecake
Pour the filling over the chilled crust and spread it evenly with a spatula. The top should be smooth and level. Tap the pan gently on the counter to remove any air bubbles that might create pockets in your finished cheesecake.
Cover with plastic wrap and refrigerate for at least 6 hours, but overnight is ideal. This chilling time allows the filling to set completely and the flavors to meld together. I know it’s hard to wait, but the texture won’t be right if you rush this step.
Step 5: Top with Fresh Berries and Serve
Just before serving, top the cheesecake with the 2 cups Fresh Strawberries and 1 cup Blueberries arranged in a decorative pattern. You can toss them lightly in a bit of the reserved sugar if you like them slightly sweeter, but I prefer the natural freshness.
Use a hot, wet knife to slice clean portions—dip the knife in hot water and wipe it dry between cuts. This ensures each piece has crisp layers and a professional presentation. Serve immediately for the best texture.
Pro Tips For Making Philadelphia No Bake Cheesecake Recipe Ideas
- Soften the Cream Cheese: Pull the Philadelphia Cream Cheese out of the fridge 2-3 hours before starting—room temperature blends smoother and avoids lumps. I learned this the hard way after my first three attempts came out grainy.
- Crush Wafers Fine: Pulse those Vanilla Wafers into near-powder before mixing with melted butter. Sounds fussy, but it gives the crust that perfect, firm base without crumbly gaps.
- Chill Overnight: Resist the urge to slice early—this needs at least 6 hours (8 is better) in the fridge to set properly. After rushing one batch, I ended up with a sad, soupy mess.
- Use Full-Fat Only: Skip the low-fat cream cheese; the full-fat Philadelphia version is non-negotiable for that rich, creamy texture. My grandmother swore by this, and she was right.
Pro Cooking Tips for This Recipe
Room Temperature Matters
Always use room-temperature cream cheese—I pull my Philadelphia blocks out 1-2 hours before starting. Cold cream cheese creates lumps no amount of mixing can smooth out. The same goes for your sour cream and heavy cream. 🌡️
Whip It Good
When whipping the 1 cup heavy whipping cream, use chilled beaters and bowl. Stop at stiff peaks—if you go to butter, you’ll need to start over. Fold gently into the cream cheese mixture to keep the filling airy and light.
Crust Perfection
Press your vanilla wafer crumbs firmly into the pan using a straight-sided glass. I find 20 minutes in the fridge sets the crust just enough to hold its shape when you add the filling. Don’t skip this step—it prevents soggy bottoms. 💡
Chilling Time
This is the hardest part, but 6 hours minimum in the fridge is non-negotiable. Overnight is even better. The filling needs time to set completely. If you’re in a rush, a 2-hour freezer stint can work, but watch for ice crystals.
Clean Slices
For bakery-perfect slices, dip your knife in hot water and wipe it dry between each cut. This trick works every time. Serve with toppings like fresh strawberries or blueberries for a pop of color and freshness.
Nutrition Facts
Frequently Asked Questions
Can I make this ahead of time?
This cheesecake actually improves with time. Prepare it up to 2 days ahead and keep it covered in the fridge. Add toppings just before serving for the best texture.
What if I don’t have a springform pan?
Use a 9×13-inch baking dish or pie plate instead. Line it with parchment paper for easy removal. The cheesecake will be slightly thicker, so adjust chilling time to 8 hours.
Why did my filling turn out lumpy?
This usually happens if the cream cheese isn’t fully softened. Always use room-temperature blocks and beat until completely smooth. Cold ingredients won’t blend evenly.
Can I swap the vanilla wafers for another cookie?
Yes! Try graham crackers or shortbread cookies for a different flavor. Use the same volume and add 1 tablespoon sugar if your cookies aren’t sweet.

- Potato Candy Recipe 1933: Vintage Peanut Butter Roll Delight - October 30, 2026
- Potato Chip Cookie Recipe With Pecans: Buttery Crunch Meets Nutty Richness - October 30, 2026
- Potato Patty Recipe No Egg: Crispy Edges Without the Binder - October 30, 2026