
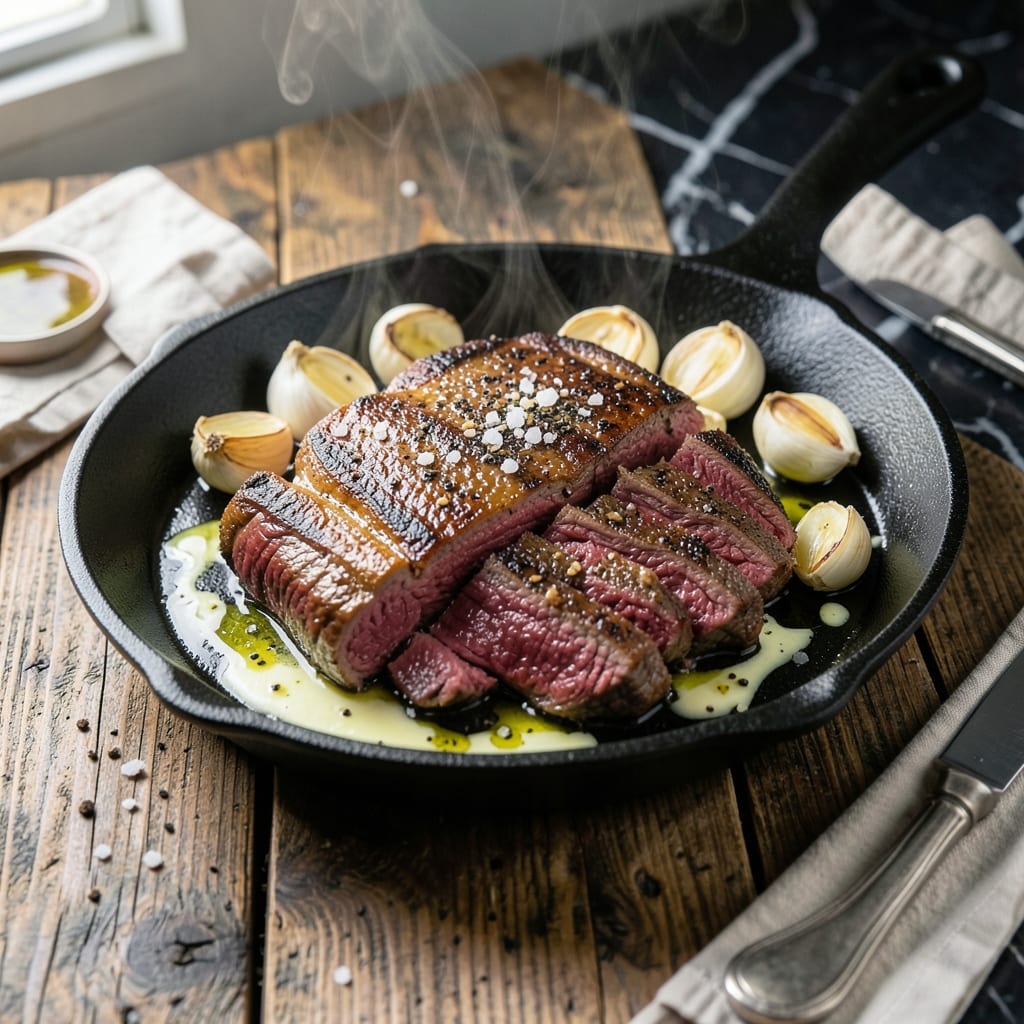
This oven method brings Brazilian steakhouse quality to your kitchen without the grill. I developed this reverse-sear technique after years of struggling to achieve that signature picanha crust and juicy interior.
The secret is starting low and slow in the oven, then finishing with a quick sear. This ensures even cooking throughout while creating that coveted caramelized exterior that picanha is known for.
You’ll end up with meat that’s tender and juicy inside with a crusty fat cap that melts in your mouth. The fat cap is what makes picanha special—it bastes the meat as it cooks, infusing every bite with rich flavor.
Serve with chimichurri or farofa for the full Brazilian experience. This technique delivers restaurant-quality results every time.
Ingredients for Picanha Steak Recipe Oven
A few premium ingredients deliver that legendary Brazilian steakhouse flavor at home.
| Ingredient | Amount | Notes |
|---|---|---|
| Picanha Steak 🥩 | 2 lb | Top sirloin cap, fat cap intact |
| Coarse Kosher Salt 🧂 | 2 tsp | Diamond Crystal preferred for texture |
| Freshly Ground Black Pepper 🌶️ | 1 ½ tsp | Coarse grind for crust |
| Garlic Cloves 🧄 | 4 cloves | Smashed, not minced for subtle flavor |
| Olive Oil 🫒 | 2 tbsp | High smoke point for searing |
| Unsalted Butter 🧈 | 2 tbsp | For basting during sear |
| Fresh Rosemary Sprigs 🌿 | 2 whole | Optional for aromatic basting |
| Fresh Thyme Sprigs 🌿 | 2 whole | Optional, paired with rosemary |
| Red Wine Vinegar 🍷 | 1 tsp | For finishing acidity |
| Flaky Sea Salt 🧂 | 1 tsp | For finishing, Maldon recommended |
The picanha is everything here. Look for top sirloin cap with a thick, intact fat cap—Whole Foods or a good butcher will have it (ask for the ‘culotte’ if they don’t recognize ‘picanha’). Avoid pre-trimmed cuts; that fat is non-negotiable. I’ve had luck at Costco too, where they often carry it whole. The meat should be bright red with creamy white fat, never gray or dull.
No picanha? A well-marbled ribeye or strip steak works in a pinch, but the texture won’t be the same. For the salt, Diamond Crystal kosher gives the best crust—table salt is too fine. Fresh herbs can be swapped for dried at one-third the amount, but fresh adds that restaurant touch. The red wine vinegar brightens everything up—apple cider vinegar is a decent substitute if that’s what you’ve got.
Picanha freezes beautifully for up to 6 months—vacuum seal if you’re going long-term. Thaw overnight in the fridge before cooking. Leftovers (if there are any) keep 3-4 days refrigerated. Reheat gently in a cast-iron skillet to revive the crust.
Why You’ll Love This Recipe
- Minimal Effort: I just rub the picanha with salt, pepper, garlic, and olive oil—no marinating overnight, no fancy prep.
- That Crispy Crust: The oven roasts the fat cap into this golden, crackling layer that melts into the meat with every bite.
- Feeds a Crowd: One big picanha steak roasted whole means I can serve six without babysitting a grill.
- Leftovers? Yes Please: The slices reheat beautifully for next-day steak sandwiches or salads—honestly, they might taste even better.
Step-by-Step Instructions for Picanha Steak Oven
Here’s how to nail that Brazilian-style succulence with your oven and a simple technique.
Step 1: Season and Prep the Picanha
Pat the 2 lb Picanha Steak dry with paper towels, making sure the fat cap stays intact. This ensures a better sear later. Generously coat all sides with the 2 tsp Coarse Kosher Salt and 1.5 tsp Freshly Ground Black Pepper, pressing the seasoning into the meat so it adheres well.
Let the seasoned picanha sit at room temperature for 45-60 minutes before cooking. This step is crucial—it allows the salt to penetrate the meat and ensures even cooking throughout. Don’t skip it; cold meat seizes up in the heat and cooks unevenly.
Step 2: Start with a Low Oven for Even Cooking
Preheat your oven to 250°F. Place the picanha on a wire rack set over a baking sheet, fat cap facing up. This reverse sear method starts with low, slow heat to cook the steak evenly from edge to edge. Roast for 45-60 minutes until the internal temperature reaches 110-115°F for medium-rare.
I use a meat thermometer to monitor the temperature closely. You want to pull it out just before it hits your target doneness—it’ll continue cooking during the sear. The fat cap should start to render slightly, but you won’t see much browning yet. That comes next.
Step 3: Sear to Build a Crust
Heat the 2 tbsp Olive Oil in a cast-iron skillet over high heat until it shimmers. Add the picanha, fat cap down, and sear for 2-3 minutes per side until deeply browned. For extra flavor, toss in the 4 cloves Garlic Cloves, 2 whole Fresh Rosemary Sprigs, and 2 whole Fresh Thyme Sprigs during the last minute of searing.
Add the 2 tbsp Unsalted Butter and baste the picanha continuously by spooning the melted butter, herbs, and garlic over the steak. This step builds a rich, aromatic crust. The fat cap should be crispy and golden, and the steak should have a deep mahogany color.
Step 4: Rest and Finish
Transfer the picanha to a cutting board and let it rest for 10-15 minutes. This allows the juices to redistribute, so every slice stays moist and flavorful. Tent it loosely with foil to keep it warm, but don’t wrap it tightly—you want the steam to escape so the crust stays crispy.
Slice the picanha against the grain into ½-inch thick slices. Drizzle with the 1 tsp Red Wine Vinegar for a bright finish and sprinkle with the 1 tsp Flaky Sea Salt. The vinegar cuts through the richness, and the flaky salt adds a final crunch. Serve immediately while it’s still warm.
Pro Tips For Making Picanha Steak Recipe Oven
- Preheat the Pan: I learned this the hard way—get your cast iron screaming hot before adding the picanha, about 5 minutes on high, or you’ll lose that deep crust.
- Score the Fat Cap: Cut a diamond pattern into the fat cap, about 1/4 inch deep, so it renders properly and crisps up in the oven.
- Don’t Overcrowd the Pan: Resist the urge to add more than one steak at a time—overcrowding steams instead of sears, and you’ll lose that beautiful brown edge.
- Rest Before Slicing: Give it a solid 10 minutes under foil after pulling it from the oven, or all those juices will end up on the cutting board instead of in the meat.
Dietary Considerations for This Dish
Keto-Friendly Option
This dish is naturally low-carb and perfect for keto diets, as picanha contains 0g net carbs per serving. The high fat content from the cap aligns well with keto macros, providing sustained energy without spiking blood sugar.
Gluten-Free Naturally
The recipe contains no gluten ingredients, making it safe for those with gluten sensitivities. Just ensure your seasonings and vinegar are certified gluten-free—I always check labels at New Seasons Market. 💪
Dairy Considerations
While the recipe includes 2 tbsp unsalted butter for basting, you can easily substitute with olive oil or ghee for a dairy-free version. The butter adds richness but isn’t essential for that perfect crust.
Low-Sodium Adaptations
To reduce sodium, cut the kosher salt in half and use a low-sodium seasoning blend instead. The fat cap still delivers plenty of flavor, and you can always adjust seasoning at the table.
Paleo-Friendly
This fits perfectly into paleo meal plans, as it uses only whole-food ingredients. The garlic, herbs, and red wine vinegar are all paleo-approved, and the cooking method preserves the meat’s natural nutrients.
Allergen Note
The only potential allergen here is dairy from the butter. For nut allergies, ensure your vinegar isn’t processed in facilities that handle nuts—Bragg brand is a safe bet from my experience. 🌟
Nutrition Facts
Frequently Asked Questions
What temperature should I pull it from the oven?
Remove at 110-115°F for medium-rare. It will rise 10°F during searing.
Can I use a different cut of meat?
Ribeye or strip steak work, but won’t have the same texture. The fat cap on picanha is key for flavor.
Why rest the meat before slicing?
Resting 10-15 minutes lets juices redistribute. Slicing too soon causes dry, uneven pieces.
How do I know when it’s done searing?
Look for a deep brown crust and crispy fat cap. Use a thermometer for 125°F medium-rare.

- Potato Candy Recipe 1933: Vintage Peanut Butter Roll Delight - October 30, 2026
- Potato Chip Cookie Recipe With Pecans: Buttery Crunch Meets Nutty Richness - October 30, 2026
- Potato Patty Recipe No Egg: Crispy Edges Without the Binder - October 30, 2026