
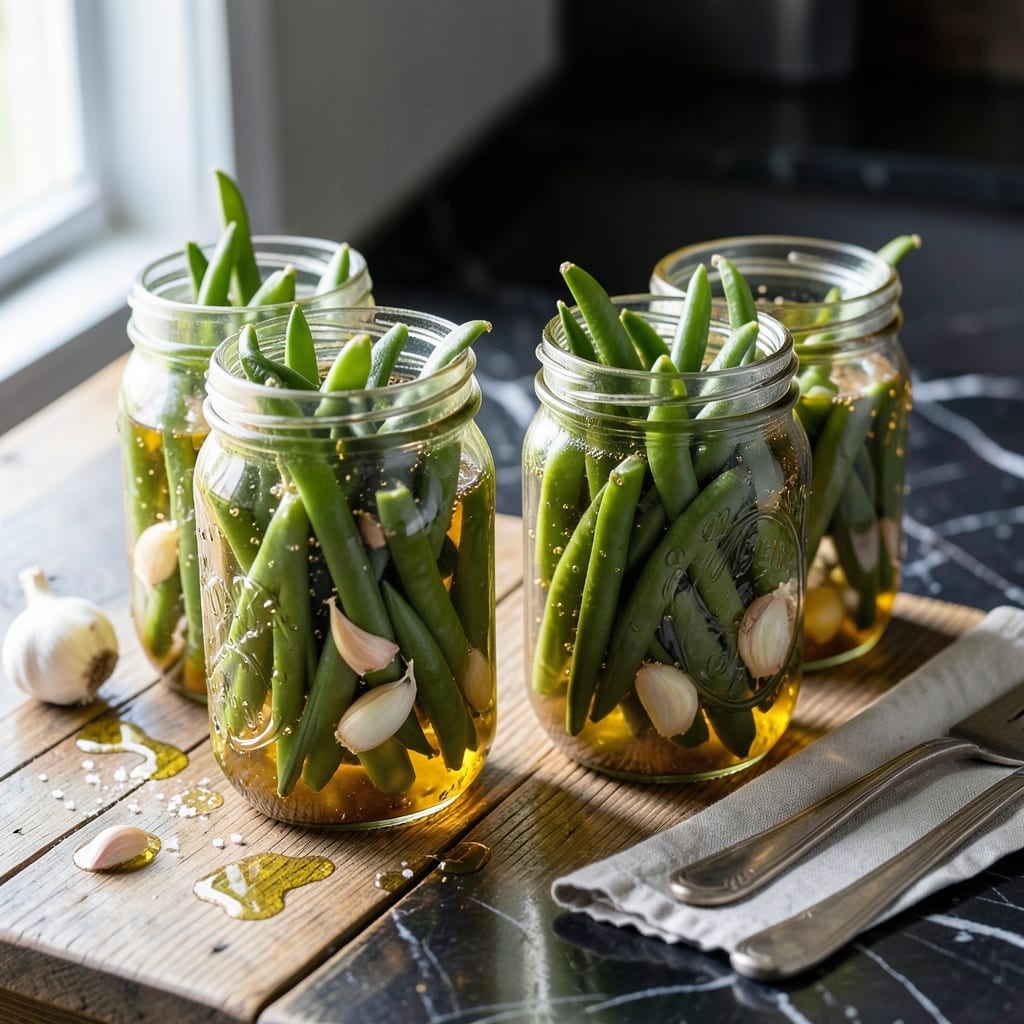
There’s a special satisfaction in preserving summer’s harvest, and this method delivers that tangy crunch straight from the jar. I learned the art of canning from Nana Mae, whose diner always had a shelf of pickled vegetables ready for hungry customers.
The process is straightforward: fresh beans, a simple brine, and proper sterilization ensure safe, long-lasting results. David, my official taste-tester, confirms these are the best pickled beans we’ve ever made.
Each bite offers a perfect balance of sharp vinegar and crisp texture, making them a standout addition to any meal. They keep beautifully in the pantry, ready to brighten sandwiches, salads, or charcuterie boards.
This technique is tried-and-true, delivering consistent flavor and safety every time. Here’s how to make them at home.
Ingredients for Pickled Beans Recipe Canned
Fresh beans meet a simple brine for that signature tangy crunch in every bite.
| Ingredient | Amount | Notes |
|---|---|---|
| Green Beans 🌿 | 2 lb | Fresh, trimmed, whole |
| White Vinegar 💧 | 4 cups | 5% acidity required |
| Water 💧 | 4 cups | Filtered or distilled |
| Pickling Salt 🧂 | ¼ cup | Non-iodized essential |
| Granulated Sugar 🍚 | ¼ cup | Optional for sweetness |
| Garlic Cloves 🧄 | 6 cloves | Peeled, smashed lightly |
| Dill Seed 🌿 | 1 tbsp | Or fresh dill heads |
| Mustard Seed 🌶️ | 1 tbsp | Yellow or brown |
| Black Peppercorns 🌶️ | 1 tbsp | Whole for brine |
| Red Pepper Flakes 🌶️ | 1 tsp | Adjust for heat preference |
| Bay Leaves 🍃 | 4 pieces | Dried, whole |
| Canning Jars 🥫 | 4 jar | 1-quart size, sterilized |
The beans are the foundation—choose young, tender pods for the best texture. Local farmers markets often have the freshest selection, but grocery store green beans work if they’re crisp. Pickling salt is non-negotiable (iodized salt can make the brine cloudy). For vinegar, 5% acidity white vinegar is standard, but apple cider vinegar adds a nice depth if you prefer.
No dill seed? Fresh dill sprigs work beautifully—use about 4-5 heads per jar. Mustard seed can be swapped for celery seed for a different flavor profile. Want it sweeter? Increase the sugar to half a cup. The garlic is flexible—shallots or small onions can stand in. For heat lovers, add a sliced jalapeño to each jar.
These keep for 12-18 months in a cool, dark pantry. Once opened, refrigerate and use within 1 month. The longer they sit, the more the flavors meld—wait at least 48 hours before digging in for the best crunch.
Why You’ll Love This Recipe
- No-Fuss Canning: I just toss the green beans in jars with vinegar, water, and a little salt and sugar—no fancy steps.
- Bright Tangy Crunch: That crisp snap paired with the sharp vinegar and touch of sweetness? I crave it straight from the jar.
- Pantry Staple: Honestly, these last for months and I throw them in salads, sandwiches, or just eat them as a snack.
- Budget Win: A few pounds of fresh beans turn into dozens of jars for pennies—my wallet loves it.
Step-by-Step Instructions for Pickled Beans
These precise steps ensure crisp, tangy beans that stay fresh in the jar for months.
Step 1: Sterilize the Canning Jars
Begin by thoroughly washing the 4 canning jars and their lids in hot, soapy water. Rinse them completely to remove all soap residue. Place the clean jars on a baking sheet and into a 200°F oven for 15 minutes to sterilize.
This step prevents contamination and ensures your pickled beans remain safe for long-term storage. Keep the jars warm until you fill them, as sudden temperature changes can cause the glass to crack when the hot brine is added.
Step 2: Prepare the Green Beans and Aromatics
Wash the 2 lb green beans thoroughly under cold water and trim the ends, leaving them whole. Pack the beans vertically into the sterilized jars, leaving ½ inch of headspace at the top. This tight packing ensures the beans stay submerged in the brine.
Divide the 6 cloves garlic, 1 tbsp dill seed, 1 tbsp mustard seed, 1 tbsp black peppercorns, 1 tsp red pepper flakes, and 4 pieces bay leaves evenly among the jars. These aromatics infuse the beans with robust flavor during the pickling process.
Step 3: Make the Brine Solution
In a large pot, combine the 4 cups white vinegar, 4 cups water, 0.25 cup pickling salt, and 0.25 cup granulated sugar. Stir well to dissolve the salt and sugar completely.
Bring the mixture to a rolling boil over high heat. Boiling ensures the salt and sugar are fully incorporated and the brine is sterile. Once boiling, reduce the heat to maintain a gentle simmer while you prepare the jars for filling.
Step 4: Fill the Jars and Process
Carefully ladle the hot brine into each jar, covering the green beans completely while maintaining the ½ inch headspace. Use a clean wooden or plastic utensil to remove any air bubbles trapped between the beans, ensuring full submersion.
Wipe the rims of the jars with a clean, damp cloth to remove any residue. Seal with the lids and process in a boiling water bath for 10 minutes. This step creates a vacuum seal, preserving the beans and enhancing their shelf life. Let the jars cool completely at room temperature before checking the seals.
Step 5: Store and Wait for Perfection
Once cooled, test the seals by pressing the center of each lid. If it doesn’t pop back, the jar is properly sealed. Store the jars in a cool, dark place for at least 48 hours before opening to allow the flavors to develop fully.
For optimal taste and texture, wait 2 weeks before consuming. The beans will keep for up to 1 year in a sealed jar. Refrigerate after opening and consume within 1 month for the best quality.
Pro Tips For Making Pickled Beans Recipe Canned
- Trim the Stems: Snap off the stem ends of the green beans rather than cutting—they’ll stay crisper and absorb the brine better. I learned this the hard way after ending up with mushy beans from a knife-cut batch.
- Boil the Brine: Heat the vinegar, water, salt, and sugar to a full boil before pouring over the beans—it guarantees the salt and sugar dissolve completely and kills any bacteria. Sounds obvious, but I skipped this once and had grainy pickles.
- Skip the Overpacking: Leave at least ½ inch of headspace in each jar to prevent liquid overflow during canning. After ruining two jars from overfilling, I now measure with my finger—no exceptions.
- Use Pickling Salt: Regular table salt can turn your brine cloudy and leave a metallic taste. Pickling salt is pure and dissolves cleanly—I was skeptical until I compared the two side by side.
Make-Ahead Tips for This Dish
Prep Ahead Strategy
I always prep my beans and aromatics the night before. Trim 2 lb green beans and store in a gallon bag with a damp paper towel in the fridge. This keeps them crisp overnight. David swears this small step makes a noticeable difference. 💪
Brine Preparation
Measure out your 4 cups white vinegar, 4 cups water, and dry ingredients the night before. Store the liquid in a pitcher in the fridge. This means you can heat your brine immediately when ready to can, saving 10-15 minutes of prep time.
Jar Sterilization
Sterilize your 4 canning jars in the morning if canning later that day. I use my oven at 200°F for 15 minutes, then leave them inside to stay warm. This timing works perfectly with my schedule at the Austin farmers market.
Batch Processing
Double the recipe if you have space. I process 8 jars at once in my largest pot. This efficiency means I only need to sterilize and process once, yet have enough to share with neighbors or store extra in the pantry.
Flavor Development
While the minimum wait is 48 hours, I recommend 2 weeks for full flavor development. Mark your calendar—this patience pays off with the best tangy crunch Nana Mae would be proud of. 🥫
Storage Tips
Store sealed jars in a cool, dark pantry. Once opened, transfer to the fridge and use within 1 month. I keep a few jars in the back of my pantry, ready to brighten any meal with that signature crunch.
Nutrition Facts
Frequently Asked Questions
How long must they sit before eating?
Wait at least 48 hours for basic flavor, but 2 weeks yields the best tangy crunch. The longer they sit, the more the flavors meld beautifully.
Can I reuse the brine for another batch?
No, always make fresh brine for each canning session. Reusing brine risks contamination and may affect flavor or safety.
What if my jars don’t seal properly?
If a jar doesn’t seal, refrigerate it immediately and use within 1 month. For long-term storage, reprocess with a new lid within 24 hours.
Is it safe to adjust the vinegar ratio?
Never reduce vinegar below 50% of the liquid. This acidity level is critical for safe preservation and preventing spoilage.

- Potato Candy Recipe 1933: Vintage Peanut Butter Roll Delight - October 30, 2026
- Potato Chip Cookie Recipe With Pecans: Buttery Crunch Meets Nutty Richness - October 30, 2026
- Potato Patty Recipe No Egg: Crispy Edges Without the Binder - October 30, 2026