
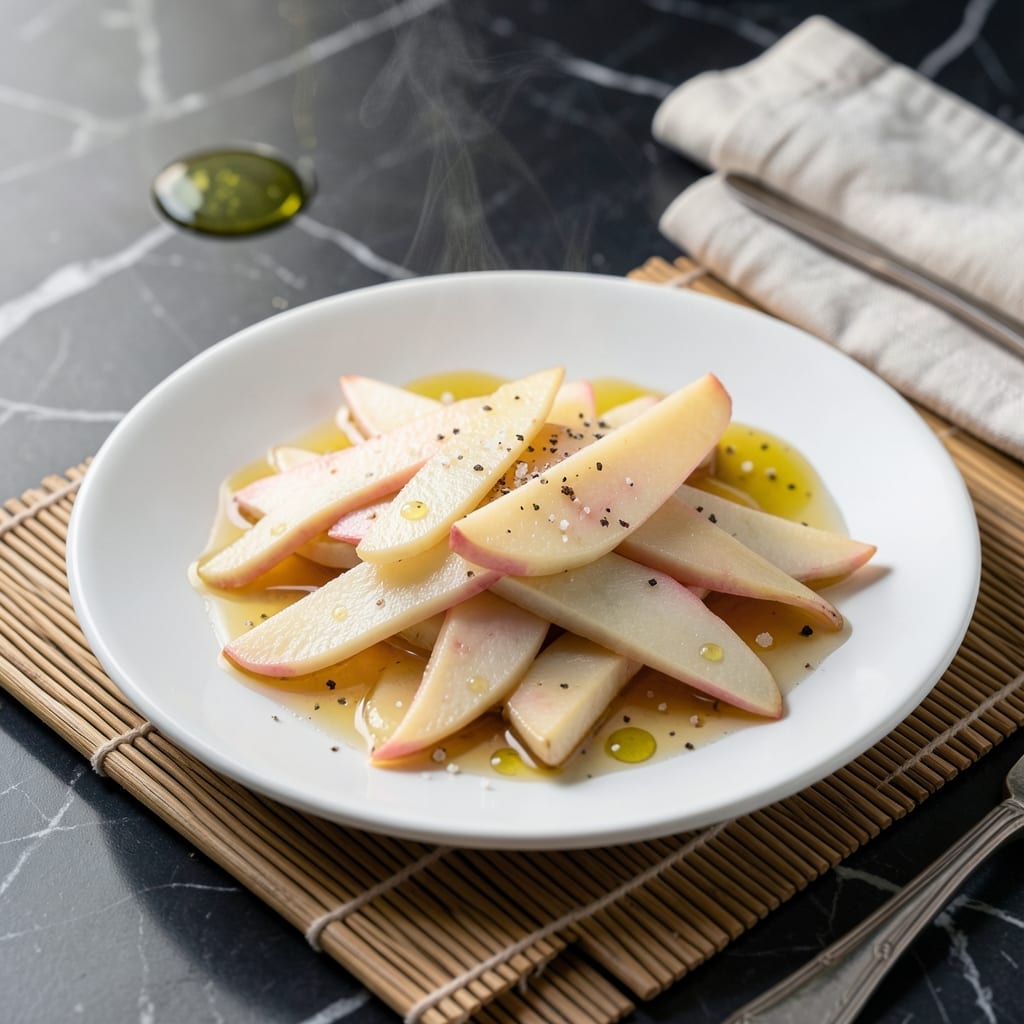
This sugar-free pickled ginger delivers the same bright, tangy punch as traditional versions without any sweetness. The secret lies in using rice vinegar and a touch of salt to create that signature zing.
I developed this method after David—my official taste-tester—complained that store-bought pickled ginger was too sweet. This version keeps all the sharp, clean flavor while letting the ginger’s natural spiciness shine through.
With just 30 minutes of active time, you’ll have a foolproof condiment that’s perfect for sushi nights or adding a kick to any dish. The ginger stays crisp and vibrant, with no artificial aftertaste.
Store in the fridge for up to a month, where it only gets better with time. Here’s how to make this essential pantry staple.
Ingredients for Pickled Ginger Recipe No Sugar
Seven simple ingredients create that sharp, clean ginger zing without a hint of sweetness.
| Ingredient | Amount | Notes |
|---|---|---|
| Fresh Ginger Root 🌿 | 1 lb | Peeled, thinly sliced |
| Rice Vinegar 💧 | 1 ½ cups | Unseasoned for clean flavor |
| Water 💧 | ½ cup | Filtered if possible |
| Sea Salt 🧂 | 2 tsp | Fine grain preferred |
| Apple Cider Vinegar 💧 | 2 tbsp | Adds depth to tang |
| Lemon Juice 🍋 | 1 tbsp | Freshly squeezed brightens |
| Red Pepper Flakes 🌶️ | ½ tsp | Optional for heat |
The ginger is everything here—look for firm, smooth roots with taut skin (no wrinkles). Asian markets often have the freshest, but Whole Foods and Trader Joe’s stock great quality too. I buy mine in bulk and freeze what I won’t use within a week. The rice vinegar should be unseasoned—seasoned versions add sugar we’re avoiding. Marukura is a solid brand if you can find it.
No rice vinegar? White wine vinegar at a one-to-one swap works in a pinch. Apple cider vinegar can replace the rice vinegar too, but cut it with a little water—it’s stronger. Skip the red pepper flakes if you want pure ginger flavor. The lemon juice is optional but adds a brightness that really makes the ginger pop. Fresh is best, but bottled works (just use a little less).
This keeps beautifully in the fridge for up to 1 month—the flavor actually gets better over time. Store in a clean glass jar with a tight lid. The ginger will stay crisp if you slice it thin and pack it tightly. Perfect for sushi nights or adding a kick to salads and bowls.
Why You’ll Love This Recipe
- 5-Minute Chop: I slice the ginger while the vinegar mix comes to a boil—no fancy skills needed.
- Zing Without Sweet: The rice vinegar and apple cider vinegar give that bright, tangy bite without any sugar masking the ginger’s natural heat.
- Sushi Night Hero: I keep a jar in the fridge for spontaneous sushi rolls or to liven up grain bowls.
- Stays Crisp for Weeks: Honestly, it keeps getting better in the fridge, and I love having it ready for last-minute meals.
Step-by-Step Instructions for Pickled Ginger No Sugar
Here’s how to make bright, tangy pickled ginger with zero sweetness—just pure zing.
Step 1: Slice the Fresh Ginger Root
Peel the 1 lb Fresh Ginger Root using a spoon or vegetable peeler, scraping away the brown skin to reveal the pale yellow flesh beneath. I prefer a spoon because it contours to the ginger’s shape better than a peeler.
Using a sharp knife or mandoline, slice the ginger into very thin pieces—about ⅛-inch thick. The thinner the slices, the faster they’ll absorb the brine and soften. You can also julienne the ginger into matchsticks if you prefer a different texture.
Step 2: Prepare the Pickling Brine
In a medium saucepan, combine the 1.5 cups Rice Vinegar, 0.5 cup Water, 2 tsp Sea Salt, 2 tbsp Apple Cider Vinegar, and 1 tbsp Lemon Juice. Stir well to dissolve the salt completely before heating.
Bring the mixture to a gentle boil over medium-high heat, then immediately reduce to low heat. You want the brine hot enough to dissolve any remaining salt but not so hot that the vinegar loses its bright flavor. Stir once more to ensure everything is fully combined.
Step 3: Blanch the Ginger Slices
Place the sliced ginger in a heatproof bowl. Pour the hot brine over the ginger, ensuring all pieces are fully submerged. Let it sit for 5-7 minutes—this blanching step softens the ginger slightly and removes some of its harsh bite.
You’ll notice the ginger turns a lighter, more translucent pink as it sits in the hot brine. This is normal and means the pickling process has begun. If you prefer a milder ginger flavor, let it blanch for the full 7 minutes.
Step 4: Add Heat and Cool Completely
If using, sprinkle the 0.5 tsp Red Pepper Flakes over the ginger and brine. Stir gently to distribute the flakes evenly. The red pepper flakes will add a subtle heat that complements the tangy vinegar beautifully.
Let the mixture cool to room temperature—this takes about 1 hour. You can speed this up by placing the bowl in an ice bath or refrigerating it, but avoid sealing the jar while it’s still warm, as this can create pressure and affect the texture.
Step 5: Transfer to Jar and Chill
Once completely cooled, transfer the ginger and brine to a clean, airtight jar. Use a spoon to press down the ginger so it’s fully submerged in the liquid. This prevents mold growth and ensures even pickling.
Seal the jar and refrigerate for at least 24 hours before eating. The ginger will continue to develop flavor over time, becoming more tangy and tender. It keeps well in the refrigerator for up to 3 months, so you can enjoy this zesty condiment for a while.
Pro Tips For Making Pickled Ginger Recipe No Sugar
- Slice Thinly Against Grain: Cut the ginger into paper-thin slices against the grain for a tender, melt-in-your-mouth texture—this makes a real difference in how the vinegar penetrates.
- Boil the Brine: Heat your rice vinegar, water, and salt to a boil first to dissolve the salt completely and kill any bacteria, then cool before adding ginger.
- Skip the Peel: Leave the skin on young ginger—it’s thin and packed with flavor—but scrub it well under cold water to remove any dirt.
- Use Two Vinegars: Mix rice vinegar with apple cider vinegar (about 3:1 ratio) for a more complex tang that balances the ginger’s sharpness without needing sugar.
Storing and Reheating This Recipe
Fridge Storage
Transfer your pickled ginger to a clean glass jar with a tight-sealing lid—I use Ball Mason jars from Central Market. Ensure the ginger stays fully submerged in the brine to maintain crispness and prevent spoilage. It will keep beautifully in the fridge for up to 3 months. ❄️
Room Temperature
Avoid leaving your pickled ginger at room temperature for more than 2 hours during prep. Once cooled and jarred, it must go straight to the fridge. The vinegar brine preserves it, but heat and time can soften the texture.
Brining Liquid
The brine is just as important as the ginger itself. If you run low, top off with a mix of 3 parts rice vinegar to 1 part water and a pinch of salt. This maintains the same flavor balance without diluting the taste.
Freezing Option
While not ideal, you can freeze pickled ginger in an airtight container for up to 6 months. David and I tested this—thaw in the fridge overnight. The texture softens slightly, but the flavor remains sharp and tangy.
Reviving Flavor
If your ginger loses its zing after a few weeks, add a splash of fresh lemon juice or a bit more rice vinegar to the jar. Stir gently and let it sit for 24 hours to refresh the tang. I do this when prepping for sushi nights. 💡
Nutrition Facts
Frequently Asked Questions
Can I use a different type of vinegar?
Yes, but stick to mild options. White wine vinegar works as a 1:1 swap for rice vinegar. For stronger flavors like balsamic, dilute with water to avoid overpowering the ginger.
Why does the ginger turn pink?
This is completely normal! The natural compounds in ginger react with acid, creating that signature pale pink hue. It deepens slightly over time in the fridge.
How do I make it spicier?
Double the red pepper flakes or add 1 sliced chili to the brine. For heat without flakes, try a dash of sriracha in the liquid. Remove seeds for milder spice.
What if my brine is too strong?
Add 1-2 tbsp water to mellow the tang. Taste after 30 minutes before adjusting further. The flavor balances as it chills.

- Potato Candy Recipe 1933: Vintage Peanut Butter Roll Delight - October 30, 2026
- Potato Chip Cookie Recipe With Pecans: Buttery Crunch Meets Nutty Richness - October 30, 2026
- Potato Patty Recipe No Egg: Crispy Edges Without the Binder - October 30, 2026