
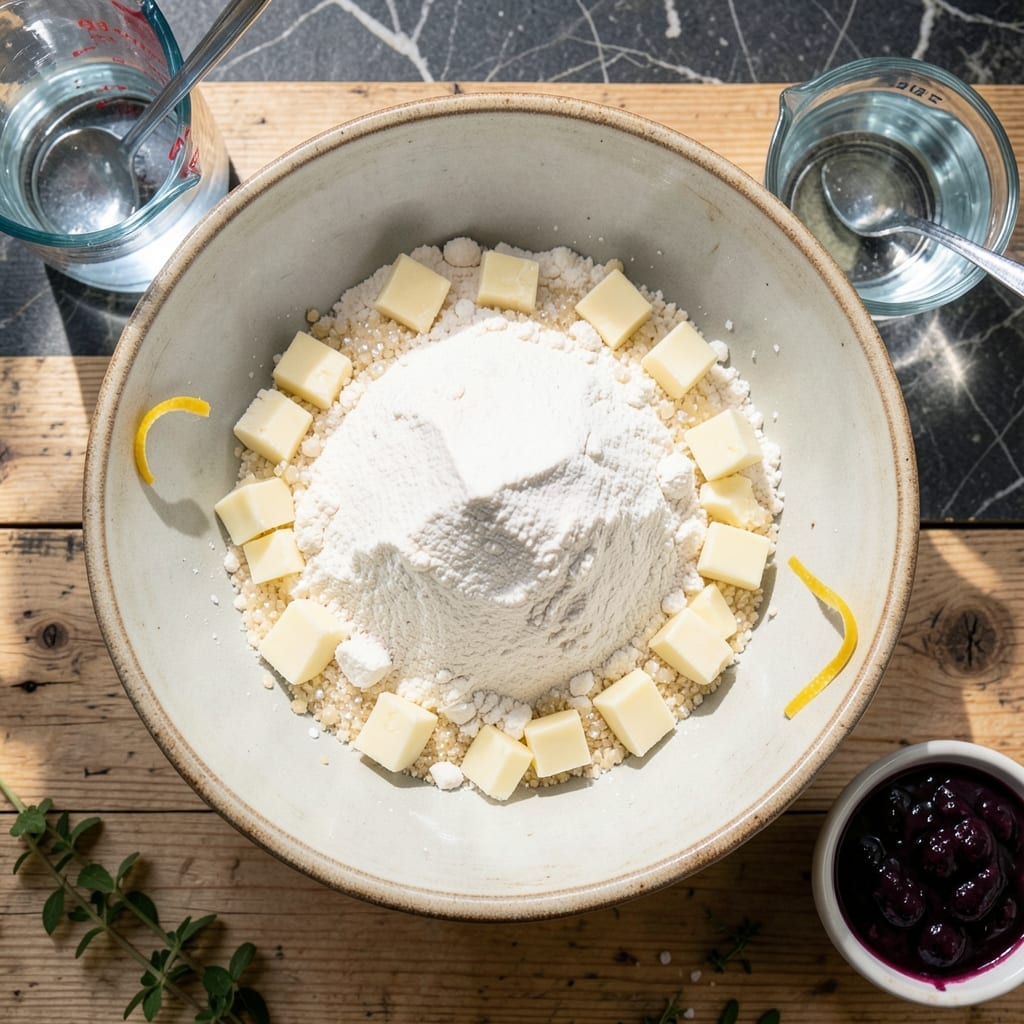
There’s a science to creating the perfect pie crust that can contain the juiciest blueberry filling without turning soggy. This proven method delivers a flaky, buttery foundation that holds every juicy bite in place.
The secret lies in cold ingredients and minimal handling. Using chilled butter and ice water prevents the fat from melting prematurely, while gentle mixing ensures tender layers rather than tough dough.
After a 30-minute rest in the refrigerator, the dough rolls out smoothly and bakes to a golden finish. The result is a crust that stays crisp beneath even the most abundant berry filling.
This technique transforms a good pie into a great one, with a texture that’s both sturdy and delicate. The foundation for any exceptional blueberry pie starts here.
Ingredients for Pie Crust Recipe for Blueberry Pie
Cold butter, minimal handling, and a few pantry staples create this flaky, sturdy foundation.
| Ingredient | Amount | Notes |
|---|---|---|
| All-Purpose Flour 🌾 | 2 ½ cups | Spoon and level method |
| Unsalted Butter 🧈 | 1 cup | Chilled, cut into cubes |
| Granulated Sugar 🍚 | 1 tbsp | Fine grain preferred |
| Salt 🧂 | ½ tsp | Diamond Crystal kosher |
| Ice Water 💧 | ⅓ cup | Plus extra as needed |
| White Vinegar 🧪 | 1 tsp | Distilled variety |
| Blueberries 🫐 | 4 cups | Fresh or frozen, unthawed |
| Lemon Juice 🍋 | 1 tbsp | Freshly squeezed |
| Cornstarch 🌽 | 2 tbsp | For thickening filling |
| Granulated Sugar 🍚 | ¾ cup | For filling |
| Vanilla Extract 🌿 | 1 tsp | Pure extract preferred |
| Cinnamon 🌿 | ¼ tsp | Ground, optional |
The butter must be cold—European-style with 82% fat content works best for flakiness. King Arthur Flour is the gold standard for all-purpose, but any unbleached variety will do. Ice water is non-negotiable; tap water at room temperature won’t cut it. For the filling, fresh blueberries are ideal, but frozen (unthawed) work in a pinch. Avoid pre-sweetened berries.
No all-purpose flour? Pastry flour at a 1:1 ratio yields a slightly more tender crust. Out of unsalted butter? Use salted and omit the added salt. The vinegar is for tenderness—apple cider vinegar works too. For the filling, tapioca starch at equal amount can replace cornstarch. Cinnamon is optional but adds warmth.
The dough needs its 30-minute rest—don’t rush it. Unused dough can be wrapped tightly and refrigerated for 2 days or frozen for 3 months. Baked crust stays fresh at room temperature for 1 day, but the filling is best served the same day it’s made.
Why You’ll Love This Recipe
- No-Fuss Mixing: Honestly, it’s just flour, cold butter, and a splash of ice water—no fancy tools, no stress.
- Buttery Crisp: That flaky, golden crust with pockets of rich butter? It’s what makes the blueberry filling shine.
- Holiday or Tuesday: I’ll make it for Thanksgiving, but also just because it’s Tuesday and we deserve pie.
- Budget Stretch: A handful of pantry staples turns into a showstopper dessert for pennies a slice.
Step-by-Step Instructions for Pie Crust for Blueberry Pie
Master these fundamental techniques to create a flaky crust that perfectly encases your filling.
Step 1: Combine Dry Ingredients for the Foundation
In a large bowl, whisk together the 2.5 cups All-Purpose Flour, 1 tbsp Granulated Sugar, and 0.5 tsp Salt until thoroughly combined. This ensures even distribution of flavor and structure throughout the crust.
The sugar adds subtle sweetness that complements the filling, while the salt enhances all the flavors. I always use fine grain sugar here as it dissolves more evenly into the dough.
Make a well in the center of the dry ingredients—this will help you incorporate the cold butter more efficiently in the next step.
Step 2: Cut in Chilled Butter for Flaky Layers
Add the 1 cup Unsalted Butter (chilled and cut into cubes) to the flour mixture. Using a pastry cutter or your fingertips, work the butter into the flour until the mixture resembles coarse crumbs with some pea-sized butter pieces remaining.
This step is crucial for flakiness—those visible butter pieces create the steam that separates the dough into layers during baking. Keep everything cold; if the butter starts to melt, chill the mixture for 10 minutes before continuing.
I prefer the pastry cutter method as it maintains the cold temperature better than using your hands, which can warm the butter prematurely.
Step 3: Bind with Liquid to Form the Dough
Create a well in the center of the butter-flour mixture. Add the 0.33 cup Ice Water and 1 tsp White Vinegar to the well. The vinegar tenderizes the gluten, creating a more forgiving dough that’s easier to work with.
Using a fork, gradually incorporate the liquid into the dry ingredients, starting from the center and working outward. Stop mixing as soon as the dough begins to come together—overworking develops gluten, which makes the crust tough.
The dough should hold together when pressed but still appear somewhat shaggy. If it seems too dry, add ice water 1 tablespoon at a time until it just comes together.
Step 4: Chill and Rest the Dough
Divide the dough into two equal portions and shape each into a disk about 1 inch thick. Wrap each disk tightly in plastic wrap, ensuring no air pockets remain.
Refrigerate for at least 1 hour (or up to 2 days). This chilling period allows the gluten to relax, making the dough easier to roll out, and gives the butter time to firm up again.
I always let my dough rest overnight when possible. The extended rest improves the texture and makes the rolling process significantly easier, especially for intricate pie designs.
Step 5: Roll and Fit the Crust
On a lightly floured surface, roll one disk of dough to a 12-inch circle about ⅛-inch thick. The dough should be uniform in thickness to ensure even baking.
Transfer the rolled dough to your pie dish, pressing it gently into the bottom and up the sides. Trim the edges, leaving a ½-inch overhang. Fold the overhang under and crimp decoratively.
For a pre-baked crust, freeze for 15 minutes before blind baking to prevent shrinking. The crust is now ready to receive your blueberry filling, which will be juicy yet perfectly contained by your flaky creation.
Pro Tips For Making Pie Crust Recipe For Blueberry Pie
- Chill Your Butter: Cut the butter into small cubes and refrigerate until ready to use—I learned this the hard way after ending up with a tough crust from melted butter.
- Use Ice Water: Fill a glass with ice and water, then measure from that; the colder the water, the flakier the crust.
- Don’t Overwork Dough: Mix just until the dough comes together, or you’ll end up with a dense, chewy crust instead of a tender one.
- Rest the Dough: Let it sit in the fridge for at least 30 minutes—this relaxes the gluten and makes rolling out much easier.
Health Benefits of This pie crust recipe for blueberry pie
Nutrient-Rich Foundation
This crust provides a good source of complex carbohydrates from the 2.5 cups All-Purpose Flour, offering sustained energy that pairs well with the natural sugars in your blueberry filling. Complex carbs are essential for maintaining steady blood sugar levels. 💪
Healthy Fats Source
The 1 cup Unsalted Butter delivers vitamin A and vitamin E, fat-soluble nutrients that support skin health and immune function. While butter is calorie-dense, these vitamins are absorbed more efficiently with dietary fat.
Minimal Added Sugar
With only 1 tbsp Granulated Sugar in the crust itself, this recipe keeps added sugars to a minimum. The subtle sweetness enhances flavor without overwhelming the natural taste of the blueberries. I appreciate how it lets the fruit shine.
Balanced Electrolytes
The 0.5 tsp Salt provides essential sodium for nerve function and fluid balance. When combined with potassium-rich blueberries in the filling, it creates a satisfying electrolyte harmony that your body will thank you for.
Gluten Considerations
While this recipe uses all-purpose flour, the 30-minute rest helps relax the gluten, making it easier to digest for some people with mild sensitivities. For those with celiac disease, simply swap in a 1:1 gluten-free flour blend. 🌾
Moderation Benefits
Enjoying homemade pie in moderation offers psychological benefits too—it can boost mood and create meaningful connections when shared. The process of making it from scratch adds to the satisfaction of the final slice.
Nutrition Facts
Frequently Asked Questions
Why does the butter need to stay cold?
Cold butter creates steam during baking, which makes the crust flaky. If it melts too soon, the layers won’t separate properly. Keep everything chilled until it goes in the oven.
Can I make the dough ahead of time?
Yes! Wrap it tightly and refrigerate for up to 2 days or freeze for 3 months. Thaw overnight in the fridge before rolling.
How do I prevent a soggy bottom crust?
Pre-bake the crust for 15 minutes at 375°F before adding filling. Also, brush the crust with egg white to create a moisture barrier.
What if my dough cracks while rolling?
Press the edges together gently or patch with extra dough. Chill briefly if it becomes too warm and sticky.

- Pina Colada Dip Recipe Red Lobster: Tropical Creaminess With Toasted Coconut - October 12, 2026
- Pickled Sweet Cherry Peppers Recipe Canning: Tangy Heat for Pantry Staples - October 12, 2026
- Peppercorn Sauce Recipe Vegan: Rich Umami Depth Without Cream - October 12, 2026