
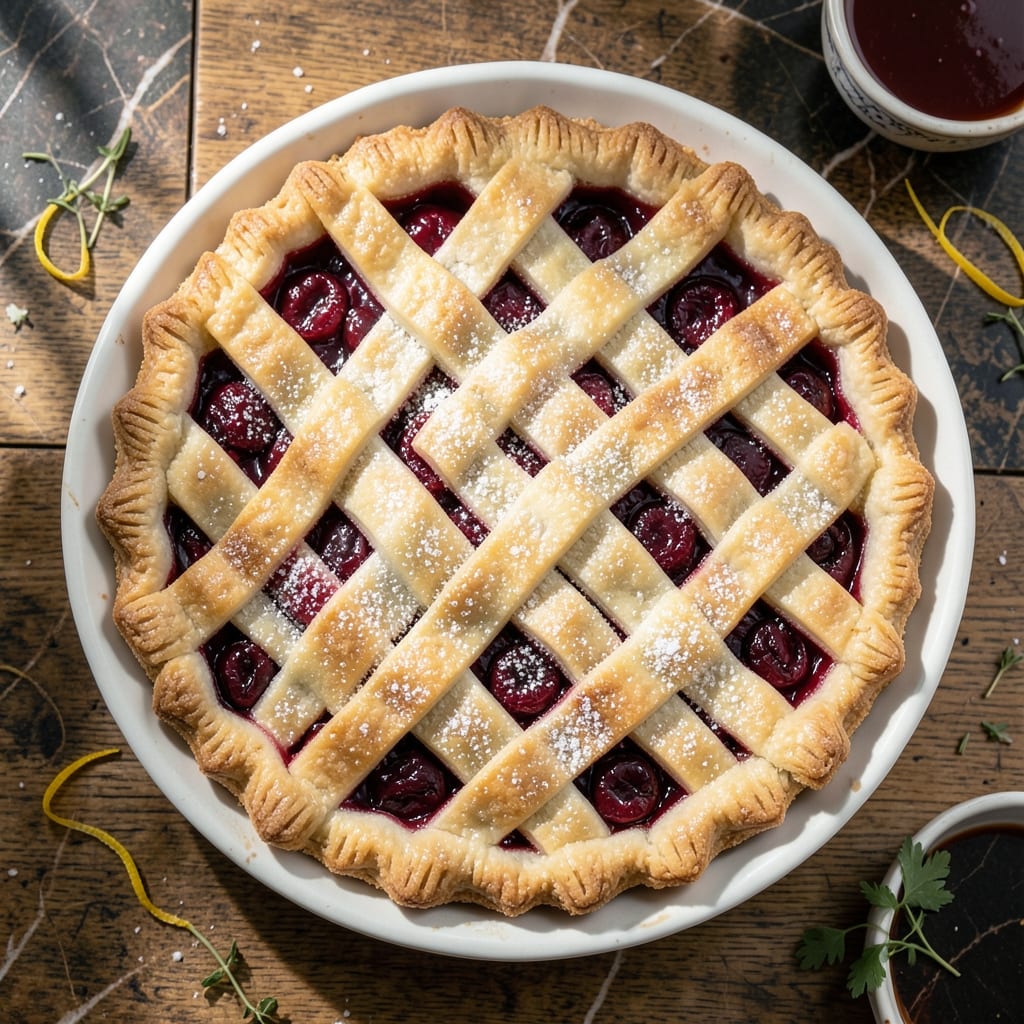
This pie crust delivers flaky layers that cradle fillings without turning soggy. I developed this method after years of struggling with undercooked bottoms and tough pastry.
The secret is cold butter and minimal handling. Cutting butter into flour creates pockets that expand during baking, forming those coveted layers. A brief 30-minute chill prevents shrinking.
What emerges from the oven is a golden crust that stays crisp beneath even the juiciest cherry filling. The buttery flavor complements sweet-tart fruit without competing with it.
Use this as your base for any fruit pie. The technique works every time.
Ingredients for Pie Crust Recipe for Cherry Pie
Cold butter, minimal handling, and flaky layers start with these essentials for perfect pie crust.
| Ingredient | Amount | Notes |
|---|---|---|
| All-Purpose Flour 🌾 | 2 ½ cups | Spoon and level, do not scoop |
| Unsalted Butter 🧈 | 1 cup | Very cold, cut into cubes |
| Granulated Sugar 🍚 | 1 tbsp | Fine grain preferred |
| Salt 🧂 | 1 tsp | Fine sea salt or table salt |
| Ice Water 💧 | ½ cup | Plus 1-2 tbsp as needed |
| White Vinegar 🍶 | 1 tsp | Or apple cider vinegar |
| Vanilla Extract 🌿 | ½ tsp | Pure extract recommended |
| Cherry Pie Filling 🍒 | 2 cups | Homemade or quality canned |
| Egg 🥚 | 1 whole | For egg wash finish |
| Milk 🥛 | 1 tbsp | For egg wash consistency |
The butter is non-negotiable—use European-style with 82% fat content like Plugrá or Keller’s for superior flakiness. Keep it ice cold; I cube and freeze mine for 10 minutes before mixing. The flour should be all-purpose, but King Arthur or Gold Medal deliver consistent results. For the salt, Diamond Crystal kosher dissolves more evenly than table salt, though both work.
No unsalted butter? Reduce added salt by half if using salted. Out of vinegar? Lemon juice at the same amount works. For the egg wash, a whole egg plus milk or cream gives that professional sheen—skip the yolk-only versions (they brown too fast). The cherry filling can be homemade or Comstock or Lucky Leaf canned—just drain well to prevent sogginess.
The dough keeps 2-3 days wrapped tightly in the fridge, or freeze for 1 month. Baked crusts stay crisp for 24 hours at room temperature. Always chill the dough 30 minutes before rolling for best layer formation and minimal shrinking.
Why You’ll Love This Recipe
- Five Ingredients: That’s it—flour, butter, sugar, salt, and ice water. No specialty items, nothing to hunt down at the store.
- Buttery Layers: The cold butter creates flaky layers that shatter with every bite, and the sugar adds just the right hint of sweetness to balance the tart cherries.
- Freezer Friendly: I always make a double batch and freeze one—it thaws perfectly and saves me a step next time I’m craving pie.
- Budget Baker: Honestly, this costs pennies compared to store-bought crusts, and it tastes a thousand times better.
Step-by-Step Instructions for Pie Crust for Cherry Pie
Master this technique and you’ll achieve a flaky, golden crust that perfectly complements the filling.
Step 1: Combine Dry Ingredients and Cold Butter
In a large bowl, whisk together the 2.5 cups All-Purpose Flour, 1 tbsp Granulated Sugar, and 1 tsp Salt until evenly distributed. This ensures the leavening is uniform throughout the crust. The sugar adds subtle sweetness that pairs beautifully with the cherry filling.
Add the 1 cup Unsalted Butter (very cold, cut into cubes) to the flour mixture. Using a pastry cutter or your fingers, work the butter into the flour until the mixture resembles coarse crumbs with some pea-sized butter pieces remaining. These visible butter pieces create the flaky layers in the finished crust.
Step 2: Incorporate Liquid Ingredients
Create a well in the center of the flour-butter mixture. Add the 0.5 cup Ice Water, 1 tsp White Vinegar, and 0.5 tsp Vanilla Extract. The vinegar tenderizes the gluten, while the vanilla adds depth of flavor. Use a fork to gently mix until the dough just begins to come together.
Be careful not to overwork the dough—this develops gluten, which makes the crust tough. The mixture should be shaggy and slightly sticky. If it’s too dry, add 1-2 tbsp more ice water, but only as needed. The exact amount can vary based on humidity and flour absorption.
Step 3: Form and Chill the Dough
Turn the dough out onto a lightly floured surface and gently knead it 2-3 times just until it forms a cohesive ball. Divide the dough in half and shape each portion into a disk about 1 inch thick. This makes rolling out easier later.
Wrap each disk tightly in plastic wrap and refrigerate for at least 1 hour (or up to 2 days). Chilling relaxes the gluten and firms the butter, making the dough easier to roll and preventing shrinkage during baking. This step is non-negotiable for achieving a professional-quality crust.
Step 4: Roll Out and Fill the Crust
On a lightly floured surface, roll one dough disk into a 12-inch circle about ⅛-inch thick. Transfer to a 9-inch pie dish, pressing the dough gently into the bottom and sides. Trim the edges, leaving a ½-inch overhang.
Add the 2 cups Cherry Pie Filling, spreading it evenly. Roll out the second dough disk in the same manner. You can create a traditional top crust or a lattice design. For a full top crust, place the dough over the filling, trim, and crimp the edges to seal. Cut 4-5 slits in the top to allow steam to escape during baking.
Step 5: Add Egg Wash and Bake to Golden Perfection
In a small bowl, whisk together the 1 whole Egg and 1 tbsp Milk to create an egg wash. Brush this mixture evenly over the entire top crust and the exposed edges. The egg wash gives the crust a beautiful golden sheen and adds a subtle richness.
Bake at 375°F for 45-50 minutes until the crust is deep golden brown and the filling is bubbling. If the edges begin to brown too quickly, cover them with aluminum foil or a pie shield. Let the pie cool for at least 2 hours before slicing to allow the filling to set properly.
Pro Tips For Making Pie Crust Recipe For Cherry Pie
- Chill the Butter: Cut your unsalted butter into small cubes and refrigerate for 30 minutes before mixing—I learned this the hard way after my crust turned tough instead of flaky.
- Ice Water Only: Use ice-cold water (literally with ice cubes in it) and add it 1 tablespoon at a time—sounds tedious, but it’s the only way to keep the dough from getting sticky.
- Skip Overworking: Mix just until the dough comes together, even if it looks a little shaggy—overmixing develops the gluten, and that means a chewy crust instead of a tender one.
- Rest Before Rolling: Wrap the dough and let it rest in the fridge for at least 1 hour (2 is better)—I was skeptical until I tried it, but it rolls out smoother and holds its shape in the pan.
Storing and Reheating pie crust recipe for cherry pie
Room Temperature Storage
Once completely cooled, your pie keeps beautifully at room temperature for 2 days. I place mine on a wire rack in a cool spot to maintain airflow underneath. Cover loosely with foil to prevent dust but avoid plastic wrap, which traps moisture and makes the crust soggy. 💡
Refrigerator Storage
For longer storage, refrigerate the cooled pie in an airtight container for up to 4 days. The cold will firm up the filling, making slices neater. Let it sit at room temperature for 30 minutes before serving to restore the crust’s flakiness.
Freezing Unbaked Crust
Wrap dough disks tightly in plastic wrap and freeze for up to 3 months. Thaw overnight in the fridge before rolling. For pre-formed crusts in the pie dish, freeze uncovered first, then wrap tightly to prevent freezer burn.
Reheating Single Slices
Warm individual slices in a 350°F oven for 10-12 minutes. This revives the crust’s crispness better than a microwave. For microwaving, use 50% power for 20-30 seconds to avoid a rubbery texture. ❄️
Whole Pie Revival
Reheat the entire pie at 300°F for 15-20 minutes. Cover the edges with foil if they brown too quickly. I check the bottom crust—if it’s still crisp, your pie is ready to serve.
Nutrition Facts
Frequently Asked Questions
Why use cold butter in pie crust?
Cold butter creates flaky layers by forming small pockets that expand during baking. If it melts before baking, you’ll lose that coveted texture. Keep it ice-cold until mixing.
Can I make the dough ahead of time?
The dough stays fresh in the fridge for 2-3 days or freezes for 1 month. Just wrap it tightly in plastic to prevent drying.
How do I prevent a soggy bottom crust?
Blind-bake the bottom crust for 10 minutes before adding filling, or use a preheated baking sheet. Also, drain cherry filling well to reduce excess liquid.
What if my dough cracks while rolling?
Press the edges together gently with your fingers. If it’s too dry, sprinkle a little ice water and knead lightly. Avoid overworking to keep it tender.

- Potato Candy Recipe 1933: Vintage Peanut Butter Roll Delight - October 30, 2026
- Potato Chip Cookie Recipe With Pecans: Buttery Crunch Meets Nutty Richness - October 30, 2026
- Potato Patty Recipe No Egg: Crispy Edges Without the Binder - October 30, 2026