
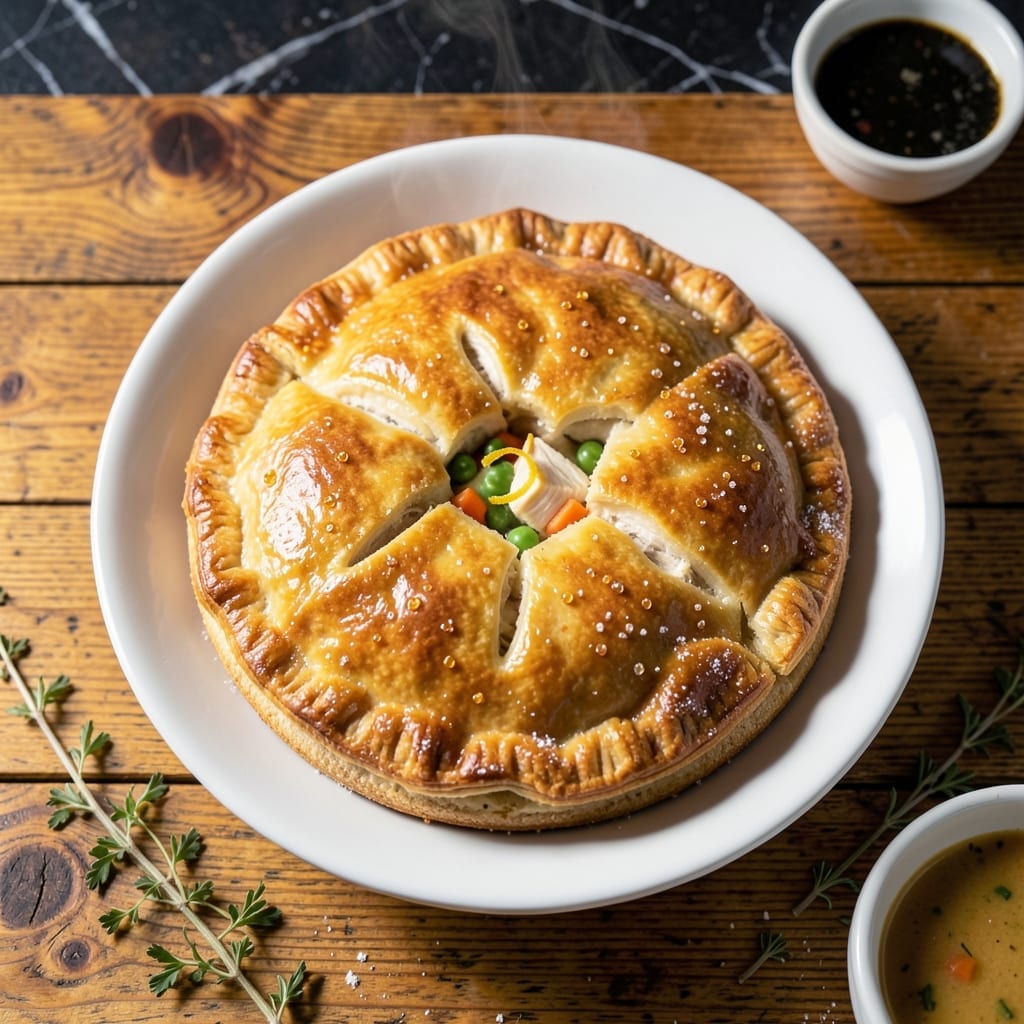
Creating the perfect pot pie begins with a golden, flaky crust that can hold up to hearty fillings without turning soggy. This recipe delivers that and more.
I developed this method after years of testing different techniques, focusing on a lattice top that bakes evenly while allowing steam to escape. The result is a comforting dish with a crust that stays crisp.
The key is working with cold ingredients and not overmixing the dough. This ensures layers that separate beautifully during baking, creating that coveted flaky texture.
Once assembled, the pie bakes to a perfect golden finish, with a filling that bubbles through the lattice. It’s the kind of meal that feels like a warm hug on a chilly evening.
Ingredients for Pie Crust Recipe for Pot Pie
Cold butter, fresh thyme, and a few pantry staples create that coveted golden crust and comforting filling.
| Ingredient | Amount | Notes |
|---|---|---|
| All-Purpose Flour 🌾 | 2 ½ cups | Spoon and level for accuracy |
| Cold Unsalted Butter 🧈 | 1 cup | Cubed, keep refrigerated until use |
| Ice Water 💧 | ½ cup | Plus more as needed |
| Salt 🧂 | 1 tsp | Fine sea salt preferred |
| Granulated Sugar 🍚 | 1 tsp | Optional, for golden color |
| Chicken Breast 🍗 | 1 ½ lb | Boneless, skinless, diced |
| Carrots 🥕 | 2 whole | Peeled and diced |
| Celery Stalks 🌿 | 2 whole | Diced, leaves included |
| Yellow Onion 🧅 | 1 whole | Medium, finely diced |
| Garlic Cloves 🧄 | 3 cloves | Minced for filling |
| Chicken Broth 🍲 | 1 ½ cups | Low-sodium preferred |
| Heavy Cream 🥛 | ½ cup | For creamy filling |
| Frozen Peas 🌱 | 1 cup | No need to thaw |
| Fresh Thyme 🍃 | 1 tbsp | Chopped, or 1 tsp dried |
| Black Pepper 🌶️ | ½ tsp | Freshly ground preferred |
The butter is critical here—use a high-quality brand like Plugrá or Kerrygold for the best layers. Keep it ice-cold until the moment you mix it into the flour (I cut mine into cubes and chill them on a plate for 10 minutes). The flour should be all-purpose, but King Arthur gives the flakiest results. For the chicken, boneless, skinless thighs stay juicier than breasts, but either works in a pinch.
No fresh thyme? Dried at one-third the amount works fine. Out of chicken broth? Vegetable broth plus a pinch of poultry seasoning gets you close. Heavy cream can be swapped for whole milk with a splash of cream—just know the filling won’t be as rich. The peas are flexible: frozen corn or diced green beans add nice color and texture. Don’t skip the ice water—it’s what keeps the dough tender.
The dough can rest in the fridge for up to 2 days, or freeze it for 3 months (wrap tightly in plastic). The filling is best made fresh, but leftovers keep for 4 days in the fridge. Reheat in the oven to keep the crust crisp—microwaving turns it soggy.
Why You’ll Love This Recipe
- 5-Minute Mix: I just pulse flour, cold butter, and ice water in my food processor—no fancy techniques, no stress.
- Buttery Flake: That cold unsalted butter creates layers so crisp and rich, it makes the pot pie filling taste even better.
- Freezer Friendly: I always double the batch and freeze one—perfect for last-minute dinners or surprise guests.
- Pantry Staples: All-purpose flour, butter, salt, sugar—things I already have, so I can make this crust anytime without a special grocery run.
Step-by-Step Instructions for Pie Crust for Pot Pie
Here is the method for achieving a flaky, golden crust that perfectly complements your filling.
Step 1: Cut the Cold Butter into the Flour
In a large bowl, whisk together the 2.5 cups All-Purpose Flour, 1 tsp Salt, and 1 tsp Granulated Sugar. This ensures even distribution of the dry ingredients and prevents clumping.
Add the 1 cup Cold Unsalted Butter (cubed) to the flour mixture. Using a pastry cutter or your fingertips, work the butter into the flour until the mixture resembles coarse crumbs with pea-sized butter pieces visible. This creates the flaky texture in the finished crust.
Step 2: Add Ice Water Gradually
Drizzle in 0.5 cup Ice Water, a few tablespoons at a time, mixing gently with a fork until the dough just begins to come together. The dough should hold when pressed but not be sticky or overly wet.
If the mixture seems too dry, add more ice water 1 tablespoon at a time until it reaches the right consistency. Overworking the dough will make it tough, so handle it as little as possible.
Step 3: Chill the Dough
Divide the dough into two equal portions, flatten into discs, and wrap each tightly in plastic wrap. Refrigerate for at least 1 hour or up to 2 days. Chilling relaxes the gluten and firms the butter, which is essential for a flaky texture.
This step also prevents shrinking during baking. If you’re in a hurry, you can freeze the dough for 20 minutes, but refrigeration is ideal.
Step 4: Roll and Shape the Crust
On a lightly floured surface, roll out one disc of dough to a 12-inch circle, about ⅛-inch thick. Transfer this to your pie dish, pressing gently into the bottom and sides. Trim the edges, leaving a ½-inch overhang.
For a lattice top, cut the second disc into strips. Weave the strips over the filling to create a lattice pattern, then crimp the edges to seal. For a full top crust, roll out the second disc, place it over the filling, trim, and crimp the edges.
Cut a few small slits in the top crust to allow steam to escape during baking. This prevents the crust from becoming soggy.
Step 5: Bake to Golden Perfection
Preheat your oven to 375°F. Brush the crust lightly with a beaten egg or milk for a shiny, golden finish. Bake for 30-40 minutes, or until the crust is deep golden brown and the filling is bubbling.
If the edges begin to brown too quickly, cover them with foil or a pie shield. Let the pie rest for 10 minutes after baking to allow the filling to set before serving.
Pro Tips For Making Pie Crust Recipe For Pot Pie
- Chill the Butter: Cut your unsalted butter into small cubes and freeze for 10-15 minutes before mixing—this keeps it cold longer while you work, preventing a tough crust.
- Use Ice Water: Fill a cup with water and ice cubes, then measure from that—using truly cold water makes a real difference in keeping the dough flaky.
- Don’t Overwork Dough: Stop mixing as soon as the dough comes together, even if it looks a little shaggy—I learned this the hard way after making too many dense crusts.
- Rest Before Rolling: Let the dough rest in the fridge for at least 30 minutes before rolling it out, or it’ll shrink when baked and fight you while you work.
Creative Variations of This Dish
Cheesy Cheddar Crust
Add 1 cup shredded sharp cheddar to your dry ingredients before cutting in the butter. The cheese melts into the dough, creating a rich, golden crust that pairs beautifully with the creamy filling. I use Cabot cheese for its bold flavor. 🧀
Herb-Infused Crust
Mix 1 tbsp fresh rosemary or 1 tsp dried thyme into the flour before adding the butter. This adds an aromatic depth that complements chicken and vegetable fillings. Fresh herbs work best for a vibrant, fragrant result.
Whole Wheat Option
Replace 1 cup of all-purpose flour with whole wheat flour for a nuttier, heartier crust. The texture will be slightly denser but adds fiber and a rustic flavor. I recommend King Arthur’s white whole wheat for a milder taste.
Gluten-Free Crust
Use a 1:1 gluten-free flour blend like Bob’s Red Mill in place of all-purpose flour. Add 1 tsp xanthan gum to improve texture. The dough may be slightly stickier, so chill it longer and roll it between parchment paper.
Sweet Potato Topping
For a unique twist, replace the top crust with thinly sliced sweet potatoes arranged in a circular pattern. Brush with olive oil and bake as directed. The potatoes caramelize slightly, adding a touch of sweetness.
This works especially well with turkey or vegetable fillings for a fall-inspired dish. ✨
Nutrition Facts
Frequently Asked Questions
Can I use store-bought dough instead?
Yes, but it won’t be as flaky. Store-bought pie crust works in a pinch, but for best results, use puff pastry.
How do I prevent a soggy bottom crust?
Blind-bake the bottom crust for 10 minutes at 375°F before adding filling. Also, avoid overfilling with wet ingredients.
What’s the best way to crimp the edges?
Use your thumb and forefinger to pinch the dough together in a pattern. Dip fingers in water if the dough isn’t sticking.
Can I make this ahead of time?
Assemble the pie without baking, then refrigerate for up to 12 hours. Bake straight from the fridge, adding 5-10 minutes to cooking time.

- Potato Candy Recipe 1933: Vintage Peanut Butter Roll Delight - October 30, 2026
- Potato Chip Cookie Recipe With Pecans: Buttery Crunch Meets Nutty Richness - October 30, 2026
- Potato Patty Recipe No Egg: Crispy Edges Without the Binder - October 30, 2026