
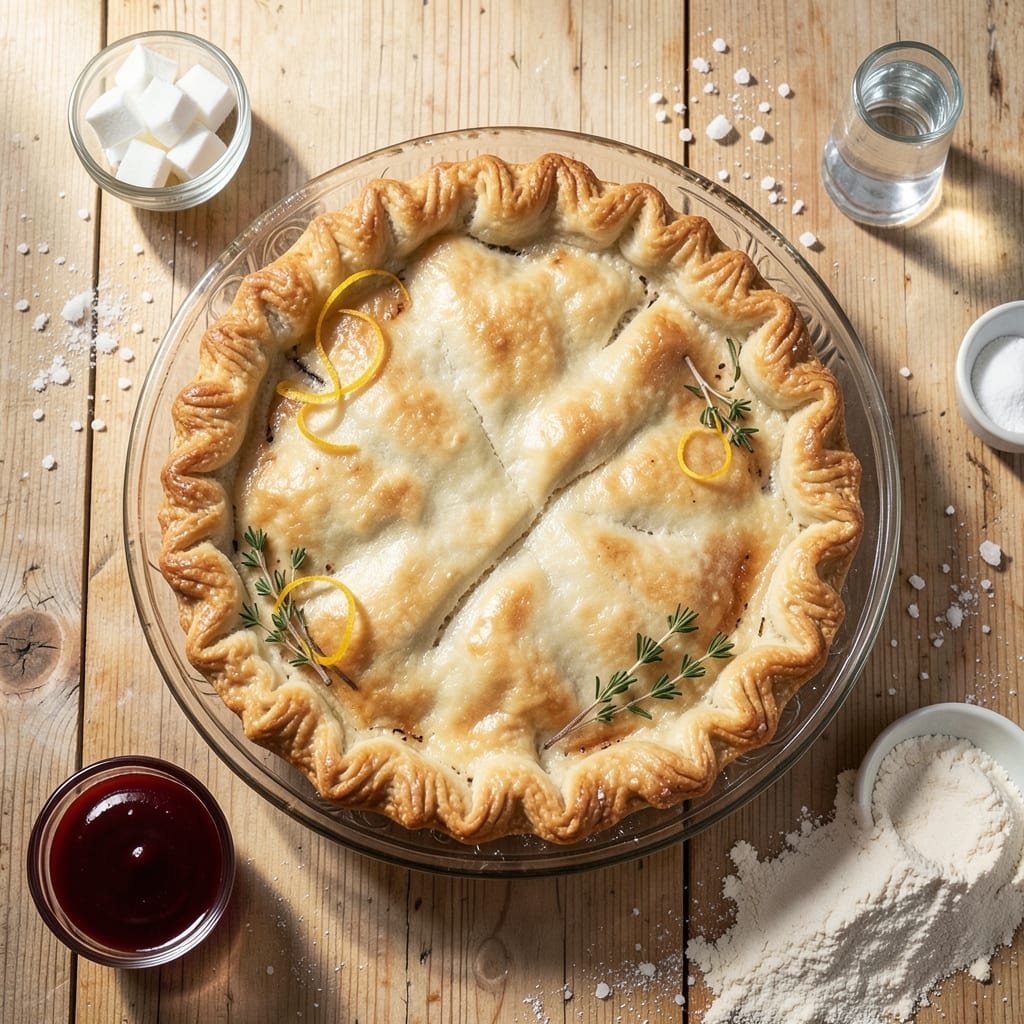
Achieving flaky pie crust without butter is simpler than you think. My grandmother taught me that Crisco creates the most tender layers, and I’ve been perfecting this method for years.
The secret lies in cold ingredients and minimal handling. The fat stays solid longer during baking, creating that sought-after flaky texture that shatters at the touch.
This recipe delivers professional results every time, whether for fruit pies or custard fillings. The dough holds its shape while baking and resists shrinking.
With just a few basic ingredients and a little patience for chilling, you’ll have a crust that rivals any bakery’s—crisp, golden, and perfectly layered.
Ingredients for Pie Crust Recipe Made with Crisco
Six simple ingredients create that bakery-quality flaky crust you crave.
| Ingredient | Amount | Notes |
|---|---|---|
| All-Purpose Flour 🌾 | 2 ½ cups | Spoon and level, plus extra for dusting |
| Crisco All-Vegetable Shortening 🧈 | ¾ cup | Chilled, cut into cubes |
| Ice Water 💧 | ⅓ cup | Plus 1 tablespoon as needed |
| Fine Sea Salt 🧂 | 1 tsp | Diamond Crystal preferred |
| Granulated Sugar 🍚 | 1 tsp | Optional for sweet crusts |
| Distilled White Vinegar 🍶 | 1 tsp | Ensures tender texture |
The shortening is non-negotiable here—Crisco All-Vegetable Shortening is what gives you those perfect layers (my grandma swore by it). Make sure it’s ice cold straight from the fridge. For flour, King Arthur or Gold Medal are my go-tos. Skip the sifter; spoon and level works fine. And don’t even think about warm water—cold is key for keeping the fat solid.
No Crisco? Cold lard works too, but keep it vegetarian with refined coconut oil (solid at room temp). Out of vinegar? Lemon juice in the same amount does the trick. The sugar is just for sweet pies—skip it for savory. Weighing your flour? 300 grams replaces the 2.5 cups. And if your dough feels dry, add that extra tablespoon of water (but don’t overdo it).
The dough keeps in the fridge for 2-3 days or freezes beautifully for 3 months. Wrap it tight in plastic—no air gaps. Let it sit at room temp for about 15 minutes before rolling (don’t skip this, or it’ll crack).
Why You’ll Love This Recipe
- No-Fuss Mixing: I just cut the Crisco into the flour with a fork—no fancy tools, no mess, and it comes together in minutes.
- Buttery, Flaky Layers: The shortening makes it so tender it practically melts, with that perfect crisp edge I crave in a crust.
- Endless Pie Possibilities: I’ve used this for apple, pumpkin, even pot pie—it’s my go-to for sweet or savory fillings.
- Pantry Staples Only: Flour, Crisco, salt, sugar, water—I always have these on hand, so pie night can happen anytime.
Step-by-Step Instructions for Pie Crust Made With Crisco
Here’s the method. Straightforward, tested, works every time.
Step 1: Combine Dry Ingredients for the Base
In a large mixing bowl, whisk together the 2.5 cups All-Purpose Flour, 1 tsp Fine Sea Salt, and 1 tsp Granulated Sugar until evenly distributed. I use Diamond Crystal salt for its clean flavor and consistent grain size.
This step ensures your dry ingredients are thoroughly blended before adding the fat. The sugar adds a subtle sweetness that complements fruit fillings beautifully, while the salt enhances all the flavors in your crust.
Step 2: Cut in the Chilled Shortening
Add the 0.75 cup Crisco All-Vegetable Shortening (chilled and cut into cubes) to the flour mixture. Using a pastry blender or two forks, cut the shortening into the flour until the mixture resembles coarse crumbs with some pea-sized pieces remaining.
Here’s the thing—those visible fat pieces are crucial. They create the flaky layers you’re after. Don’t overwork the mixture or you’ll end up with a tough crust. The shortening should stay cold throughout this process to maintain its structure.
Step 3: Add the Liquid Ingredients
Create a well in the center of your flour-shortening mixture. Pour in the 0.33 cup Ice Water and 1 tsp Distilled White Vinegar. Using a fork, gently mix the liquid into the dry ingredients just until the dough begins to come together.
The vinegar might seem unusual, but it’s my secret weapon. It tenderizes the gluten just enough to prevent toughness while keeping the crust sturdy. The ice water ensures the fat stays solid, which is essential for flakiness.
Step 4: Form and Chill the Dough
Turn the dough out onto a lightly floured surface and gently shape it into a disk about 1 inch thick. Wrap it tightly in plastic wrap and refrigerate for at least 1 hour (or up to 2 days).
This resting period allows the gluten to relax and the fat to firm up again. You’ll know it’s ready when you can press your finger into the dough and it springs back slowly. If it’s too firm, let it sit at room temperature for 10-15 minutes before rolling.
Step 5: Roll Out and Fit the Crust
On a lightly floured surface, roll out the chilled dough to a 12-inch circle about ⅛-inch thick. Transfer it to a 9-inch pie dish, easing it into the plate without stretching. Trim the edges, leaving a ½-inch overhang.
For a single-crust pie, crimp the edges decoratively. For a double-crust pie, repeat with the remaining dough. The key is to work quickly but gently—the less you handle the dough, the flakier your crust will be. If the dough starts to soften, pop it back in the fridge for 10 minutes before continuing.
Pro Tips For Making Pie Crust Recipe Made With Crisco
- Chill the Shortening: Pop your Crisco in the freezer for 15 minutes before using—cold fat means flakier layers. I learned this the hard way after my first few crusts came out dense and tough.
- Use Ice-Cold Water: Fill a glass with ice cubes and water, then measure from that—any warmer and the dough will be sticky. Sounds fussy, but it actually changes the outcome.
- Don’t Overwork It: Mix just until the dough comes together, even if it looks a little shaggy. After burning three batches, I finally figured out that overmixing makes the crust tough.
- Rest Before Rolling: Give the dough a solid 30 minutes in the fridge after mixing—this relaxes the gluten. My grandmother swore by this, and she was right: it rolls out smoother and holds its shape better.
Serving Suggestions for This Recipe
Sweet Pairings
This crust shines with classic apple pie filling—toss 6 cups thinly sliced apples with ¾ cup sugar and 2 tsp cinnamon. The buttery flavor of the crust complements the fruit perfectly. I always use Granny Smith apples for that perfect tartness. 💛
Savory Options
For dinner pies, try a chicken pot pie filling. The flaky texture holds up to creamy sauces beautifully. My family loves it with 1 cup diced carrots, 1 cup peas, and 2 cups cooked chicken in a velouté sauce. It’s Sunday dinner perfection.
Custard Classics
Pumpkin pie is a natural match—pour 2 cups pumpkin purée mixed with ¾ cup brown sugar and spices into the pre-baked crust. The shortening-based dough stays crisp underneath the creamy filling. I always blind-bake the crust first for 10 minutes to prevent sogginess.
Fruit Variations
Berry fillings work wonderfully too. For blueberry pie, mix 4 cups fresh berries with ¾ cup sugar and 3 tbsp cornstarch. The crust’s neutral flavor lets the fruit flavors shine. I like to brush the top with egg wash for extra shine. ✨
Presentation Tips
Dust the finished pie with powdered sugar through a stencil for an elegant touch. For lattice tops, weave strips of dough about 1 inch wide for a professional look. I learned this trick from my grandmother in Sicily—it makes every pie look special.
Serving Style
Serve warm with a scoop of vanilla ice cream or a dollop of whipped cream. The contrast of hot and cold is irresistible. For savory pies, a side of green salad with balsamic dressing cuts through the richness beautifully.
Nutrition Facts
Frequently Asked Questions
Can I use butter instead of shortening?
You can, but the texture will differ. Shortening has a higher melting point, creating flakier layers, while butter adds flavor but can make the crust denser.
How do I prevent a soggy bottom crust?
Blind-bake the crust for 10 minutes before adding fillings. Also, avoid overfilling and poke the base with a fork to let steam escape.
Why is the vinegar included?
It tenderizes the gluten, preventing toughness while keeping the crust sturdy. Just 1 tsp makes a noticeable difference.
Can I make this dough in advance?
Yes! The dough keeps in the fridge for 2-3 days or freezes for up to 3 months. Wrap it tightly in plastic.

- Pina Colada Dip Recipe Red Lobster: Tropical Creaminess With Toasted Coconut - October 12, 2026
- Pickled Sweet Cherry Peppers Recipe Canning: Tangy Heat for Pantry Staples - October 12, 2026
- Peppercorn Sauce Recipe Vegan: Rich Umami Depth Without Cream - October 12, 2026