
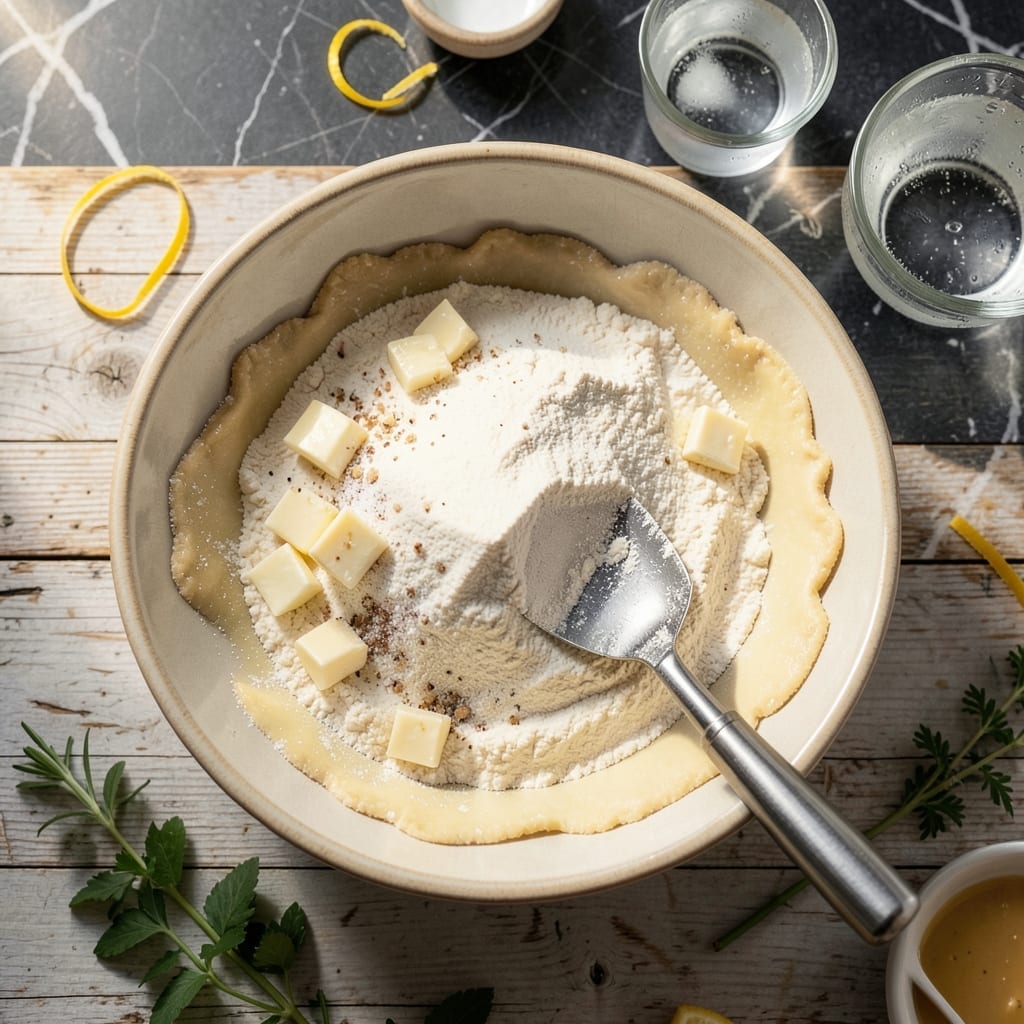
Achieving flaky pie crust without butter is absolutely possible with the right technique. I developed this method after years of testing substitutes in my grandmother’s diner.
Margarine works beautifully when kept ice-cold and handled minimally. The key is working quickly to prevent the fat from melting before baking, which would compromise those coveted layers.
This recipe delivers the same tender, flaky texture as traditional crusts. The margarine creates steam pockets during baking, resulting in that perfect crisp yet delicate structure.
Use it for any pie filling—sweet or savory. The results will impress even the most discerning pastry lovers.
Ingredients for Pie Crust Recipe Using Margarine
Seven simple ingredients yield a tender, flaky crust without dairy butter.
| Ingredient | Amount | Notes |
|---|---|---|
| All-Purpose Flour 🌾 | 2 ½ cups | Plus more for dusting surface |
| Margarine 🧈 | 1 cup | Ice-cold, unsalted sticks preferred |
| Salt 🧂 | 1 tsp | Fine sea salt preferred |
| Granulated Sugar 🍚 | 1 tbsp | Optional for sweet crusts |
| Ice Water 💧 | ¼ cup | Plus 1 tbsp as needed |
| White Vinegar 🍶 | 1 tbsp | Or apple cider vinegar |
| Baking Powder 🧂 | ¼ tsp | Optional for extra flakiness |
The margarine must stay ice-cold—Land O’Lakes or Imperial brands work well. Use stick margarine, not tub, for proper fat content (80% minimum). Chill the bowl and pastry cutter too. For best results, freeze margarine for 15 minutes before starting. The flour should be all-purpose, unbleached if possible, but bleached works fine in a pinch.
No margarine? Vegan butter sticks like Earth Balance work at a 1:1 ratio. For a richer flavor, try shortening (though texture differs slightly). The vinegar tenderizes—don’t skip it. If your kitchen is warm, chill the dough between steps. The sugar is optional but recommended for fruit pies.
Dough keeps 2 days wrapped tightly in the fridge, or freeze for 3 months. Pre-baked crusts can be stored at room temperature for 1 day in an airtight container. Always work quickly to prevent the fat from softening before baking.
Why You’ll Love This Recipe
- One Bowl Wonder: I just dump flour, cold margarine, a pinch of salt and sugar, then slowly mix in ice water—no fancy tools, no mess.
- Buttery Crisp: The margarine gives it that flaky, melt-in-your-mouth texture without the dairy price tag.
- Freezer Friendly: I always make a double batch and freeze the extras for spontaneous pie nights.
- Penny Pincher: Honestly, it costs me under two dollars for two crusts, and it tastes better than store-bought.
Step-by-Step Instructions for Pie Crust Using Margarine
Master this method for a perfectly flaky crust that rivals any butter-based version.
Step 1: Combine Dry Ingredients for the Base
In a large mixing bowl, whisk together the 2.5 cups All-Purpose Flour, 1 tsp Salt, and 0.25 tsp Baking Powder until evenly distributed. The baking powder adds a subtle lift, creating extra flakiness in the final crust.
If you’re making a sweet crust, add the 1 tbsp Granulated Sugar at this stage. This fine whisking ensures all dry ingredients are uniformly blended, preventing pockets of salt or baking powder in your finished dough.
Step 2: Cut in Ice-Cold Margarine
Add the 1 cup Margarine (cut into small cubes) to the dry ingredients. Using a pastry cutter or your fingers, work the margarine into the flour until the mixture resembles coarse crumbs with pea-sized pieces of margarine visible. The key is keeping everything cold—warm margarine will melt and create a tough crust instead of flaky layers.
I prefer using my fingertips for this step, as it gives me better control over the texture. Work quickly but gently to avoid warming the margarine with your hands. You should see distinct margarine pieces throughout the mixture—this is what creates those coveted flaky layers.
Step 3: Add Liquid Ingredients to Form Dough
In a small bowl, combine the 0.25 cup Ice Water and 1 tbsp White Vinegar. The vinegar tenderizes the gluten, resulting in a more delicate crust. Create a well in the center of your flour-margarine mixture and pour in the liquid.
Using a fork, gently stir the mixture until it just begins to come together. The dough will look shaggy and slightly dry—that’s perfect. Overworking at this stage develops gluten, which makes for a tough crust. If the dough seems too dry to hold together, add 1 tbsp of additional ice water.
Step 4: Chill and Rest the Dough
Turn the dough out onto a lightly floured surface and gently knead it just until it forms a cohesive ball—no more than 3-4 turns. Divide the dough in half and shape each portion into a disk about 1 inch thick.
Wrap each disk tightly in plastic wrap and refrigerate for at least 1 hour (or up to 2 days). This chilling period allows the margarine to re-solidify and the gluten to relax, making the dough easier to roll out and preventing shrinkage during baking. The vinegar will continue to work its magic during this rest.
Step 5: Roll and Shape for Baking
On a lightly floured surface, roll out one disk of dough to about ⅛-inch thickness, turning and re-flouring the surface as needed to prevent sticking. For a standard 9-inch pie, aim for a 12-inch circle to allow for crimping.
Transfer the rolled dough to your pie dish, gently pressing it into the bottom and sides. Trim any excess dough hanging over the edge, leaving about ½ inch for crimping. For a pre-baked crust, chill the lined pie dish for 30 minutes before baking to prevent shrinking.
Pro Tips For Making Pie Crust Recipe Using Margarine
- Chill the Margarine: Cut the margarine into small cubes and refrigerate for 15 minutes before mixing—cold fat is non-negotiable for flaky layers. I learned this the hard way after ending up with a dense, greasy crust.
- Use Ice Water Sparingly: Add the ice water 1 tablespoon at a time, mixing just until the dough comes together. After overworking my first few crusts, I finally figured out that too much water makes the dough tough.
- Don’t Overmix: Stop mixing as soon as the dough forms a shaggy ball. My grandmother swore by this, and she was right: overmixing develops gluten, which ruins the tenderness.
- Rest Before Rolling: Let the dough rest in the fridge for at least 30 minutes before rolling it out. Sounds weird, but it works—it relaxes the gluten and prevents shrinking during baking.
Make-Ahead Tips for This Recipe
Prep Ahead Dough
The dough keeps beautifully in the fridge for up to 2 days wrapped tightly in plastic. I always make extra when testing recipes—David loves surprise pies! Just let it sit at room temperature for 15 minutes before rolling to soften slightly. 💡
Freeze for Later
For longer storage, freeze dough disks for up to 3 months in a ziplock bag. Thaw overnight in the fridge before using. I’ve had great results with this method, even in our Austin heat.
Pre-Baked Crusts
Pre-baked crusts can be stored at room temperature for 1 day in an airtight container. For longer storage, freeze for up to 1 month—perfect for those busy weeknights when you need a quick dessert.
Par-Baked Shortcut
Par-bake crusts (partially baked) and freeze for up to 2 weeks. When ready to use, fill and bake as directed. This trick saves me 20 minutes on holiday pies.
Preventing Freezer Burn
Press plastic wrap directly onto the dough surface before sealing in a bag. This prevents freezer burn and keeps the margarine from absorbing odors. I learned this from Nana Mae’s diner days.
Re-rolling Scraps
Save dough scraps in the fridge for up to 3 days. Combine, re-roll, and use for mini tarts or decorations. It’s a great way to reduce waste, and my kids love helping with the shapes. ✨
Nutrition Facts
Frequently Asked Questions
Can I use tub margarine instead of sticks?
No, stick margarine has 80% fat content needed for flakiness. Tub versions contain more water and will make your crust tough. Always use cold stick margarine for best results.
Why does the recipe include vinegar?
The 1 tbsp vinegar tenderizes gluten strands, creating a more delicate texture. It also helps prevent shrinkage during baking. Don’t worry—you won’t taste it in the final crust.
How do I prevent the crust from shrinking?
Chill the dough for at least 1 hour before rolling. Then, chill the lined pie dish for 30 minutes before baking. This keeps the margarine solid until the oven heat sets the structure.
What’s the best way to crimp the edges?
Use your thumb and forefinger to create a simple flute, or press with a fork for a classic look. For extra flair, try a rope edge by rolling strips of dough. Always trim excess first!

- Potato Candy Recipe 1933: Vintage Peanut Butter Roll Delight - October 30, 2026
- Potato Chip Cookie Recipe With Pecans: Buttery Crunch Meets Nutty Richness - October 30, 2026
- Potato Patty Recipe No Egg: Crispy Edges Without the Binder - October 30, 2026