
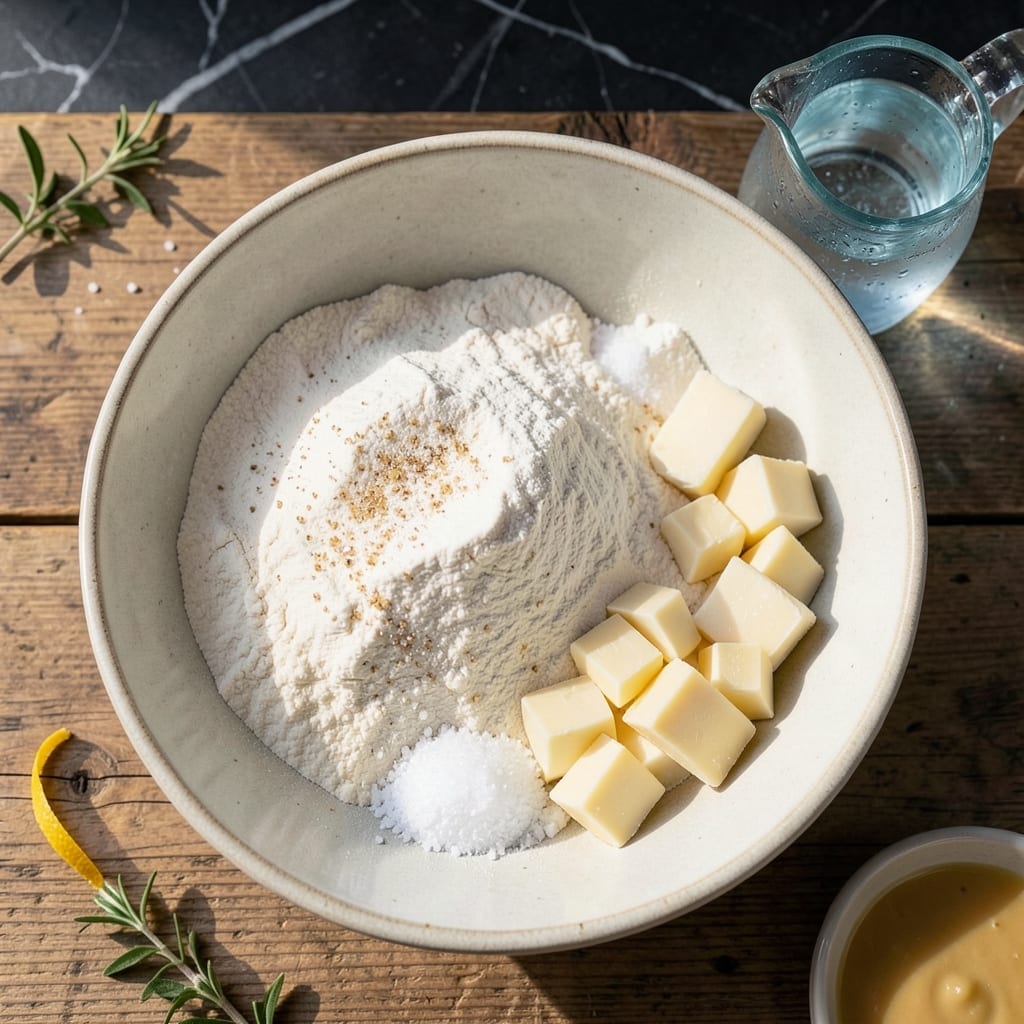
There’s a reason grandmas swore by lard for pie crust—it creates the most flaky, tender layers you’ll ever taste. This method delivers a golden, crisp base that holds its shape without shrinking or getting tough.
The secret is keeping the lard cold and working it just until pea-sized crumbles form. A splash of ice water binds everything without overdeveloping the gluten, ensuring that perfect, delicate texture.
What you get is a crust that bakes up tall, with distinct layers that shatter at the touch. It’s the foundation for any pie, from fruit to custard, and stays crisp even after slicing.
No special equipment needed—just a bowl, a pastry cutter, and about 15 minutes of prep. Here’s how to make it right.
Ingredients for Pie Crust Recipe with Lard
Cold lard, flour, salt, and ice water—simple stuff for the flakiest crust.
| Ingredient | Amount | Notes |
|---|---|---|
| All-Purpose Flour 🌾 | 2 ½ cups | Spooned and leveled, plus extra for dusting |
| Lard 🐷 | ¾ cup | Cold, leaf lard preferred |
| Salt 🧂 | 1 tsp | Fine sea salt or table salt |
| Ice Water 💧 | ⅓ cup | Plus 1 tbsp as needed |
| Granulated Sugar 🍚 | 1 tbsp | Optional, for sweet pies |
| Unsalted Butter 🧈 | ¼ cup | Cold, cubed (optional for flavor) |
Lard is the star here. Leaf lard (the stuff from around kidneys) is the gold standard—snow white, neutral flavor, perfect for baking. Most grocery stores carry Armour or Morrell in the baking aisle. If you only find regular lard, check the ingredients list—some brands add hydrogenated oils. For this recipe, you want pure lard, nothing else. It stays solid at room temp, which is key for those flaky layers.
No lard? Half lard, half butter still works well (butter adds flavor, lard adds flakiness). Shortening is a decent backup, but it lacks the depth. For a sweeter crust, add 1-2 tbsp sugar—great for fruit pies. The water must be ice cold to keep the fat from melting. And if your dough feels dry, add 1 tbsp more water at a time. Don’t overwork it or you’ll lose that tenderness.
Dough keeps wrapped in plastic for 2 days in the fridge or 3 months frozen. Pre-baked crusts stay fresh for 1 day at room temp or 1 week frozen. Always chill dough 30 minutes before rolling—this prevents shrinking. And yes, grandma was right: lard really is the secret.
Why You’ll Love This Recipe
- No Fuss Dough: I can mix this with a fork right in the bowl—no pastry cutter, no food processor, just lard cutting through the flour like a dream.
- Rich, Flaky Layers: That lard makes the crust so tender it practically melts, with just the right crunch from the sugar.
- Holiday or Tuesday: Honestly, it’s as good under a Thanksgiving apple pie as it is for a random weeknight pot pie.
- Pocketbook Friendly: Lard costs pennies compared to butter, and a double batch keeps in the fridge for a week ready for any baking whim.
Step-by-Step Instructions for Pie Crust With Lard
Here’s the method I’ve refined over years of making perfect, flaky crusts.
Step 1: Combine Dry Ingredients
In a large bowl, whisk together the 2.5 cups All-Purpose Flour, 1 tsp Salt, and 1 tbsp Granulated Sugar until evenly distributed. I always spoon and level my flour to avoid compacting it, which can make your crust dense.
This mixing ensures the salt and sugar (if using for sweet pies) are evenly dispersed throughout the flour. The sugar adds a subtle sweetness that complements fruit fillings beautifully. Make sure there are no lumps in your mixture before moving to the next step.
Step 2: Cut in the Cold Fat
Add the 0.75 cup Lard and 0.25 cup Unsalted Butter (both cold and cubed) to the flour mixture. I prefer leaf lard for its superior flakiness. Using a pastry cutter or your fingers, work the fat into the flour until the mixture resembles coarse crumbs with some pea-sized pieces of fat remaining.
Here’s the thing—you want those visible fat pieces for flakiness. They’ll create steam pockets during baking that separate the layers. If you don’t have a pastry cutter, use your fingertips and work quickly to keep the fat cold. The butter adds extra flavor, but you can skip it for a pure lard crust.
Step 3: Add Ice Water Gradually
Make a well in the center of your flour-fat mixture. Add 0.33 cup Ice Water and use a fork to gently mix just until the dough begins to come together. Start with the lesser amount—you can always add more, but you can’t take it out.
I’ve found that using ice water prevents the fat from melting prematurely, which is crucial for flakiness. The dough should look shaggy and slightly dry—don’t overmix or it’ll become tough. If it’s not coming together, add the reserved 1 tbsp of ice water as needed.
Step 4: Chill and Rest the Dough
Turn the dough out onto a lightly floured surface and gently press it into a cohesive ball. Divide it in half and flatten each portion into a disk about 1 inch thick. Wrap each disk tightly in plastic wrap.
Refrigerate for at least 1 hour, or up to 2 days. This resting period allows the gluten to relax and the fat to firm up. I know it’s hard to wait, but rushing this step results in a tough crust that shrinks during baking. When you’re ready to roll, let the dough sit at room temperature for 10 minutes to soften slightly.
Step 5: Roll and Fit into Pan
On a lightly floured surface, roll one disk of dough into a 12-inch circle about ⅛ inch thick. I like to roll from the center outward, turning the dough occasionally to prevent sticking. If it cracks, just press the edges back together.
Transfer the rolled dough to a 9-inch pie dish by rolling it loosely around your rolling pin and then unrolling it over the dish. Gently press the dough into the bottom and up the sides, being careful not to stretch it. Trim the edges to a ½-inch overhang, then fold and crimp. Your crust is now ready for filling and baking to golden perfection.
Pro Tips For Making Pie Crust Recipe With Lard
- Chill the Lard: Cut the lard into small cubes and freeze for 15-20 minutes before mixing—I learned this the hard way after ending up with a greasy, tough crust.
- Use Ice-Cold Water: Measure your water, add ice cubes to it, and let it sit for 5 minutes so it’s truly cold when you add it to the flour mixture.
- Don’t Overwork Dough: Mix just until the dough comes together, even if it looks shaggy—overworking it develops gluten, and that means a tough crust.
- Rest Before Rolling: Wrap the dough and refrigerate for at least 30 minutes, or it’ll shrink and fight you when you try to roll it out.
Serving Suggestions for pie crust recipe with lard
Classic Pairings
This crust shines with traditional fruit pies like apple or peach. The neutral flavor of lard lets the filling take center stage. I love how it holds up to juicy berries without getting soggy. 💪
Custard Pies
For pumpkin or pecan pie, the flaky texture provides perfect contrast to the creamy filling. Pre-bake the crust for 10 minutes at 375°F to prevent a gummy bottom.
Savory Options
Don’t limit yourself to sweets! This crust works beautifully for quiche or pot pie. The lard’s high smoke point makes it ideal for savory applications. Add 1 tsp black pepper to the dough for extra depth.
Presentation Tips
Brush the top with 1 egg white and sprinkle with coarse sugar for a glossy, professional finish. This works especially well for lattice-top pies. Crimp edges with a fork for a classic look.
Serving Temperature
Let your pie cool for at least 2 hours before slicing. This allows the filling to set and prevents the crust from breaking. Warm slices briefly in a 300°F oven if desired.
Garnish Ideas
A dusting of powdered sugar or a drizzle of caramel elevates the presentation. For savory pies, garnish with fresh herbs like thyme or rosemary. 🌟
Nutrition Facts
Frequently Asked Questions
Why use lard instead of butter?
Lard has a higher melting point than butter, creating taller, flakier layers. It also has a neutral flavor that lets your filling shine through.
Can I make this ahead of time?
The dough keeps wrapped in plastic for 2 days in the fridge or 3 months frozen. Thaw overnight before rolling.
What if my crust shrinks while baking?
This usually means the dough wasn’t chilled long enough. Always rest it for at least 1 hour before rolling and baking.
How do I prevent a soggy bottom?
Pre-bake the crust for 10 minutes at 375°F before adding wet fillings. This creates a barrier against moisture.

- Potato Candy Recipe 1933: Vintage Peanut Butter Roll Delight - October 30, 2026
- Potato Chip Cookie Recipe With Pecans: Buttery Crunch Meets Nutty Richness - October 30, 2026
- Potato Patty Recipe No Egg: Crispy Edges Without the Binder - October 30, 2026