
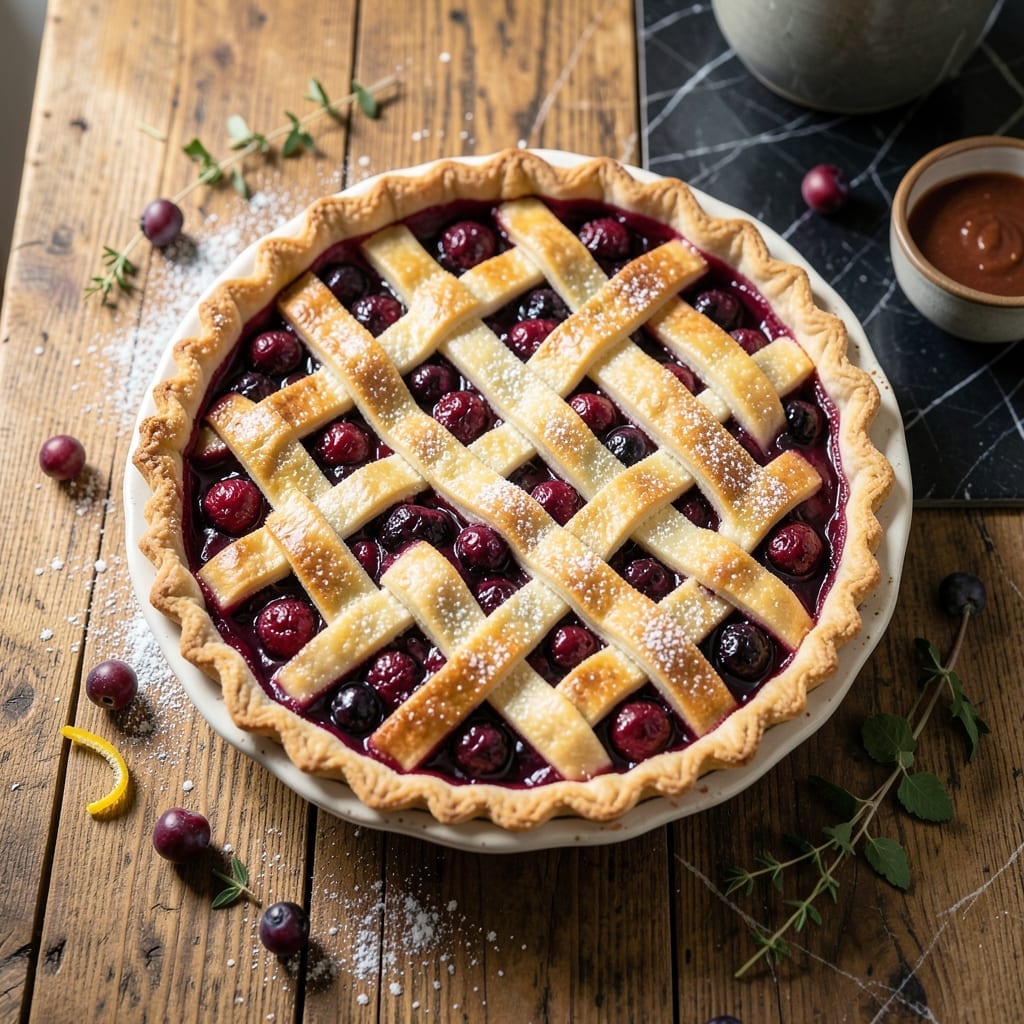
There’s an art to creating pies that balance flaky crusts with inventive fillings that surprise and delight. This collection of recipes transforms classic techniques into extraordinary results without overwhelming the home baker.
Each pie begins with a master crust formula that delivers reliable, golden layers every time. The secret lies in cold ingredients and minimal handling, which prevents tough pastry while ensuring that coveted flaky texture that shatters at the touch.
From fruit combinations that sing with seasonal freshness to savory options that redefine dinner, these fillings complement the buttery crust beautifully. The recipes guide you through balance—sweet with tart, rich with bright—so every slice satisfies.
Whether served warm with ice cream or at room temperature for a picnic, these pies prove that homemade can outshine any bakery offering. The process is as rewarding as the first bite.
Ingredients for Pie Recipe Ideas
Master these ingredients for a buttery, flaky crust and vibrant berry filling every time.
| Ingredient | Amount | Notes |
|---|---|---|
| All-Purpose Flour 🌾 | 2 ½ cups | Plus extra for dusting surface |
| Unsalted Butter 🧈 | 1 cup | Cold, cut into small cubes |
| Ice Water 💧 | ½ cup | Plus extra as needed |
| Granulated Sugar 🍚 | 1 tbsp | For crust sweetness |
| Kosher Salt 🧂 | 1 tsp | Diamond Crystal preferred |
| Mixed Berries 🍓 | 4 cups | Fresh or frozen, unsweetened |
| Granulated Sugar 🍚 | ¾ cup | For filling adjustment |
| Cornstarch 🌾 | 2 tbsp | Thickening agent for filling |
| Lemon Juice 🍋 | 1 tbsp | Freshly squeezed for brightness |
| Lemon Zest 🍋 | 1 tsp | From one medium lemon |
| Vanilla Extract 💧 | 1 tsp | Pure extract recommended |
| Heavy Cream 🥛 | ¼ cup | For glossy fruit topping |
| Large Egg 🥚 | 1 whole | For egg wash finish |
| Coarse Sugar ✨ | 1 tbsp | For crust topping sparkle |
The butter is non-negotiable for that coveted flaky texture. European-style unsalted butter with higher fat content (82-85%) delivers superior layers, but standard grocery store unsalted works well. King Arthur Flour is my go-to for all-purpose—consistent protein content ensures reliable results. Keep both butter and water ice-cold throughout the process (trust me on this one).
No berries? Peaches or apples make excellent substitutions—adjust sugar to taste since some fruits are sweeter than others. Cornstarch can be swapped for tapioca starch at a 1:1 ratio. If avoiding dairy, replace heavy cream with coconut cream (the canned kind, not the beverage). The crust can be made with vegan butter if needed.
Assembled pies freeze beautifully before baking—just wrap tightly in plastic and foil. Baked pies keep at room temperature for 2 days or refrigerated for 5 days. The dough itself can be refrigerated for 2 days or frozen for 3 months (thaw overnight before using).
Why You’ll Love This Recipe
- Five Ingredient Magic: The crust comes together with just flour, butter, ice water, sugar, and salt—no fancy ingredients, no fuss.
- Buttery Perfection: That flaky, golden crust from cold butter and a touch of sugar is the kind of simple luxury I crave.
- Endless Fillings: Sweet or savory, this base handles anything from summer berries to winter squash—my go-to for every season.
- Dollar Stretcher: A bag of flour and a stick of butter make multiple pies, so I’m feeding my family for pennies per slice.
Step-by-Step Instructions for Mixed Berry Pie
Master the technique for a flaky crust and vibrant filling that defines exceptional pie.
Step 1: Prepare the Flaky Pie Crust
In a large bowl, whisk together the 2.5 cups All-Purpose Flour, 1 tbsp Granulated Sugar, and 1 tsp Kosher Salt. This ensures even distribution of the dry ingredients, which is crucial for consistent texture throughout the crust.
Add the 1 cup Unsalted Butter, cut into small cubes and still cold. Use a pastry cutter or your fingers to work the butter into the flour until the mixture resembles coarse crumbs with some pea-sized butter pieces visible. These butter chunks create the flaky layers as they melt during baking.
Gradually add the 0.5 cup Ice Water, one tablespoon at a time, mixing gently with a fork until the dough just comes together. The dough should hold when pressed but not be sticky. If it’s too dry, add more ice water, one teaspoon at a time.
Step 2: Chill and Roll Out the Crust
Divide the dough into two equal portions, shape each into a disk, and wrap them in plastic. Refrigerate for at least 1 hour—this resting period allows the gluten to relax and the butter to firm up, which prevents shrinking during baking and ensures a tender, flaky texture.
After chilling, roll one disk on a lightly floured surface into a 12-inch circle. Transfer it to a 9-inch pie dish, press it gently into the bottom and up the sides, and trim the edges to leave a ½-inch overhang. Refrigerate the lined pie dish while you roll out the second disk for the top crust.
Step 3: Prepare the Mixed Berry Filling
In a large bowl, gently toss the 4 cups Mixed Berries with the 0.75 cup Granulated Sugar, 2 tbsp Cornstarch, 1 tbsp Lemon Juice, 1 tsp Lemon Zest, and 1 tsp Vanilla Extract. The cornstarch thickens the natural juices released during baking, while the lemon and vanilla enhance the berries’ natural sweetness.
Let the mixture sit for 15 minutes to macerate. This step draws out the berries’ juices, which combine with the cornstarch to create a glossy, thick filling that holds its shape when sliced. Stir once more before assembling the pie.
Step 4: Assemble and Bake the Pie
Pour the berry filling into the chilled pie crust. Drizzle the 0.25 cup Heavy Cream evenly over the top of the filling—this adds a silky richness and helps prevent the fruit from drying out during baking.
Place the second rolled-out crust over the filling. Trim and crimp the edges to seal, then cut several slits in the top crust to allow steam to escape. Brush the top crust with a beaten large Egg and sprinkle evenly with the 1 tbsp Coarse Sugar for a golden, crisp finish.
Bake in a preheated 375°F oven for 50-60 minutes, or until the crust is deep golden brown and the filling bubbles thickly through the vents. If the edges brown too quickly, cover them with a pie shield or aluminum foil.
Step 5: Cool and Serve
Transfer the pie to a wire rack and let it cool for at least 2 hours before slicing. This cooling period allows the filling to set completely, ensuring clean slices with a filling that holds its shape.
The crust should be crisp and flaky, with distinct layers visible where the butter created pockets of air. The filling should be glossy and thick, with the berries suspended in a vibrant, slightly tart sauce. Serve at room temperature for the best texture and flavor.
Pro Tips For Making Pie Recipe Ideas
- Chill the Butter: Cut your unsalted butter into 1/2-inch cubes and refrigerate for 20 minutes before mixing—I learned this the hard way after ending up with a tough, chewy crust instead of flaky layers.
- Use Ice-Cold Water: Fill a glass with water and ice cubes, then measure from that—warm water is the fastest way to activate gluten in all-purpose flour and ruin your pie’s tenderness.
- Skip Overworking Dough: Mix just until the dough comes together, even if it looks shaggy. After burning three batches, I finally figured out that overmixing develops gluten and makes crusts dense.
- Blind Bake First: Pre-bake your crust for 10 minutes at 375°F with pie weights or dried beans to prevent a soggy bottom—sounds weird, but it works for custard or fruit fillings.
Troubleshooting pie recipe ideas
Soggy Bottom Crust
Prevent this by ensuring your filling isn’t too wet. For fruit pies, toss berries with 2 tbsp cornstarch and let sit for 15 minutes before assembling. Also, chill your crust-lined pie dish for 30 minutes before adding filling to help it set faster in the oven. 💡
Over-Browning Edges
If your crust edges darken too quickly, cover them with a pie shield or aluminum foil after the first 30 minutes of baking. This allows the center to cook through without burning. I always keep a few foil strips ready for this exact purpose.
Filling Bubbles Over
Place your pie on a rimmed baking sheet to catch any spills. Cut 4-5 large vents in the top crust to allow steam to escape. If you notice excessive bubbling, reduce oven temp by 25°F and extend baking time by 10 minutes. 🔥
Crust Shrinks
This happens when gluten develops too much. After rolling, let your dough rest for 5 minutes before transferring to the pie dish. Also, avoid stretching the dough when fitting it into the pan—press it in gently instead.
Dry Filling
If your fruit filling seems dry, it likely needs more thickening agent. Next time, add an extra 1 tbsp cornstarch to your filling mixture. For cream pies, ensure you don’t overbake—pull them when the center is just set but still has a slight wobble.
Crust Not Flaky
The key is cold butter and minimal handling. Ensure your 1 cup Unsalted Butter stays ice-cold until baking. Use a pastry cutter rather than your hands to work butter into flour. The visible pea-sized butter pieces in your dough create those coveted flaky layers. ✨
Nutrition Facts
Frequently Asked Questions
Can I use frozen berries instead of fresh?
Yes, but don’t thaw them first. Toss frozen berries with 1 extra tablespoon cornstarch to absorb excess liquid. Bake for an additional 5-10 minutes as frozen fruit may take longer to cook through.
How do I prevent a soggy crust with juicy fillings?
Chill your dough-lined pie dish for 30 minutes before adding filling. Also, sprinkle 1 tablespoon flour on the bottom crust before adding fruit to create a moisture barrier.
What’s the best way to crimp pie edges?
Use your thumb and index finger to press the edge of the top crust into the bottom crust. For a decorative touch, try a fork or twisted rope design. Always seal edges tightly to prevent filling leaks.
Can I make the dough ahead of time?
Wrap tightly in plastic and refrigerate for up to 2 days or freeze for 3 months. Thaw overnight in the fridge before using. Cold dough is actually easier to work with.

- Potato Candy Recipe 1933: Vintage Peanut Butter Roll Delight - October 30, 2026
- Potato Chip Cookie Recipe With Pecans: Buttery Crunch Meets Nutty Richness - October 30, 2026
- Potato Patty Recipe No Egg: Crispy Edges Without the Binder - October 30, 2026