
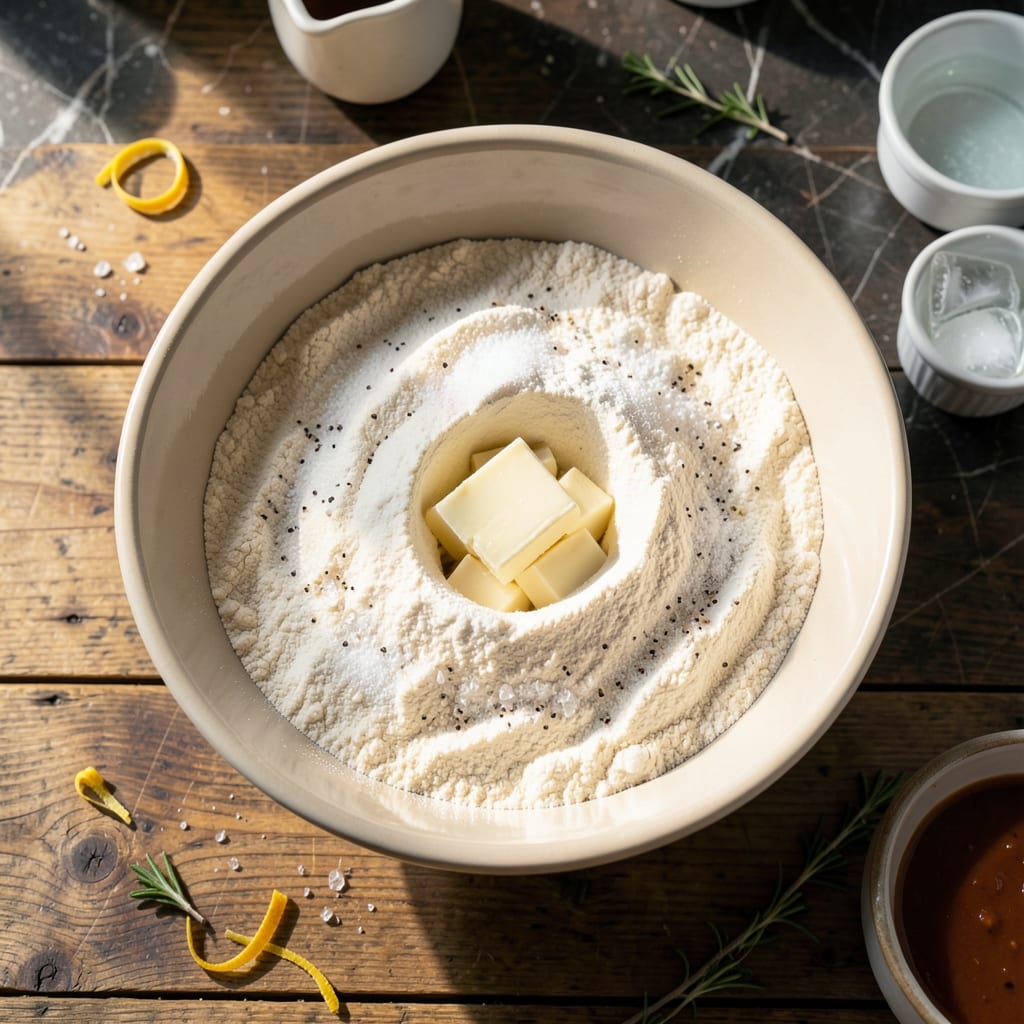
This pie crust recipe delivers flaky layers that perfectly contain the juiciest strawberry filling without turning soggy. After years of testing, I’ve found the ideal balance of butter, flour, and technique to create a crust that’s both tender and sturdy.
The secret lies in keeping the butter cold and working it just enough to create visible layers. This method ensures a golden, crisp base that holds up against even the most generous fruit filling.
Once baked, the crust forms a sturdy yet delicate shell that complements the sweet-tart strawberries without stealing the spotlight. The contrast between the buttery layers and the juicy filling is what makes this pie unforgettable.
Perfect for summer gatherings or a simple weekend treat. Here’s how to make it right every time.
Ingredients for Pie Crust Recipe for Strawberry Pie
Flaky layers start with cold butter and just enough flour to hold it all together beautifully.
| Ingredient | Amount | Notes |
|---|---|---|
| All-Purpose Flour 🌾 | 2 ½ cups | Plus extra for dusting surface |
| Unsalted Butter 🧈 | 1 cup | Cold, cubed into 1/2-inch pieces |
| Granulated Sugar 🍚 | 1 tbsp | For slight sweetness in crust |
| Salt 🧂 | 1 tsp | Fine sea salt preferred |
| Ice Water 💧 | 6 tbsp | Plus up to 2 extra tbsp as needed |
| White Vinegar 🍋 | 1 tsp | Or lemon juice for tenderness |
| Strawberries 🍓 | 6 cups | Fresh, hulled and sliced |
| Cornstarch 🌽 | ¼ cup | For thickening filling |
| Granulated Sugar 🍚 | ¾ cup | Adjust to taste for filling |
| Lemon Juice 🍋 | 1 tbsp | Freshly squeezed for filling |
| Vanilla Extract 🌿 | 1 tsp | Pure vanilla for depth |
| Large Egg 🥚 | 1 whole | For egg wash on crust |
| Coarse Sugar 🍚 | 1 tbsp | For sprinkling on crust |
The butter is everything here. Land O’Lakes unsalted is my go-to—consistent quality and flavor. Keep it ice-cold, and cut it into even cubes (about 1/2-inch) so it distributes perfectly in the flour. The flour should be all-purpose, not bread flour, which has too much protein. For the vinegar, white distilled keeps the color neutral, but apple cider works too if that’s what you have.
No vinegar? Lemon juice at the same amount does the trick. Short on ice water? Use very cold tap water in a pinch. The strawberries should be ripe but firm—local farmers market berries have the best flavor. If they’re super juicy, let them macerate with the sugar for 30 minutes, then drain excess liquid before adding cornstarch. For a richer crust, swap 1 tbsp of water for 1 tbsp of heavy cream.
The dough keeps in the fridge for up to 2 days or freezes for 1 month. Wrap it tightly in plastic, then foil. Baked crust stays crisp for 24 hours at room temperature. For the filling, strawberries hold their shape best when baked the same day they’re prepped.
Why You’ll Love This Recipe
- No-Fuss Mixing: I just pulse the flour, cold butter, sugar, and salt in my food processor—ice water ties it all together in seconds.
- Buttery Perfection: That flaky, golden crust with just a hint of sweetness lets the strawberries shine.
- Weekend or Weeknight: Honestly, it’s as good for a fancy dinner as it is for a Tuesday treat when I’m craving something homemade.
- Pantry Staples: All-purpose flour, butter, sugar—stuff I always have on hand, so I can make this crust whenever the mood strikes.
Step-by-Step Instructions for Pie Crust for Strawberry Pie
This method ensures a flaky, sturdy crust that perfectly contains the juicy strawberry filling.
Step 1: Cut the Butter into the Flour
In a large bowl, combine the 2.5 cups All-Purpose Flour, 1 tbsp Granulated Sugar, and 1 tsp Salt. I always whisk these together first to distribute the salt and sugar evenly. The sugar adds subtle sweetness that complements the strawberries beautifully.
Add the 1 cup Unsalted Butter (cold and cubed into 1/2-inch pieces) to the flour mixture. Using a pastry cutter or your fingers, work the butter into the flour until the mixture resembles coarse crumbs with pea-sized butter pieces visible. These visible butter pieces create the flaky layers we want.
Step 2: Add the Liquid and Form the Dough
Create a well in the center of the flour-butter mixture. Add the 6 tbsp Ice Water and 1 tsp White Vinegar. The vinegar tenderizes the gluten, making the crust more forgiving when rolling. Using a fork, gently stir the liquid into the flour mixture just until it begins to come together.
Turn the dough out onto a lightly floured surface and gently knead it 2-3 times until it forms a cohesive ball. Be careful not to overwork the dough—this would develop too much gluten and make the crust tough. Divide the dough into two equal portions, flatten into discs, and wrap in plastic. Refrigerate for at least 1 hour.
Step 3: Roll Out the Crust and Prepare the Filling
On a lightly floured surface, roll one disc of dough into a 12-inch circle about 1/8-inch thick. Transfer to a 9-inch pie dish, pressing gently into the bottom and sides. Trim the edges, leaving a 1/2-inch overhang. Refrigerate while you prepare the filling.
In a large bowl, gently toss the 6 cups Strawberries (hulled and sliced) with the 0.25 cup Cornstarch, 0.75 cup Granulated Sugar, 1 tbsp Lemon Juice, and 1 tsp Vanilla Extract. The cornstarch will thicken the juices as the pie bakes, preventing a soggy bottom crust.
Step 4: Assemble and Bake the Pie
Pour the strawberry filling into the chilled pie crust. Roll out the second disc of dough and place it over the filling. Crimp the edges to seal, then cut several 1-inch slits in the top crust to allow steam to escape. Brush the top crust with the 1 whole Large Egg (lightly beaten) and sprinkle with the 1 tbsp Coarse Sugar for a golden, crisp finish.
Place the pie on a baking sheet (to catch any drips) and bake at 425°F for 15 minutes. Reduce the heat to 350°F and continue baking for 45-55 minutes until the crust is deep golden brown and the filling is bubbling through the vents. The filling should be thick and syrupy, not runny.
Step 5: Cool and Serve
Transfer the pie to a wire rack and let it cool for at least 2 hours before slicing. This cooling period allows the filling to set properly. I know it’s tempting to dive in right away, but cutting too soon will result in a runny filling that doesn’t hold its shape.
Serve each slice warm or at room temperature, with a scoop of vanilla ice cream if desired. The crust should be flaky and tender, with a beautiful golden color, and the filling should be thick, juicy, and bursting with strawberry flavor.
Pro Tips For Making Pie Crust Recipe For Strawberry Pie
- Chill the Butter: Cut the butter into small cubes and refrigerate for 30 minutes before mixing—I learned this the hard way after my first few crusts turned out tough instead of flaky.
- Use Ice-Cold Water: Keep your water truly ice-cold, and add it one tablespoon at a time. After burning three batches, I finally figured out that even slightly warm water makes the dough sticky.
- Don’t Overwork Dough: Mix just until the dough comes together, even if it looks a bit shaggy. My grandmother swore by this, and she was right: overworking develops gluten, which ruins that tender crust.
- Rest Before Rolling: Wrap the dough and let it rest in the fridge for at least 1 hour—yes, even if you’re impatient like me. It relaxes the gluten and makes rolling out so much easier.
Essential Equipment for pie crust recipe for strawberry pie
Pastry Cutter
A pastry cutter is essential for cutting cold butter into flour without warming it with your hands. I use the OXO Good Grips model—its stainless steel blades cut cleanly through even the coldest butter, creating those perfect pea-sized pieces we need for flaky layers.
Rolling Pin
Invest in a wooden rolling pin with handles for even pressure. My J.K. Adams maple pin gives me consistent 1/8-inch thickness every time. Dust it lightly with flour to prevent sticking, but avoid excess—too much flour can toughen the crust.
Pie Dish
A 9-inch glass pie dish is ideal for even heat distribution and a golden bottom crust. I prefer Pyrex because it’s durable and lets me monitor the browning. Avoid dark metal pans—they can overbrown the edges before the center is done. 💡
Bench Scraper
This tool helps lift and turn dough while rolling, and it’s perfect for trimming excess crust. A stainless steel bench scraper with a comfortable handle gives you clean edges. I use mine to divide the dough into equal portions before chilling.
Baking Sheet
Place your pie on a heavy-duty baking sheet to catch inevitable fruit drips. I use a half-sheet pan lined with parchment for easy cleanup. The sheet also helps the bottom crust brown evenly by reflecting heat upward.
Cooling Rack
After baking, transfer your pie to a wire cooling rack to prevent the bottom crust from steaming. This allows air circulation all around, keeping the crust crisp. I let my strawberry pie cool for at least 2 hours to set the filling completely. 🔥
Nutrition Facts
Frequently Asked Questions
Can I use frozen strawberries instead of fresh?
Yes, but thaw and drain them first to remove excess liquid. This prevents a soggy crust. Adjust sugar to taste since frozen berries may be sweeter.
How do I prevent the bottom crust from getting soggy?
Chill the dough before rolling and blind-bake for 10 minutes at 375°F. Also, toss strawberries with cornstarch to absorb juices.
Can I make the crust ahead of time?
The dough keeps in the fridge for 2 days or freezes for 1 month. Wrap tightly in plastic and foil to prevent freezer burn.
What if my crust cracks while rolling?
Patch small cracks with extra dough, pressing gently to seal. For larger tears, re-roll the dough. Keep everything cold to avoid overworking.

- Potato Candy Recipe 1933: Vintage Peanut Butter Roll Delight - October 30, 2026
- Potato Chip Cookie Recipe With Pecans: Buttery Crunch Meets Nutty Richness - October 30, 2026
- Potato Patty Recipe No Egg: Crispy Edges Without the Binder - October 30, 2026