
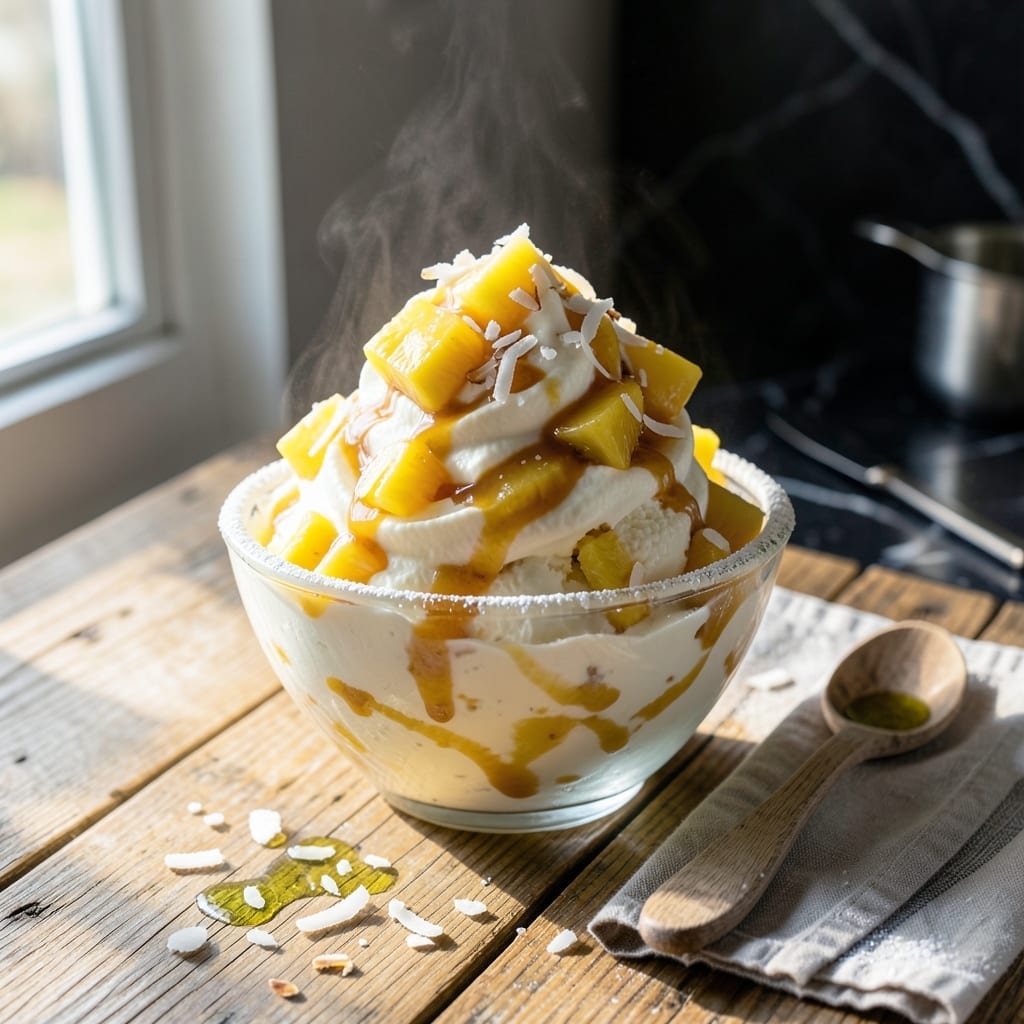
Transform your Ninja Creami into a tropical vacation with this foolproof piña colada ice cream. I developed this method after testing countless ratios to achieve the perfect creamy texture without iciness.
The secret is using full-fat coconut milk as the base, which provides the richness needed for smooth results. Fresh pineapple adds authentic flavor while a touch of rum extract captures that classic cocktail essence.
With just 5 minutes of prep and the Creami’s processing power, you’ll have creamy, dreamy ice cream that tastes like a beach getaway. The machine’s unique blending creates an airy yet dense texture.
This recipe proves you can enjoy restaurant-quality frozen treats at home anytime. The flavors are balanced—sweet, creamy, and subtly tropical without being overpowering.
Ingredients for Pina Colada Ice Cream Recipe Ninja Creami
Nine simple ingredients bring tropical beach vibes to your freezer in minutes.
| Ingredient | Amount | Notes |
|---|---|---|
| Full-Fat Coconut Milk 🥥 | 2 cups | Canned, well-shaken for creaminess |
| Fresh Pineapple 🍍 | 2 cups | Diced into small chunks |
| Granulated Sugar 🍚 | ½ cup | Adjust to taste preference |
| Heavy Cream 🥛 | ½ cup | Cold, for extra richness |
| Rum Extract 🍹 | 1 tsp | Or 1 tbsp dark rum |
| Vanilla Extract 🌿 | 1 tsp | Pure extract preferred |
| Sweetened Shredded Coconut 🥥 | ½ cup | Toasted for garnish |
| Lime Juice 🍈 | 1 tbsp | Freshly squeezed for brightness |
| Salt 🧂 | ¼ tsp | Fine sea salt for balance |
| Maraschino Cherries 🍒 | ¼ cup | Chopped, for garnish |
The coconut milk is non-negotiable here. Full-fat canned (like Thai Kitchen or Native Forest) gives that ultra-creamy base the Creami needs. Fresh pineapple is ideal—its bright, tangy sweetness cuts through the richness. If using canned, drain well and pat dry so you don’t end up with ice crystals. The heavy cream takes this from good to restaurant-quality (worth the splash).
No fresh pineapple? Frozen works in a pinch—thaw and drain first. Out of rum extract? Dark rum at triple the amount (1 tbsp) gives authentic flavor. Skip the alcohol entirely if needed—just add an extra 1/2 tsp vanilla. The shredded coconut can be unsweetened if you prefer less sweetness. Lime juice is key for balancing the richness (don’t skip it).
Make the base the night before—it needs 24 hours to freeze solid. Store leftovers in an airtight container for up to 2 weeks. Garnish with extra toasted coconut and cherries just before serving for that classic piña colada look.
Why You’ll Love This Recipe
- Ninja Easy: I just dump everything in the pint, mix, and let the Creami do its thing—no churning, no waiting hours.
- Tropical Escape: The fresh pineapple and rum extract taste like a beach vacation in every bite.
- Weekend Ready: I prepped a batch for my book club and it was gone before the first chapter.
- Budget Treat: Full-fat coconut milk and pineapple are cheaper than a plane ticket to Hawaii but taste just as dreamy.
Step-by-Step Instructions for Pina Colada Ice Cream Ninja Creami
Here’s the method. Straightforward, tested, works every time.
Step 1: Blend the Tropical Base
In a blender, combine the 2 cups Full-Fat Coconut Milk, 2 cups Fresh Pineapple, 0.5 cup Granulated Sugar, 0.5 cup Heavy Cream, 1 tsp Rum Extract, 1 tsp Vanilla Extract, and 1 tbsp Lime Juice. I always start on low speed to avoid splashing, then increase to high once everything is incorporated.
Blend for 30-45 seconds until the mixture is completely smooth and creamy. You’ll know it’s ready when there are no visible pineapple chunks left and the mixture has a consistent, pourable texture. The fresh pineapple will give you that authentic tropical flavor that makes this recipe shine.
Step 2: Season and Chill the Mixture
Add the 0.25 tsp Salt to the blender and pulse 2-3 times to incorporate. Salt might seem like a small addition, but it’s crucial for balancing the sweetness of the tropical flavors and enhancing all the other ingredients.
Pour the mixture into your Ninja Creami pint container, leaving ½ inch of headspace at the top to allow for expansion during freezing. Secure the lid and place it in the freezer. Let it freeze for a full 24 hours—this ensures the mixture is solid enough for the Creami to work its magic.
Step 3: Process in the Ninja Creami
After 24 hours, remove the pint from the freezer and place it in your Ninja Creami. Select the “Ice Cream” setting and let the machine run its full cycle. The initial result will be soft and slightly crumbly—that’s completely normal at this stage.
Here’s the thing—you’ll need to run the “Re-spin” function 1-2 times to achieve that perfect creamy texture. Between spins, use a spoon to break up any large chunks that might have formed. The machine works best when the mixture is uniformly cold and solid before processing.
Step 4: Add Mix-Ins and Finish
Once you’re satisfied with the texture, it’s time for the fun part. Add the 0.5 cup Sweetened Shredded Coconut and 0.25 cup Maraschino Cherries to the pint. I like to press them down gently into the ice cream to ensure even distribution.
Run the “Mix-in” function for 5-10 seconds to incorporate the add-ins without overmixing. The result should be a creamy ice cream with visible flecks of coconut and pops of cherry color. Serve immediately for a soft-serve texture, or freeze for 1-2 hours for a firmer consistency.
Pro Tips For Making Pina Colada Ice Cream Recipe Ninja Creami
- Chill the Base: Freeze your coconut milk and heavy cream mixture for at least 24 hours before spinning in the Ninja Creami—I learned this the hard way after ending up with soupy results from rushing it.
- Drain the Pineapple: Press fresh pineapple chunks in a fine-mesh strainer for 10 minutes to remove excess juice, or your ice cream will ice up with frustratingly large crystals.
- Skip Low-Fat Swaps: Full-fat coconut milk is non-negotiable here; the lighter stuff turns icy and loses that creamy piña colada texture we’re all after.
- Add Rum Last: Stir in the rum extract after spinning, not before—alcohol lowers the freezing point and can prevent your base from setting properly in the Ninja Creami.
Dietary Considerations for These Flavors
Dairy-Free Option
Swap the heavy cream for full-fat coconut cream to make this completely dairy-free. I tested this with Native Forest brand and the texture remained just as creamy. The coconut flavor will be more pronounced, which actually enhances the piña colada profile. 💪
Lower Sugar Version
Reduce the granulated sugar by half and add 1-2 tbsp monk fruit sweetener for a lower-carb option. The natural sweetness from the pineapple balances the reduction nicely. I found the flavor still shines through without being overly sweet.
Alcohol-Free Adaptation
Omit the rum extract and replace it with an extra ½ tsp vanilla extract and ¼ tsp coconut extract. This maintains the tropical essence without alcohol. The lime juice will still provide that signature brightness.
Nut Allergy Note
While this recipe doesn’t contain nuts, always check your coconut milk label for cross-contamination warnings. Brands like Thai Kitchen and So Delicious have dedicated allergy-friendly facilities. 🥥
Vegan Modification
Use coconut cream instead of heavy cream and ensure your maraschino cherries are vegan (many brands use animal-derived dyes). The texture will be identical, and the tropical flavors work perfectly with plant-based ingredients.
Gluten-Free Confirmation
This recipe is naturally gluten-free as written. Just verify that all your ingredients, especially the rum extract and maraschino cherries, are certified gluten-free to avoid any hidden sources. ✨
Nutrition Facts
Frequently Asked Questions
Can I use canned pineapple instead of fresh?
Yes, but drain it well and pat dry first to prevent ice crystals. Fresh is ideal for flavor and texture, though.
Why does the mixture need 24 hours to freeze?
The Ninja Creami requires a solid base to process properly. 24 hours ensures even freezing for smooth, creamy results.
Can I skip the heavy cream?
You can, but the texture won’t be as rich. For best results, keep it or use full-fat coconut cream.
How do I store leftovers?
Place in an airtight container for up to 2 weeks. Let sit at room temperature for 5 minutes before scooping.

- Potato Candy Recipe 1933: Vintage Peanut Butter Roll Delight - October 30, 2026
- Potato Chip Cookie Recipe With Pecans: Buttery Crunch Meets Nutty Richness - October 30, 2026
- Potato Patty Recipe No Egg: Crispy Edges Without the Binder - October 30, 2026