
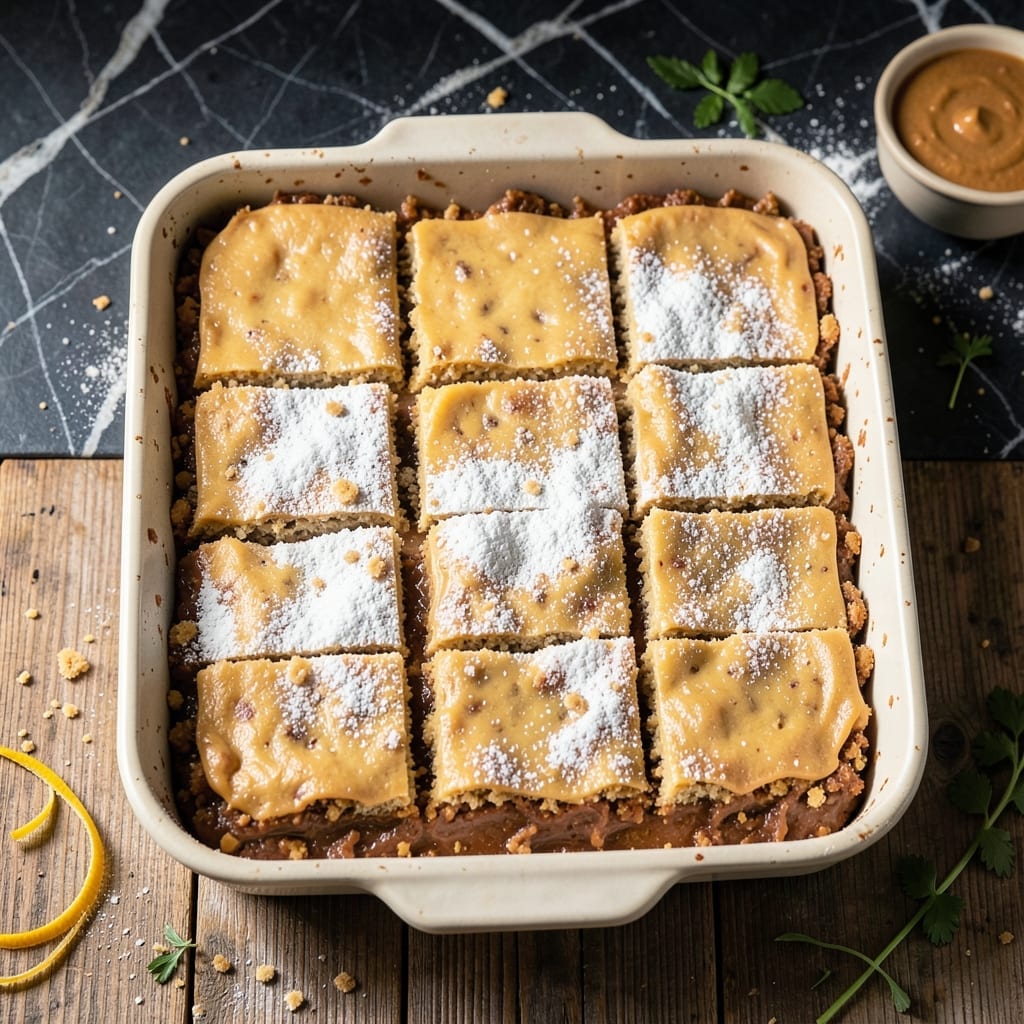
These no-bake peanut butter bars deliver rich, chewy satisfaction with just 5 ingredients and zero oven time. I’ve refined this method to ensure the perfect balance of sweet and salty, with a texture that holds together beautifully.
The beauty lies in the simplicity—melted butter, peanut butter, and powdered sugar form the base, while graham cracker crumbs add structure. A quick chill sets everything in place, making this a foolproof treat for any occasion.
What you’ll get is a batch of indulgent bars with a velvety peanut butter center and a hint of crunch. They’re ideal for potlucks, lunchboxes, or satisfying a sudden sweet tooth with minimal effort.
Store them in the fridge for up to a week, though they rarely last that long.
Ingredients for Pioneer Woman Recipe for No Bake Peanut Butter Bars
Five simple ingredients transform into these rich, chewy no-bake bars everyone will love.
| Ingredient | Amount | Notes |
|---|---|---|
| Unsalted Butter 🧈 | ½ cup | Melted for base mixture |
| Creamy Peanut Butter 🥜 | 1 ½ cups | Smooth, no stir variety |
| Powdered Sugar 🧂 | 2 cups | Sifted for smooth texture |
| Graham Cracker Crumbs 🍪 | 2 cups | About 14 full crackers |
| Vanilla Extract 🌿 | 1 tsp | Pure for best flavor |
| Salt 🧂 | ¼ tsp | Balances sweetness |
The peanut butter is key here—Jif or Skippy work perfectly, but any creamy variety will do. I grab mine from Walmart or Target since they’re always stocked. The graham crackers should be fine crumbs (not coarse), and most brands work fine. For the butter, unsalted lets you control the salt content better than salted varieties.
No creamy peanut butter? Crunchy works too, but the texture will be slightly different. Need to skip the graham crackers? Vanilla wafer crumbs make a great substitute. If you’re watching sugar, powdered sugar substitutes can work at a 1:1 ratio (though texture may vary). The vanilla extract is worth using the real stuff for best flavor.
These keep beautifully in the fridge for about 1 week (if they last that long). Store in an airtight container with parchment between layers to prevent sticking. They also freeze well for up to 3 months—perfect for making ahead.
Why You’ll Love This Recipe
- No Oven Needed: I just melt the butter and peanut butter together, mix in the rest, and chill—no baking required.
- That PB Love: The creamy peanut butter and powdered sugar make these bars taste like a dreamy, sweet-salty treat.
- Feeds a Crowd: Honestly, I make a batch for potlucks and they disappear faster than I can cut them.
- Budget Friendly: Between us, graham cracker crumbs and peanut butter stretch farther than you’d think for pennies per serving.
Step-by-Step Instructions for No Bake Peanut Butter Bars
These no bake bars come together quickly with precise mixing and proper chilling for the best texture.
Step 1: Melt the Butter and Incorporate Peanut Butter
In a large microwave-safe bowl, melt the 0.5 cup Unsalted Butter in 30-second intervals, stirring between each, until completely liquid. This gradual melting prevents hot spots that could separate the mixture.
Immediately stir in the 1.5 cups Creamy Peanut Butter until fully combined and smooth. The mixture should be glossy and free of any streaks. I use a silicone spatula for this—it scrapes the bowl clean and handles the thick mixture better than a spoon.
Step 2: Add Dry Ingredients for Structure
Measure the 2 cups Powdered Sugar (sifted) and 2 cups Graham Cracker Crumbs into the peanut butter mixture. The powdered sugar dissolves completely while the crumbs provide the signature crumbly base.
Add the 1 tsp Vanilla Extract and 0.25 tsp Salt at this stage. I fold everything together with the spatula just until no dry streaks remain—overmixing can make the bars too dense. The dough will be thick and slightly sticky.
Step 3: Press Firmly into the Pan
Transfer the mixture to a 9×9-inch baking dish lined with parchment paper. Use the spatula to spread it evenly, then press down firmly with the flat bottom of a measuring cup or your hands (lightly moistened to prevent sticking).
The key here is even pressure—this ensures the bars hold together when sliced. I aim for a uniform ½-inch thickness across the entire pan. The surface should look smooth with no visible crumbs.
Step 4: Chill Until Completely Set
Cover the pan with plastic wrap and refrigerate for at least 2 hours, though 4 hours or overnight yields the cleanest cuts. This chilling time solidifies the butter and peanut butter, transforming the mixture from spreadable to sliceable.
Test the firmness by pressing the center lightly—it should resist your finger with no indentation. If it still feels soft, give it another 30 minutes in the fridge. Rushing this step results in bars that crumble when sliced.
Step 5: Cut and Serve
Remove the pan from the refrigerator and let it sit at room temperature for 5-10 minutes before cutting. This brief rest prevents the bars from cracking when you slice into them.
Use a sharp knife to cut into 16 equal squares (for 4 servings of 4 bars each). Wipe the knife clean between cuts for neat edges. Store leftovers in an airtight container in the refrigerator for up to 1 week.
Pro Tips For Making Pioneer Woman Recipe For No Bake Peanut Butter Bars
- Melt Butter Slowly: Use low heat when melting the butter and peanut butter—high heat can cause the mixture to separate or burn, and you’ll end up with a greasy mess instead of a smooth base.
- Use Fresh Graham Crumbs: Crush the graham crackers yourself just before mixing—they absorb moisture better than pre-packaged crumbs and keep the bars from turning dry or crumbly.
- Chill Before Cutting: I learned this the hard way—let the pan set in the fridge for at least 1 hour before slicing, or the bars will fall apart when you try to cut them.
- Press Mixture Firmly: Pack the peanut butter mixture into the pan with the back of a spoon or a flat-bottomed cup—this prevents air pockets and gives you even layers that hold together.
Essential Equipment for This Dish
Mixing Bowl
A large microwave-safe bowl is essential for melting the 0.5 cup Unsalted Butter and combining all ingredients. I prefer Pyrex glass bowls because they’re sturdy and allow me to see the mixture clearly as I work.
Silicone Spatula
This is my go-to tool for folding in the 2 cups Powdered Sugar and 2 cups Graham Cracker Crumbs. A good spatula, like OXO’s heat-resistant model, scrapes every last bit from the bowl and handles the thick mixture with ease.
9×9-inch Baking Dish
For even chilling and clean cuts, use a 9×9-inch pan. I line mine with parchment paper to make removal effortless. A metal pan works best for quick, even cooling in the fridge.
Measuring Tools
Precise measurements matter here. I use a set of stainless steel measuring cups for the 1.5 cups Creamy Peanut Butter and dry ingredients. A flat-bottomed measuring cup also helps press the mixture evenly into the pan. 📏
Plastic Wrap
Covering the pan with heavy-duty plastic wrap prevents the bars from absorbing fridge odors during the 2-4 hour chill. Press it directly onto the surface for the best results.
Sharp Knife
A long, sharp knife is key for clean cuts. I run mine under hot water between slices to glide through the chilled bars smoothly. Aim for 16 equal squares for perfect portions. ✨
Nutrition Facts
Frequently Asked Questions
Can I use crunchy peanut butter instead of creamy?
Yes, but the texture will be slightly different. Crunchy adds extra bits of peanut, giving a more varied mouthfeel. The bars will still hold together well.
How long do these bars need to chill?
Refrigerate for at least 2 hours, but 4 hours or overnight produces the cleanest cuts. Rushing this step may cause crumbling.
Can I freeze these for later?
Store in an airtight container with parchment between layers. They’ll keep frozen for up to 3 months. Thaw in the fridge before serving.

- Potato Candy Recipe 1933: Vintage Peanut Butter Roll Delight - October 30, 2026
- Potato Chip Cookie Recipe With Pecans: Buttery Crunch Meets Nutty Richness - October 30, 2026
- Potato Patty Recipe No Egg: Crispy Edges Without the Binder - October 30, 2026