
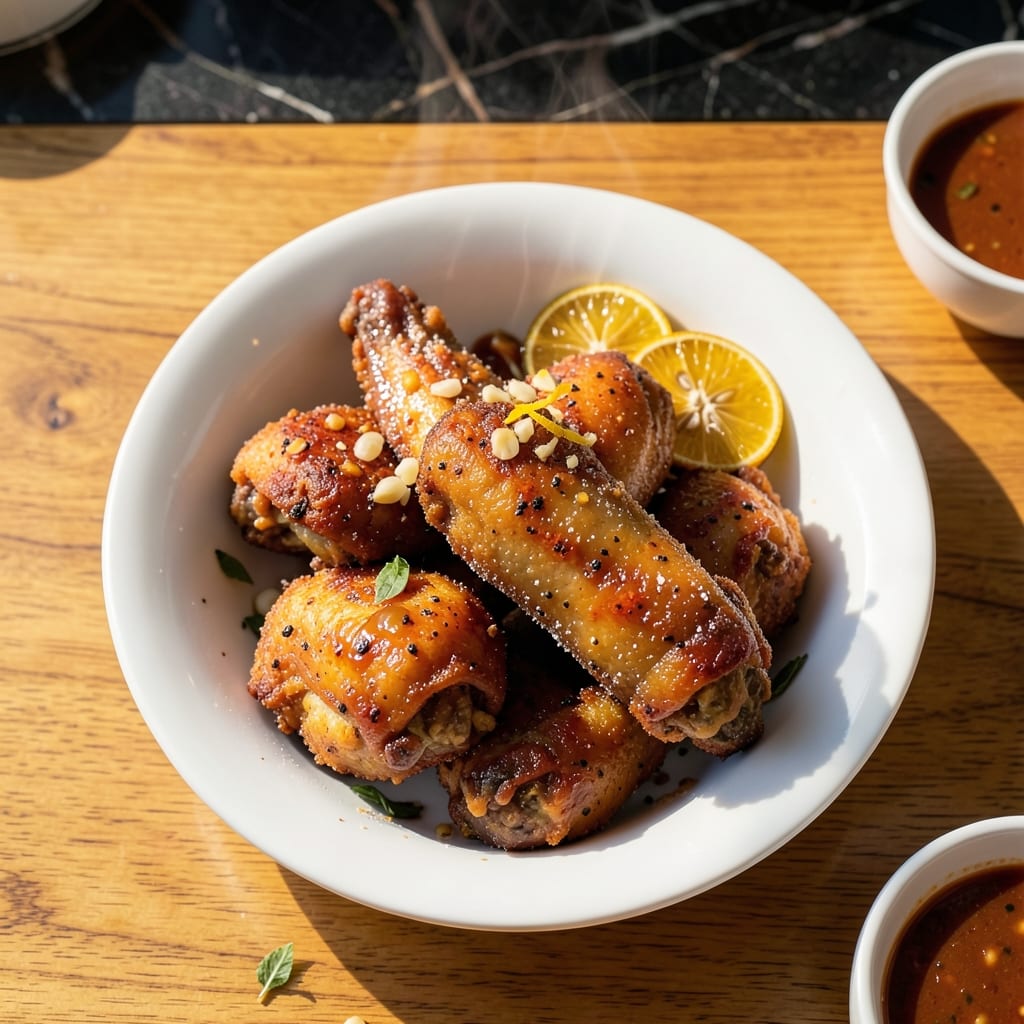
This homemade version captures the crispy texture and sweet-spiced flavor that made Jollibee famous. After testing multiple batches, I’ve perfected the balance of garlic, paprika, and a touch of sugar that defines the taste.
The marinade is simple but essential—soaking the chicken in soy sauce, calamansi, and spices ensures every bite is packed with that signature Pinoy taste. Double-frying guarantees a shatteringly crispy exterior while keeping the meat juicy inside.
What you’ll get is golden, crave-worthy fried chicken with that nostalgic fast-food flavor, minus the long lines. The aroma alone will transport you straight to a Jollibee counter.
Serve with steamed rice and banana ketchup for the full experience.
Ingredients for Pinoy Fried Chicken Recipe Ala Jollibee
Pantry staples plus a few Filipino essentials. Nothing you can’t find at an Asian market.
| Ingredient | Amount | Notes |
|---|---|---|
| Chicken Thighs 🍗 | 2 lb | Boneless, skin-on preferred |
| Soy Sauce 🥫 | ½ cup | Light or all-purpose |
| Calamansi Juice 🍋 | ¼ cup | Or substitute lime juice |
| Garlic Cloves 🧄 | 8 cloves | Minced for marinade |
| Granulated Sugar 🍚 | 2 tbsp | Balances savory flavors |
| Paprika 🌶️ | 1 tbsp | Sweet or smoked variety |
| Ground Black Pepper 🌶️ | 1 tsp | Freshly ground preferred |
| All-Purpose Flour 🌾 | 1 ½ cups | For dredging chicken |
| Cornstarch 🌾 | ½ cup | For extra crispiness |
| Baking Powder 🧂 | 1 tsp | Helps coating puff |
| Salt 🧂 | 1 tsp | Adjust to taste |
| Vegetable Oil 🫒 | 4 cups | For deep-frying |
| Banana Ketchup 🍌 | ½ cup | For serving |
The chicken is the star here. Thighs with skin-on give you that shatteringly crispy exterior while staying juicy inside—don’t substitute breasts, they dry out. For the soy sauce, Silver Swan or Datu Puti are the gold standard (any Filipino brand works). Calamansi juice is non-negotiable for that authentic Pinoy taste, but lime in a pinch does the trick. I grab mine from the freezer aisle at Seafood City or Filipino grocery stores.
Out of calamansi? Lime juice with a pinch of zest gets you 80% there. No fresh garlic? Garlic powder at half the amount works, but fresh is better. Want it spicier? Add a pinch of cayenne to the dredge. The cornstarch is what makes it extra crispy—don’t skip it. If you’re avoiding gluten, swap the all-purpose flour for rice flour (same amount).
Marinate the chicken overnight for maximum flavor—minimum 4 hours if you’re in a rush. The frying oil can be reused once (strain and store in a cool place). Leftovers keep 3-4 days in the fridge, but they’re best eaten fresh. Reheat in an air fryer to revive the crispiness.
Why You’ll Love This Recipe
- I’ll be real: it tastes even better the next day, cold or reheated, and stretches my grocery budget.
- Five Ingredient Magic: I love that this only needs chicken thighs, soy sauce, calamansi, garlic, and sugar—no fancy pantry hunting.
- That Jollibee Crunch: The soy-calamansi marinade gives it that sweet-savory tang I crave, with garlic punching through every bite.
- Feeds the Gang: Honestly, it’s my go-to for birthdays or lazy Sundays—everyone from kids to lolos inhales it.
Step-by-Step Instructions for Pinoy Fried Chicken Ala Jollibee
Here’s the method that delivers that signature crispy coating with sweet-spiced flavor in every bite.
Step 1: Marinate the Chicken Thighs
In a large bowl, combine the 2 lb Chicken Thighs with 0.5 cup Soy Sauce, 0.25 cup Calamansi Juice, 8 cloves Garlic Cloves (minced), 2 tbsp Granulated Sugar, 1 tbsp Paprika, and 1 tsp Ground Black Pepper.
Mix thoroughly to ensure each piece is evenly coated. The soy sauce and calamansi juice tenderize the meat while infusing it with that distinct Filipino flavor. Cover and refrigerate for at least 4 hours or overnight for maximum flavor penetration.
Step 2: Prepare the Crispy Coating
In a separate large bowl, whisk together the 1.5 cups All-Purpose Flour, 0.5 cup Cornstarch, 1 tsp Baking Powder, and 1 tsp Salt. The cornstarch is the secret to achieving that ultra-crispy exterior, while the baking powder helps the coating puff slightly during frying.
Remove the chicken from the marinade (discard excess marinade) and dredge each piece thoroughly in the flour mixture. Press firmly to create an even, thick coating that clings to the meat. Let the coated chicken rest for 10-15 minutes—this helps the coating adhere better during frying.
Step 3: Deep-Fry to Golden Perfection
Heat the 4 cups Vegetable Oil in a deep, heavy-bottomed pot to 350°F. Use a candy or deep-fry thermometer for accuracy. Carefully lower 3-4 pieces of chicken into the hot oil, being careful not to overcrowd the pot—this would lower the oil temperature and result in greasy chicken.
Fry for 8-10 minutes, turning occasionally, until the coating is deep golden brown and crispy. The internal temperature should reach 165°F. Transfer to a wire rack or paper towels to drain excess oil, keeping the first batch warm while you fry the remaining chicken.
Step 4: Serve with Banana Ketchup
While still hot, serve the crispy fried chicken with 0.5 cup Banana Ketchup on the side for dipping. The sweet, tangy flavor of the banana ketchup perfectly complements the savory, spiced notes of the chicken.
For the full Jollibee experience, serve immediately. The contrast between the crispy exterior and juicy interior is at its peak right after frying. Any leftovers can be reheated in a 375°F oven for 10-12 minutes to restore crispiness.
Pro Tips For Making Pinoy Fried Chicken Recipe Ala Jollibee
- Marinate Overnight: I learned this the hard way—letting the chicken thighs soak in soy sauce, calamansi juice, and crushed garlic for at least 6 hours (or overnight) makes the flavor penetrate deep instead of just sitting on the surface.
- Double Fry for Crisp: Fry the chicken at 350°F until cooked through, then crank the heat to 375°F and fry again for 2-3 minutes to get that signature Jollibee-style crunch.
- Dry the Chicken: After marinating, pat the thighs completely dry with paper towels—any moisture left will steam the chicken instead of frying it to a golden crisp.
- Add Sugar Late: Mix the granulated sugar into the marinade just before cooking, not hours ahead, or it’ll start breaking down the meat and turn your chicken mushy.
Make-Ahead Tips for Leftovers
Marinade Prep
Mix the soy sauce, calamansi juice, garlic, sugar, paprika, and black pepper the night before. I always use Silver Swan soy sauce for authentic flavor. Store in an airtight container in the fridge for up to 24 hours before cooking. 💡
Coating Prep
Combine the flour, cornstarch, baking powder, and salt in a large bowl the morning of cooking. Keep covered at room temperature. This prevents the mixture from absorbing moisture and ensures a crispier coating.
Double-Batch Strategy
Double the marinade and coating if serving a crowd. I learned this the hard way after running out mid-batch during a family dinner. Use two large bowls to keep everything organized and prevent cross-contamination.
Frying Setup
Set up your frying station in advance. Fill your pot with oil and place it near the stove. Have a wire rack or paper towels ready for draining. I use a Lodge cast iron Dutch oven for even heat distribution.
Oil Temperature
Use a thermometer to check your oil temp is 350°F before starting. If the oil isn’t hot enough, the chicken will absorb too much oil. I keep a candy thermometer clipped to the pot for easy monitoring.
Reheating Leftovers
Store leftovers in an airtight container in the fridge for up to 3 days. Reheat in a 375°F oven for 10-12 minutes to restore crispiness. The microwave will make it soggy, so avoid that. 🔥
Nutrition Facts
Frequently Asked Questions
Can I use chicken breasts instead of thighs?
Thighs are best for that juicy texture, but breasts work if you adjust the cooking time. Reduce frying to 6-8 minutes to prevent dryness. Brining the breasts first can help maintain moisture.
What if I don’t have calamansi juice?
Lime juice is the closest substitute. Use the same amount and add a pinch of zest for extra flavor. Avoid lemon juice, as it can overpower the dish.
How do I keep the coating crispy longer?
Drain on a wire rack, not paper towels, to avoid steam. For leftovers, reheat in an oven at 375°F for 10-12 minutes instead of a microwave.
Can I bake instead of fry?
Yes, but the texture won’t be the same. Bake at 400°F for 20-25 minutes, flipping halfway. For extra crispiness, spritz with oil before baking.

- Potato Candy Recipe 1933: Vintage Peanut Butter Roll Delight - October 30, 2026
- Potato Chip Cookie Recipe With Pecans: Buttery Crunch Meets Nutty Richness - October 30, 2026
- Potato Patty Recipe No Egg: Crispy Edges Without the Binder - October 30, 2026