
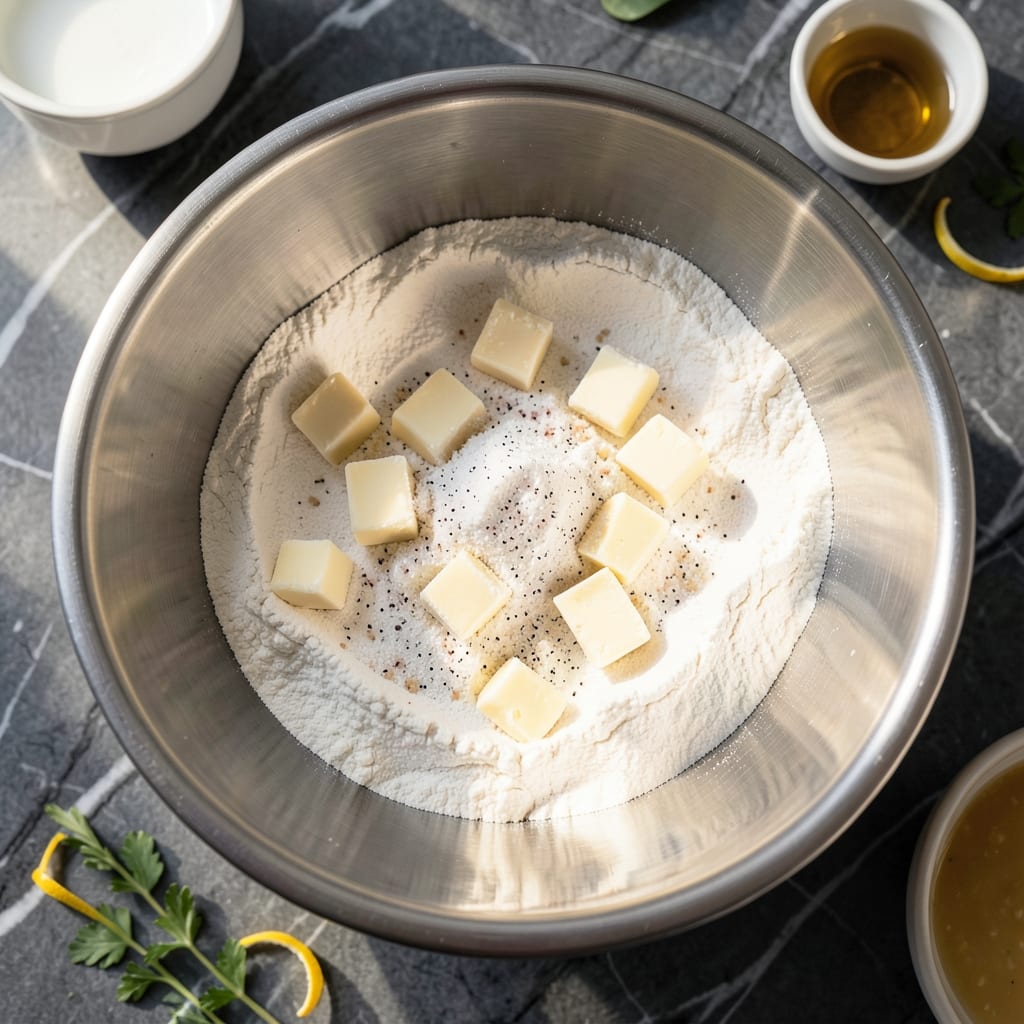
Achieving perfectly flaky pie crust at home is simpler than you think. The food processor does the heavy lifting, cutting cold butter into flour in seconds for that coveted layered texture.
This method eliminates the guesswork of hand-cutting while maintaining the essential cold fat principle. The result is a tender, golden crust that holds its shape and delivers that satisfying crunch with every bite.
I developed this technique to streamline the process without sacrificing quality. The food processor ensures even distribution of fat, creating those beautiful flaky layers that make pie crust extraordinary.
Ready in minutes with minimal effort, this crust works for sweet and savory pies alike. The consistency is foolproof every time.
Ingredients for Pie Crust Recipe Using Food Processor
Cold butter and minimal handling create extraordinary flaky layers in this foolproof crust.
| Ingredient | Amount | Notes |
|---|---|---|
| All-Purpose Flour 🌾 | 2 ½ cups | Spoon and level method |
| Unsalted Butter 🧈 | 1 cup | Cold, cubed into 1/2-inch pieces |
| Fine Sea Salt 🧂 | 1 tsp | Diamond Crystal preferred |
| Granulated Sugar 🍚 | 1 tbsp | Optional for sweet crusts |
| Ice Water 💧 | ½ cup | Plus additional as needed |
| Apple Cider Vinegar 🍏 | 1 tsp | Enhances flakiness |
| Vanilla Extract 🌿 | ½ tsp | Optional for sweet variations |
The butter must stay cold—cut it into cubes and refrigerate until ready to use. King Arthur Flour or similar high-protein all-purpose flour provides optimal structure. Use European-style butter (82% fat) for superior flakiness if available. The food processor should pulse just until pea-sized crumbs form—overworking develops gluten, toughening the crust.
No food processor? Use a pastry cutter or two forks for the same effect (just takes longer). Vodka substitution (replace half the water) creates even flakier layers. For a richer flavor, swap 1/4 cup butter for lard. The vinegar tenderizes but can be omitted—lemon juice works too.
The dough rests 30 minutes before rolling—this relaxes the gluten for easier rolling. Wrapped tightly, it keeps in the fridge for 3 days or freezes for 2 months. Always work on a lightly floured surface to prevent sticking.
Why You’ll Love This Recipe
- No-Fuss Mixing: The food processor does all the work—just pulse, add ice water, and you’ve got flaky layers without the arm workout.
- Buttery Perfection: That cold butter and a pinch of sugar create the most tender, golden crust with just the right hint of sweetness.
- Endless Possibilities: Sweet pies, savory quiches—this crust handles it all, and I’ve yet to find a filling it doesn’t complement.
- Budget-Friendly Staple: A handful of pantry basics turns into a homemade crust that’s cheaper than store-bought and twice as impressive.
Step-by-Step Instructions for Pie Crust Using Food Processor
This professional method guarantees perfectly flaky layers with minimal effort and maximum consistency.
Step 1: Pulse the Dry Ingredients
Measure the 2.5 cups All-Purpose Flour using the spoon and level method for accuracy. Add it to the food processor bowl along with the 1 tsp Fine Sea Salt and 1 tbsp Granulated Sugar if making a sweet crust.
Pulse the mixture 3-4 times in 1-second bursts until the ingredients are evenly combined. This aerates the flour and prevents dense spots in your crust. The mixture should look like fine, uniform crumbs with no visible salt or sugar particles.
Step 2: Incorporate the Cold Butter
Add the 1 cup Unsalted Butter that’s been cubed into ½-inch pieces and chilled. Distribute the cubes evenly over the flour mixture. Pulse in 1-second bursts, stopping to scrape the sides as needed, until the mixture resembles coarse crumbs with visible pea-sized butter pieces.
This should take 10-15 pulses total. The key is maintaining visible butter chunks—this creates the flaky layers. If the mixture becomes too fine or starts to clump, you’ve over-processed. The texture should be irregular, not uniform.
Step 3: Add the Liquid Ingredients
Combine the 0.5 cup Ice Water, 1 tsp Apple Cider Vinegar, and 0.5 tsp Vanilla Extract (if using) in a small bowl. With the food processor running continuously, pour the liquid mixture through the feed tube in a slow, steady stream.
Process for 5-8 seconds until the dough just begins to come together. It will look shaggy and slightly crumbly, not smooth. Stop immediately when you see the dough start to form a ball—over-mixing develops gluten, which makes the crust tough rather than flaky.
Step 4: Test and Adjust the Dough
Transfer the dough to a lightly floured surface and gently press it together with your hands. If it doesn’t hold together, sprinkle 1 tablespoon of ice water at a time over the dough and pulse 2-3 times until it just comes together. Repeat as needed, but use restraint—too much water makes the crust tough.
The finished dough should hold its shape when pressed but still have visible butter streaks. If it feels sticky, lightly dust with flour, but avoid working it in. The less you handle the dough, the flakier your crust will be.
Step 5: Chill and Rest Before Rolling
Divide the dough into two equal portions and shape each into a 1-inch thick disc. Wrap tightly in plastic wrap and refrigerate for at least 1 hour, or up to 2 days.
This chilling period allows the gluten to relax and the butter to firm up, which prevents shrinking during baking and ensures distinct flaky layers. When ready to use, let the dough sit at room temperature for 5-10 minutes to soften slightly before rolling out for your pie.
Pro Tips For Making Pie Crust Recipe Using Food Processor
- Chill the Butter: Cut your unsalted butter into 1-inch cubes and freeze for 15 minutes before pulsing—I learned this the hard way after ending up with a tough crust from butter that was too soft.
- Pulse, Don’t Blend: Use 1-second pulses in the food processor, about 10-12 times, just until the mixture resembles coarse crumbs. Over-processing develops gluten, and that’s the fast track to a chewy crust.
- Ice Water Only: Measure your ice water in a cup with ice cubes, then pour off the liquid as needed—never use tap water. The cold temperature keeps the butter from melting, which is non-negotiable for flakiness.
- Rest the Dough: After shaping, refrigerate the dough for at least 1 hour. Sounds tedious, but it relaxes the gluten and makes rolling out a breeze—I skip this when I’m lazy, but the crust shrinks every time.
Dietary Considerations for This Dish
Gluten-Free Option
Swap 2.5 cups All-Purpose Flour for a 1:1 gluten-free blend like King Arthur Measure for Measure. Add ½ tsp xanthan gum to improve structure. The texture will be slightly different but still flaky and delicious. 💪
Dairy-Free Alternative
Replace 1 cup Unsalted Butter with 1 cup cold coconut oil or vegan butter like Miyoko’s. Ensure it’s solid and cold for best results. The flavor will be subtly different but still buttery and rich.
Reduced Sugar
For savory pies, simply omit the 1 tbsp Granulated Sugar. For sweet pies, reduce to ½ tbsp or use a sugar substitute like monk fruit sweetener. The crust will still brown beautifully.
Nut-Free Version
This recipe is naturally nut-free, but check your flour blend if using gluten-free options. Some brands contain almond flour. I always use Bob’s Red Mill 1-to-1 for guaranteed nut-free baking. ✨
Lower Sodium
Reduce the 1 tsp Fine Sea Salt to ½ tsp or use a salt-free seasoning blend. The apple cider vinegar still enhances flavor without added sodium. Taste your dough before chilling to adjust.
Vegan Adaptation
Use vegan butter and replace the 1 tsp Apple Cider Vinegar with white vinegar. Ensure all ingredients are plant-based. The result is a flaky, golden crust that’s indistinguishable from traditional.
Nutrition Facts
Frequently Asked Questions
Why use a food processor for pie crust?
It quickly cuts cold butter into flour, creating even pea-sized crumbs for maximum flakiness. The processor also prevents overworking the dough, which keeps it tender.
Can I make this crust ahead of time?
Yes! Wrap the dough tightly and refrigerate for up to 3 days or freeze for 2 months. Thaw overnight in the fridge before using.
What if my dough is too crumbly?
Sprinkle in 1 tablespoon of ice water at a time and pulse until it just holds together. Avoid adding too much, as extra moisture makes the crust tough.
Can I use shortening instead of butter?
Yes, but butter yields better flavor. If using shortening, keep it cold and use the same amount. The texture will be slightly different but still flaky.

- Potato Candy Recipe 1933: Vintage Peanut Butter Roll Delight - October 30, 2026
- Potato Chip Cookie Recipe With Pecans: Buttery Crunch Meets Nutty Richness - October 30, 2026
- Potato Patty Recipe No Egg: Crispy Edges Without the Binder - October 30, 2026