
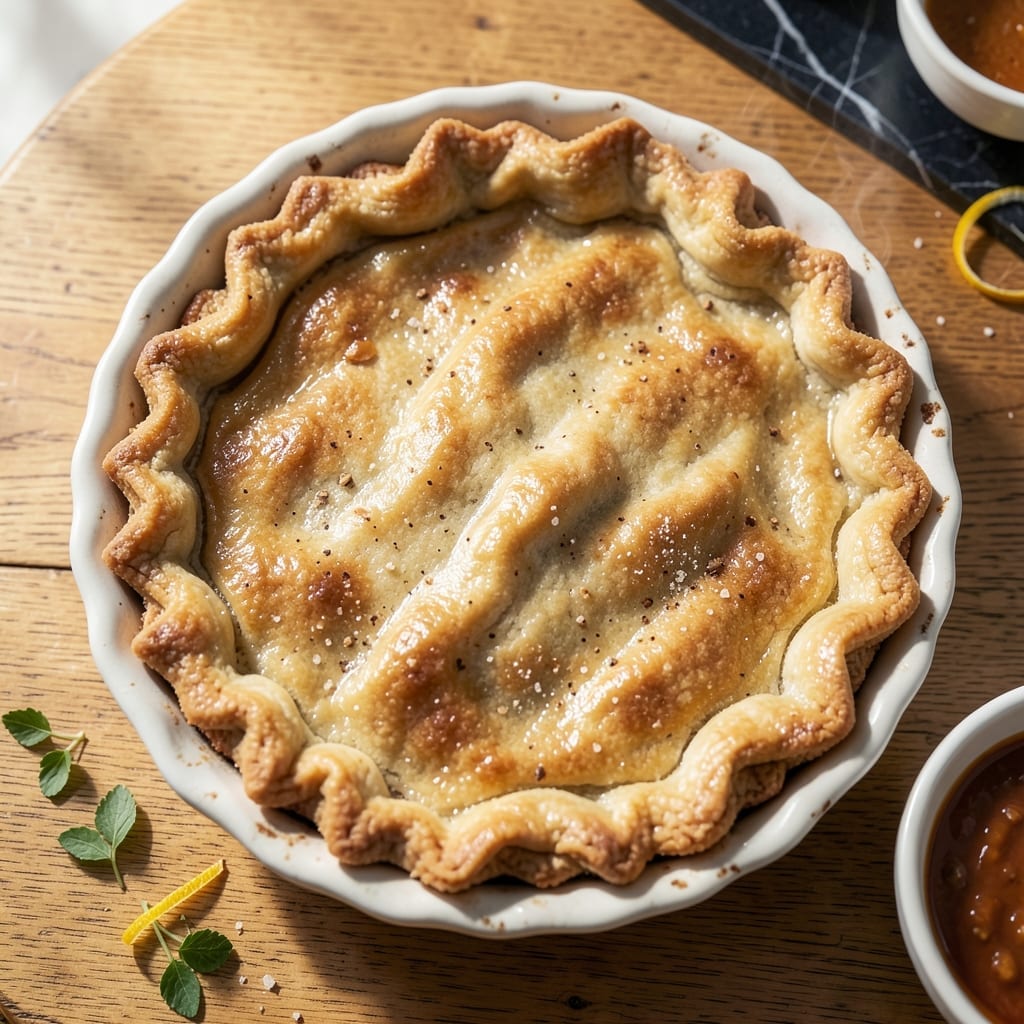
Achieving a flaky pie crust with gluten-free flour is absolutely possible with the right technique. This method delivers the tender, layered texture you expect from traditional crusts without compromising on quality.
The secret lies in using a blend of gluten-free flours and xanthan gum to mimic wheat’s elasticity. Cold butter and minimal handling prevent tough crusts, while chilling ensures the layers stay distinct during baking.
What you’ll get is a golden, crisp crust that holds its shape and flakes beautifully with each slice. It works for both sweet and savory pies, giving you the same professional results as any classic recipe.
Perfect for anyone avoiding gluten but unwilling to sacrifice texture or flavor. This recipe delivers on its promise every time.
Ingredients for Pie Crust Recipe Using Gluten Free Flour
A precise blend of gluten-free flours and cold butter creates that elusive flaky texture everyone craves.
| Ingredient | Amount | Notes |
|---|---|---|
| Gluten-Free All-Purpose Flour Blend 🌾 | 2 ½ cups | With xanthan gum included |
| Almond Flour 🌰 | ½ cup | Fine, blanched preferred |
| Xanthan Gum 🧪 | 1 tsp | Omit if blend already contains it |
| Unsalted Butter 🧈 | 1 cup | Cold, cubed, for flakiness |
| Ice Water 💧 | ⅓ cup | Plus 1 tbsp as needed |
| Granulated Sugar 🍚 | 1 tsp | Optional, for sweet pies |
| Salt 🧂 | ½ tsp | Fine sea salt preferred |
| Apple Cider Vinegar 🍏 | 1 tsp | Enhances tenderness and flakiness |
The flour blend is critical here. King Arthur Measure for Measure or Bob’s Red Mill 1-to-1 are reliable choices—they already include xanthan gum, so skip adding extra. Almond flour adds tenderness and structure; Bob’s Red Mill super-fine is ideal. For the butter, European-style unsalted (like Plugrá) has higher fat content, which means better layers. Keep it ice cold until the very last moment.
Out of almond flour? Tapioca starch at the same quantity works in a pinch. No xanthan gum? Psyllium husk powder at half the amount can substitute, but texture may vary slightly. The apple cider vinegar might seem odd, but it tenderizes the dough—white vinegar or lemon juice are fine alternatives. For a richer flavor, swap the ice water for cold buttermilk (if dairy is acceptable).
This dough needs to rest. Wrap it tightly in plastic and refrigerate for at least 1 hour—overnight is even better. The butter will firm up, making rolling easier. Stored in the fridge, the dough keeps for 2 days, or freeze for up to 3 months (thaw overnight before using).
Why You’ll Love This Recipe
- One Bowl Wonder: I just mix the gluten-free flour, almond flour, and cold butter right in one bowl—no fancy equipment, no mess.
- Buttery Richness: The unsalted butter gives it that classic flaky texture, and the almond flour adds a subtle nutty depth I didn’t expect.
- Freezer Friendly: I’ll roll out a few extra crusts and freeze them—perfect for last-minute pies or tarts.
- Pocketbook Pleaser: Almond flour stretches the gluten-free blend, so it’s cheaper than buying pre-made crusts and tastes way better.
Step-by-Step Instructions for Pie Crust Using Gluten Free Flour
This method ensures a tender, flaky crust that holds its shape beautifully when baked.
Step 1: Mix Dry Ingredients for Structure
In a large bowl, whisk together the 2.5 cups Gluten-Free All-Purpose Flour Blend, 0.5 cup Almond Flour, and 1 tsp Xanthan Gum until fully combined. The almond flour adds richness, while the xanthan gum compensates for gluten’s absence, providing elasticity.
Add the 0.5 tsp Salt and 1 tsp Granulated Sugar to the dry mixture. The salt enhances flavor balance, and the sugar, though optional, contributes a subtle sweetness that pairs well with fruit fillings. Stir thoroughly to distribute these finely.
Step 2: Cut in Cold Butter for Flakiness
Add the 1 cup Unsalted Butter, cold and cubed, to the dry ingredients. Using a pastry cutter or your fingertips, work the butter into the flour until the mixture resembles coarse crumbs with pea-sized butter pieces visible. This step is critical—visible butter flakes create the flaky layers.
Be careful not to overwork the butter. The heat from your hands can soften it, so work quickly. If the butter starts to melt, chill the mixture for 10 minutes before continuing. The goal is to keep the butter cold so it steams in the oven, lifting the dough into flaky layers.
Step 3: Bind with Liquid Ingredients
Create a small well in the center of the mixture. Add the 0.33 cup Ice Water and 1 tsp Apple Cider Vinegar to the well. The vinegar tenderizes the dough by weakening some of the starches, ensuring a more delicate texture.
Using a fork, gently mix the liquid into the dry ingredients just until the dough begins to come together. It will look shaggy and slightly crumbly—that’s perfect. Avoid overmixing, as this can develop gluten in the flour blend, making the crust tough.
Step 4: Chill and Rest the Dough
Turn the dough out onto a lightly floured surface and gently shape it into a disk, about 1 inch thick. Wrap the disk tightly in plastic wrap to prevent drying. Chill in the refrigerator for at least 1 hour, or up to 2 days.
This resting period allows the flour to fully hydrate and the butter to firm up, making the dough easier to roll out. It also relaxes any formed gluten, ensuring a tender, flaky result. If the dough feels too firm after chilling, let it sit at room temperature for 10-15 minutes before rolling.
Step 5: Roll and Shape for Baking
On a lightly floured surface, roll the chilled dough to a 12-inch circle, about ⅛-inch thick. Use a bench scraper to lift and turn the dough occasionally to prevent sticking. If cracks appear, press them together gently with your fingers.
Transfer the rolled dough to a pie dish, pressing it lightly into the bottom and sides. Trim any excess dough, leaving a slight overhang for crimping. For a pre-baked shell, prick the bottom with a fork and chill for 30 minutes before baking at 375°F until lightly golden.
Pro Tips For Making Pie Crust Recipe Using Gluten Free Flour
- Chill the Dough: I learned this the hard way—gluten-free pie crust needs at least 30 minutes in the fridge before rolling, or it’ll crumble apart. The butter must stay cold to create those flaky layers.
- Weigh Your Flours: After burning a few crusts, I finally figured out that scooping gluten-free flour can pack it down—use a scale for the 1:1 ratio of GF blend to almond flour to avoid a dense crust.
- Skip Warm Water: Sounds weird, but it works: use ice water straight from the freezer, not just cold tap water. Warm water activates the xanthan gum too early, making the dough gummy.
- Roll Between Parchment: This isn’t the prettiest method, but it’s the tastiest—roll the dough between two sheets of parchment to prevent sticking and tearing, especially with gluten-free’s delicate texture.
Best Sauces and Condiments for This pie crust recipe using gluten free flour
Sweet Pairings
For fruit pies, a warm caramel sauce drizzle elevates the crust’s buttery notes beautifully. I use Smucker’s Salted Caramel for convenience. A dusting of powdered sugar adds simple elegance to any sweet creation. 💛
Savory Enhancers
Quiche or pot pie crusts shine with a white gravy topping. I whisk 2 tbsp flour blend into 1 cup warm milk for a quick, lump-free sauce. A sprinkle of dried herbs complements the flaky texture perfectly.
Dipping Sauces
Hand pies become irresistible with a chocolate ganache dip. Melt ½ cup chocolate chips with ¼ cup heavy cream for a glossy finish. For savory versions, try spicy mayo with a dash of hot sauce. 🔥
Glaze Options
An egg wash before baking creates a golden sheen. I use 1 egg beaten with 1 tbsp water. For extra shine, brush with melted honey butter right after baking—this adds a subtle sweetness.
Fruit Compotes
Serve pie slices with a berry compote for vibrant contrast. Simmer 2 cups frozen berries with ¼ cup sugar until thickened. The tartness balances the crust’s richness beautifully.
Nutrition Facts
Frequently Asked Questions
Why use almond flour in the mix?
Almond flour adds tenderness and structure, mimicking wheat flour’s richness. It also improves flavor and helps create flaky layers when combined with cold butter.
Can I skip the resting time?
No—resting for at least 1 hour is critical. It lets the flour hydrate and the butter firm up, preventing a tough or crumbly crust. Overnight chilling yields even better results.
How do I prevent cracks when rolling?
Roll on a lightly floured surface and keep the dough cold. If cracks appear, press them gently with your fingers. Work quickly to avoid warming the butter.
What if my dough feels too dry?
Add ice water 1 tablespoon at a time until it just holds together. Overmixing can make it tough, so stop as soon as it forms a shaggy ball.

- Potato Candy Recipe 1933: Vintage Peanut Butter Roll Delight - October 30, 2026
- Potato Chip Cookie Recipe With Pecans: Buttery Crunch Meets Nutty Richness - October 30, 2026
- Potato Patty Recipe No Egg: Crispy Edges Without the Binder - October 30, 2026