
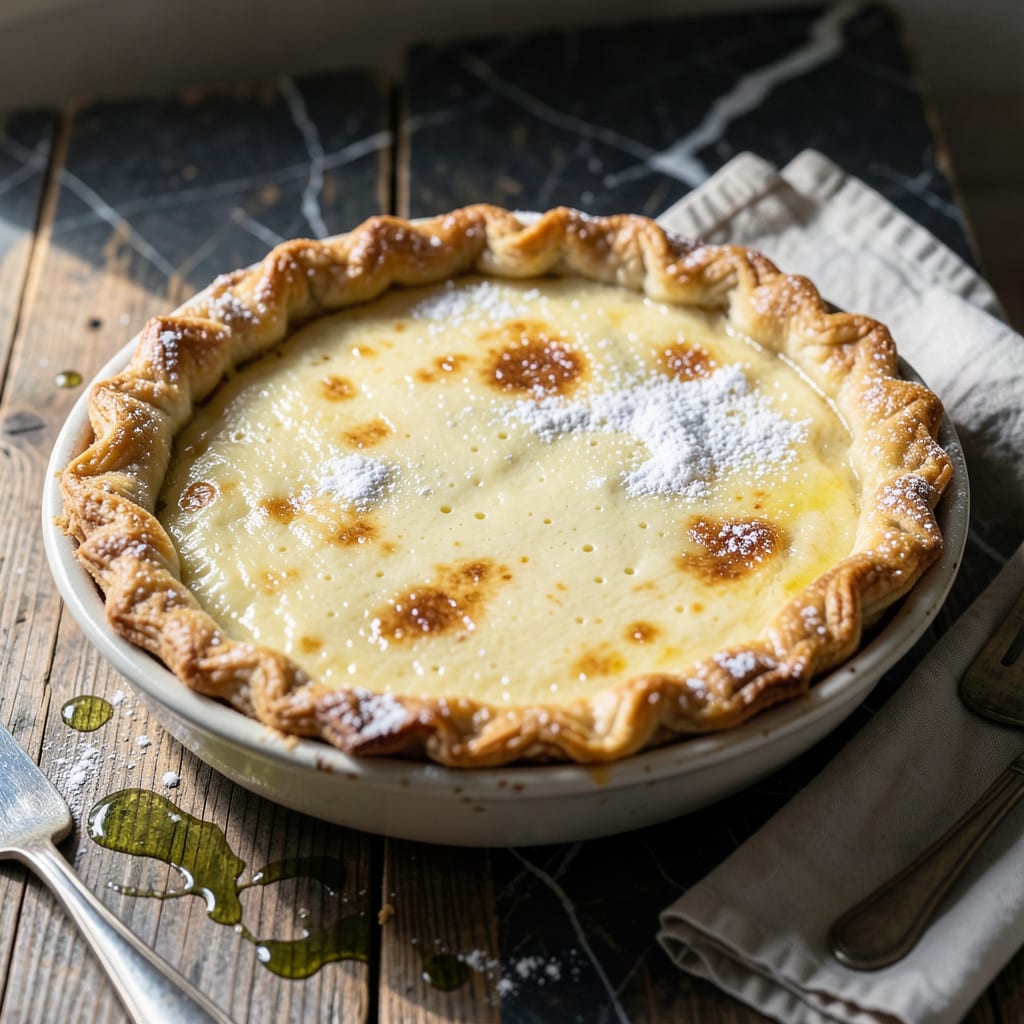
This custard pie delivers a perfect balance of sweetness and tang, with a texture that’s both creamy and light. I’ve refined the technique to ensure a smooth, jiggle-free filling every time.
With just a handful of pantry staples and 30 minutes of prep, you’ll have a restaurant-quality dessert that’s as simple as it is impressive. The buttermilk gives it that signature zing.
Ingredients for Pioneer Woman Buttermilk Pie
A handful of pantry basics creates this creamy, tangy custard pie with effortless elegance.
| Ingredient | Amount | Notes |
|---|---|---|
| All-Purpose Flour 🌾 | 1 ½ cups | Sifted for pie crust |
| Granulated Sugar 🍚 | 1 ½ cups | Divided for crust and filling |
| Unsalted Butter 🧈 | ½ cup | Chilled, cubed for crust |
| Ice Water 💧 | ¼ cup | For pie crust dough |
| Salt 🧂 | ½ tsp | Fine sea salt preferred |
| Large Eggs 🥚 | 3 whole | Room temperature for filling |
| Buttermilk 🥛 | 1 ½ cups | Full-fat for best tang |
| Vanilla Extract 🌿 | 1 tsp | Pure extract recommended |
| Baking Powder 🧂 | ¼ tsp | For filling structure |
| Nutmeg 🌰 | ¼ tsp | Freshly grated preferred |
| Lemon Zest 🍋 | 1 tsp | Freshly grated for brightness |
[recipeingredientscaler]
The buttermilk is non-negotiable here—full-fat from a trusted dairy like Organic Valley or local brands gives that signature tang. For the crust, cold butter and ice water are key to flakiness. I source my flour from King Arthur for consistency. The nutmeg should be freshly grated (those pre-ground jars lose potency fast). Don’t skip sifting the flour; it prevents dense crust.
No buttermilk? Stir 1 tbsp lemon juice or vinegar into regular milk and let sit 5 minutes. Out of fresh nutmeg? Ground nutmeg at half the amount works. The sugar can be swapped for light brown sugar (adds a caramel note). For extra richness, replace ¼ cup buttermilk with heavy cream. Eggs must be room temp—cold eggs won’t incorporate smoothly.
The pie keeps 3-4 days at room temp (covered) or 5 days refrigerated. Freeze sliced portions for up to 2 months. The crust can be prepped a day ahead—just wrap tightly. Best served slightly warm or at room temperature.
Why You’ll Love This Recipe
- No Fuss Crust: The ice water and butter come together so quickly I can roll it out before the coffee cools.
- Sweet-Salty Magic: That buttery crust with the tang of buttermilk filling? I’ll be real: it’s dangerously addictive.
- Crowd Pleaser: From Sunday dinner to potlucks, this pie disappears first every single time.
- Budget Winner: A handful of pantry staples and under $5—here’s what sold me—it feeds eight without breaking the bank.
Step-by-Step Instructions for Pioneer Woman Buttermilk Pie
Master the art of this custard pie with my tested method for perfect texture every time.
Step 1: Prepare the Pie Crust
In a food processor, pulse the 1.5 cups All-Purpose Flour with the 0.5 tsp Salt to combine. Add the 0.5 cup Unsalted Butter (chilled and cubed) and pulse until the mixture resembles coarse crumbs with pea-sized butter pieces visible.
With the processor running, drizzle in the 0.25 cup Ice Water through the feed tube, adding just enough so the dough begins to clump together. The moment it forms a cohesive mass, stop processing—overworking develops gluten and makes crust tough.
Turn the dough onto a lightly floured surface and shape it into a disk. Wrap in plastic and refrigerate for 30 minutes while you prepare the filling. This rest relaxes the gluten and prevents shrinking during baking.
Step 2: Roll and Blind-Bake the Crust
On a floured surface, roll the chilled dough to a 12-inch circle about ⅛-inch thick. Transfer to a 9-inch pie dish, pressing gently into the bottom and up the sides. Trim the edges, leaving a slight overhang, then crimp decoratively.
Line the crust with parchment paper and fill with pie weights or dried beans. Blind-bake at 375°F for 15 minutes until the edges just begin to turn light golden brown. Remove the weights and parchment, then bake for another 5 minutes to set the bottom.
This pre-baking prevents a soggy crust when you add the wet filling. The crust should be firm but not completely browned at this stage.
Step 3: Make the Buttermilk Filling
In a large bowl, whisk together the 1.5 cups Granulated Sugar and 3 whole Large Eggs until pale and slightly thickened—about 2 minutes of vigorous whisking. Add the 1.5 cups Buttermilk, 1 tsp Vanilla Extract, 0.25 tsp Baking Powder, 0.25 tsp Nutmeg, and 1 tsp Lemon Zest, whisking until completely smooth.
The filling should look like thin pancake batter. I always use full-fat buttermilk for its tangy richness—low-fat versions won’t deliver the same depth of flavor. The lemon zest adds a bright note that balances the sweetness.
Step 4: Bake the Pie to Custard Perfection
Pour the filling into the pre-baked crust. Bake at 350°F for 45-55 minutes, rotating the pie 180 degrees halfway through for even browning. The pie is done when the center is just set with a slight jiggle when gently shaken.
Don’t overbake—it will continue to set as it cools. You want the top to be golden brown with a few darker spots, but not cracked. If the edges brown too quickly, tent them with a pie shield or foil.
Step 5: Cool and Serve
Transfer the pie to a wire rack and let it cool completely at room temperature—about 2 hours. This cooling time is crucial for the custard to fully set. Serving it warm will result in a runny filling that won’t hold its slice.
Once cooled, the pie can be served immediately or refrigerated for up to 3 days. I prefer it slightly chilled. For the cleanest slices, use a sharp knife dipped in hot water and wiped clean between cuts. Each serving should have a flaky crust and creamy, tangy-sweet custard that’s firm but not dense.
Pro Tips For Making Pioneer Woman Buttermilk Pie
- Chill the Dough: After mixing the flour, butter, and ice water, pop the crust dough in the fridge for at least 30 minutes—I learned this the hard way after my first three pies shrunk like a deflated balloon.
- Use Cold Butter: Cut the unsalted butter into small cubes and keep it ice-cold until you mix it with the flour; sounds fussy, but it’s the only way to get that flaky crust the Pioneer Woman’s recipe is known for.
- Don’t Overmix: As soon as the dough comes together, stop mixing. Overworking it develops gluten, and you’ll end up with a tough crust instead of a tender, melt-in-your-mouth one.
- Blind Bake First: Pre-bake the crust for 8-10 minutes before adding the filling—this keeps the bottom from turning soggy, which is the #1 complaint I hear about buttermilk pies.
Best Sauces and Condiments for pioneer woman buttermilk pie
Classic Whipped Cream
Nothing beats fresh whipped cream with this pie. I whip 1 cup cold heavy cream with 2 tbsp powdered sugar and ½ tsp vanilla until soft peaks form. It adds a light, airy contrast to the dense custard filling. 💛
Berry Compote
A warm berry compote cuts through the sweetness beautifully. Simmer 2 cups mixed berries with ¼ cup sugar and 1 tsp lemon juice for 10 minutes until thickened. I love using fresh raspberries or blackberries for their tartness.
Caramel Drizzle
Store-bought caramel sauce works, but homemade is worth the effort. Melt 1 cup sugar until amber, then whisk in ½ cup warm cream and 2 tbsp butter. Drizzle over slices for a rich, buttery finish.
Citrus Glaze
For a bright, zesty touch, whisk 1 cup powdered sugar with 2-3 tbsp lemon juice until smooth. The acidity balances the pie’s sweetness, and it’s ready in 2 minutes. I often add a pinch of lemon zest for extra pop.
Spiced Honey
Drizzle with warmed honey infused with a dash of cinnamon or cardamom. Heat ½ cup honey with ¼ tsp ground cinnamon for 30 seconds in the microwave. It’s simple but elevates the pie with warm, aromatic notes.
Nutrition Facts
Frequently Asked Questions
Can I use store-bought crust instead of homemade?
Yes, a pre-made 9-inch pie crust works fine. Blind-bake it for 10-12 minutes at 375°F before adding the filling. Homemade offers better flakiness, but store-bought saves time.
Why did my pie crack on top?
Overbaking is the usual culprit. Pull it from the oven when the center still has a slight jiggle. Also, avoid opening the oven door too early, as temperature fluctuations can cause cracks.
How do I know when it’s fully set?
The center should be just firm with a gentle wobble, not liquid. A toothpick inserted near the center should come out clean. Let it cool 2 hours to finish setting.
Can I make this ahead of time?
Bake and cool completely, then refrigerate for up to 3 days. For longer storage, freeze slices for up to 2 months. Thaw overnight in the fridge.

- BBQ Sausage Recipe Oven: Smoky Depth Without the Grill - September 28, 2026
- BBQ Chicken Bowl Recipe Rice: Smoky Sweetness Over Fluffy Grains - September 28, 2026
- Beef Cutlet Recipe Ideas: Crispy Breaded Patties With Bold Seasonings - September 28, 2026