
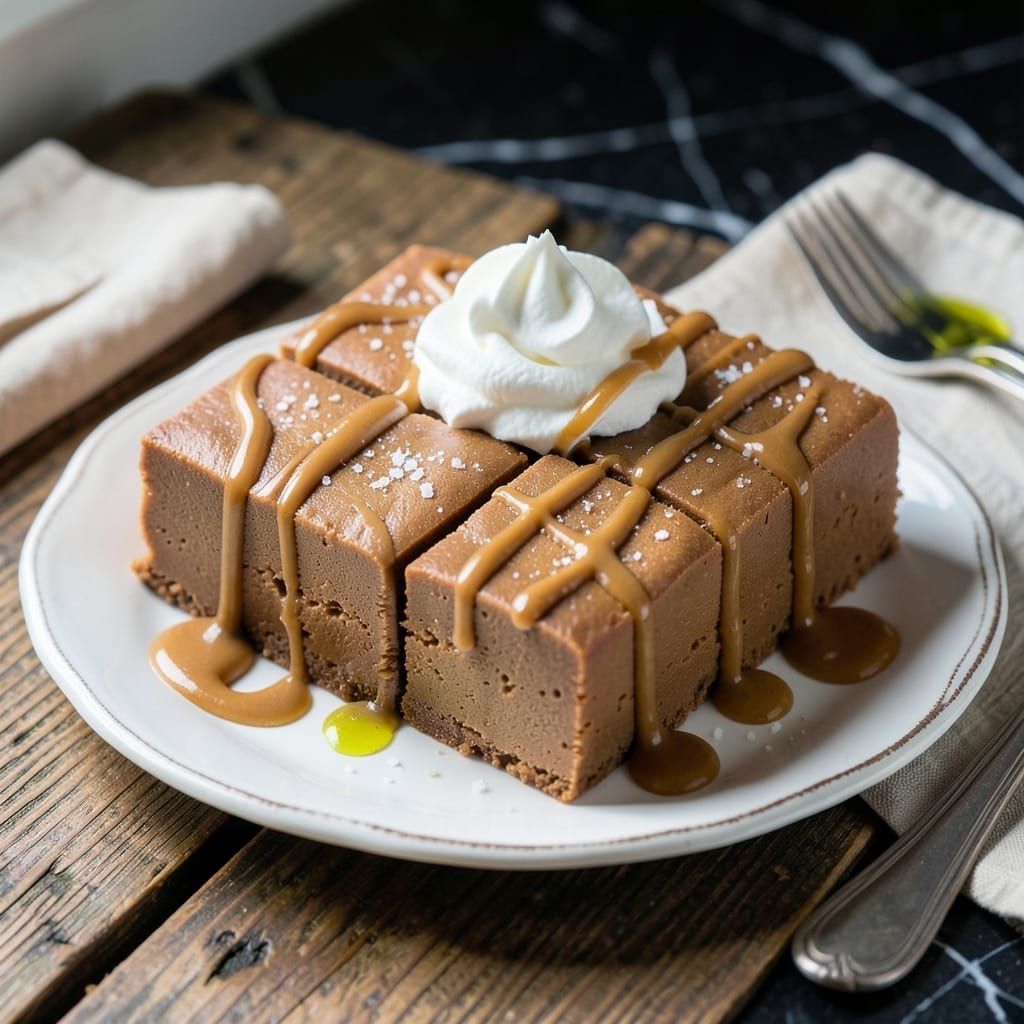
There’s nothing quite like homemade fudge that delivers that perfect balance of sweet and nutty. This recipe transforms simple ingredients into rich, decadent squares that melt in your mouth.
The secret lies in the precise combination of peanut butter, sugar, and butter, cooked to just the right temperature. I’ve tested this method countless times to ensure it sets with that ideal fudgy texture without turning grainy.
What you’ll get are smooth, creamy squares with a deep peanut butter flavor that’s impossible to resist. The addition of vanilla extract adds a subtle depth that elevates this classic treat.
Perfect for gifting or satisfying that sweet tooth, this fudge keeps well at room temperature for days. Here’s how to make it.
Ingredients for Pioneer Woman Peanut Butter Fudge
Rich peanut butter and sugar combine for melt-in-your-mouth indulgence every time.
| Ingredient | Amount | Notes |
|---|---|---|
| Peanut Butter 🥜 | 1 ½ cups | Creamy, not natural style |
| Granulated Sugar 🍚 | 2 cups | White sugar preferred |
| Unsalted Butter 🧈 | ½ cup | Cut into pieces for melting |
| Evaporated Milk 🥛 | 0.67 cup | 1 small can, about 5 oz |
| Vanilla Extract 🌿 | 1 tsp | Pure vanilla for best flavor |
| Marshmallow Fluff ⚪ | 1 cup | 7 oz jar standard size |
| Salt 🧂 | ¼ tsp | Balances sweetness perfectly |
| Chopped Peanuts 🥜 | ½ cup | Optional for texture topping |
The peanut butter is non-negotiable here. Jif or Skippy creamy give the smoothest texture—natural styles separate and can make the fudge oily. Butter matters too: unsalted lets you control the salt perfectly. I grab my evaporated milk at the regular grocery store (look for Carnation brand in the baking aisle). Don’t skimp on the vanilla—pure extract makes a noticeable difference.
No marshmallow fluff? Mini marshmallows melted with 1 tbsp milk works in a pinch. Want it nut-free? Skip the peanuts (or swap for sprinkles). Need a dairy-free version? Coconut milk swap for the evaporated milk and vegan butter work, but texture changes slightly. The sugar can’t be substituted—brown sugar adds moisture that throws off the set.
This keeps at room temp for 2 weeks in an airtight container (if it lasts that long). Freezes beautifully for 3 months—cut into squares first, then layer between parchment. The peanuts soften over time, so add them fresh if you’re gifting.
Why You’ll Love This Recipe
- One Pot Wonder: I love that this comes together in a single saucepan—just melt, stir, and pour.
- Rich PB Perfection: The combo of creamy peanut butter and vanilla gives that melt-in-your-mouth sweetness.
- Holiday Staple: I bring this to every cookie swap and it’s always the first to disappear.
- Budget Friendly: Five simple ingredients I already have on hand, and it makes a big batch.
Step-by-Step Instructions for Pioneer Woman Peanut Butter Fudge
Here’s the method. Straightforward, tested, works every time for the creamiest fudge.
Step 1: Melt and Combine the Base Ingredients
In a heavy-bottomed saucepan, melt the 0.5 cup Unsalted Butter over medium heat. I cut mine into pieces first so it melts evenly without scorching. Once melted, add the 2 cups Granulated Sugar and stir constantly until fully dissolved.
Pour in the 0.67 cup Evaporated Milk and continue stirring. You’ll see the mixture start to bubble vigorously—that’s your cue to keep stirring to prevent burning. This process should take about 4-5 minutes until the mixture reaches a full rolling boil.
Step 2: Achieve the Perfect Boiling Point
Once boiling, stop stirring and let the mixture cook undisturbed for exactly 4 minutes. This timing is crucial for achieving that ideal fudge consistency. If you stir during this time, you might cause sugar crystals to form, resulting in grainy fudge.
Watch for the mixture to turn a light caramel color and thicken slightly. The surface should look glossy and the bubbles will become smaller and more uniform. Remove from heat immediately after 4 minutes—any longer and your fudge might become too hard.
Step 3: Incorporate the Flavorful Additions
Working quickly, stir in the 1.5 cups Peanut Butter until completely smooth. I use creamy peanut butter for the best texture. The mixture will thicken noticeably as the peanut butter melts and combines with the hot sugar mixture.
Next, add the 1 cup Marshmallow Fluff, 1 tsp Vanilla Extract, and 0.25 tsp Salt. Stir vigorously for 1-2 minutes until the marshmallow fluff is fully incorporated and the mixture is uniform. The vanilla adds depth, while the salt balances the sweetness perfectly.
Step 4: Set and Finish with a Crunchy Topping
Pour the fudge mixture into a greased 8×8-inch baking dish. I line mine with parchment paper for easy removal. Use a spatula to smooth the top evenly. The fudge will still be quite warm and pourable at this stage.
Sprinkle the 0.5 cup Chopped Peanuts evenly over the top, pressing them in lightly so they adhere. These add a delightful crunch that contrasts beautifully with the creamy fudge. Let it cool at room temperature for 2 hours or until firm enough to cut into squares.
For the creamiest texture, I recommend cutting the fudge into 1-inch squares once it’s completely set. Store in an airtight container at room temperature for up to 1 week, though it rarely lasts that long!
Pro Tips For Making Pioneer Woman Peanut Butter Fudge
- Boil to Soft Ball: Use a candy thermometer and cook the sugar mixture to exactly 234-238°F—this is the soft-ball stage that guarantees smooth, creamy fudge every time. I learned this the hard way after ending up with grainy fudge from guessing the temperature.
- Use Creamy Peanut Butter: Skip the natural or chunky stuff for this recipe; creamy peanut butter blends seamlessly into the sugar mixture and gives that classic smooth texture. The oil separation in natural brands can mess with the consistency.
- Resist Early Stirring: Don’t stir the sugar mixture while it’s boiling, even if it looks uneven—this can cause sugar crystals to form and leave your fudge grainy. Just let it do its thing until it reaches temperature.
- Line the Pan First: Butter a 8×8-inch pan and line it with parchment paper before pouring the fudge in. It makes cutting clean squares a breeze and prevents sticking—sounds simple, but it’s the thing that matters most for presentation.
Make-Ahead Tips for pioneer woman peanut butter fudge
Prep Ahead Strategy
Measure all your ingredients the night before and store them in separate containers. I use small glass bowls for the peanut butter, sugar, and evaporated milk. This saves 10-15 minutes on cooking day and prevents last-minute scrambling. 💡
Parchment Prep
Line your 8×8-inch pan with parchment paper before starting. I cut a 12-inch square, fold it to fit, and leave overhang on all sides. This makes removal effortless and prevents sticking. The paper can stay in place for 24 hours without affecting texture.
Early Mixing
Combine the chopped peanuts with a pinch of salt in a small bag the day before. Shake to distribute evenly. This ensures your topping is ready to sprinkle immediately after pouring the hot fudge mixture.
Cooling Trick
Place your baking dish on a wire rack before pouring in the fudge. This allows air to circulate underneath, speeding up the cooling process by about 30 minutes. I often set mine near an open window for extra airflow.
Portion Control
Use a pizza cutter to score the fudge into squares after 1 hour of cooling. This makes final cutting cleaner and gives you perfect 1-inch pieces without guessing. The lines will disappear as it finishes setting.
Storage Prep
Have your airtight container ready with parchment between layers. I use a 2-quart plastic container with a snap-tight lid. This system keeps the fudge fresh for the full 2 weeks it can last at room temperature. 💛
Nutrition Facts
Frequently Asked Questions
Can I use natural peanut butter instead?
Natural peanut butter can separate and make the fudge oily. For best results, use creamy peanut butter like Jif or Skippy. Natural styles lack the stabilizers needed for smooth texture.
Why does my fudge turn grainy?
Graininess usually comes from sugar crystals forming. Avoid stirring during the 4-minute boil and ensure sugar fully dissolves before boiling. A candy thermometer helps maintain precise temperature.
How long does it take to set?
At room temperature, the fudge typically sets in 2 hours. For faster results, refrigerate for 1 hour, but let it sit at room temp for 15 minutes before cutting for cleanest squares.
Can I double the recipe?
Yes, but use a larger pan like 9×13-inch to maintain even thickness. Double all ingredients and extend the boiling time slightly. Watch closely to prevent burning.

- BBQ Sausage Recipe Oven: Smoky Depth Without the Grill - September 28, 2026
- BBQ Chicken Bowl Recipe Rice: Smoky Sweetness Over Fluffy Grains - September 28, 2026
- Beef Cutlet Recipe Ideas: Crispy Breaded Patties With Bold Seasonings - September 28, 2026