
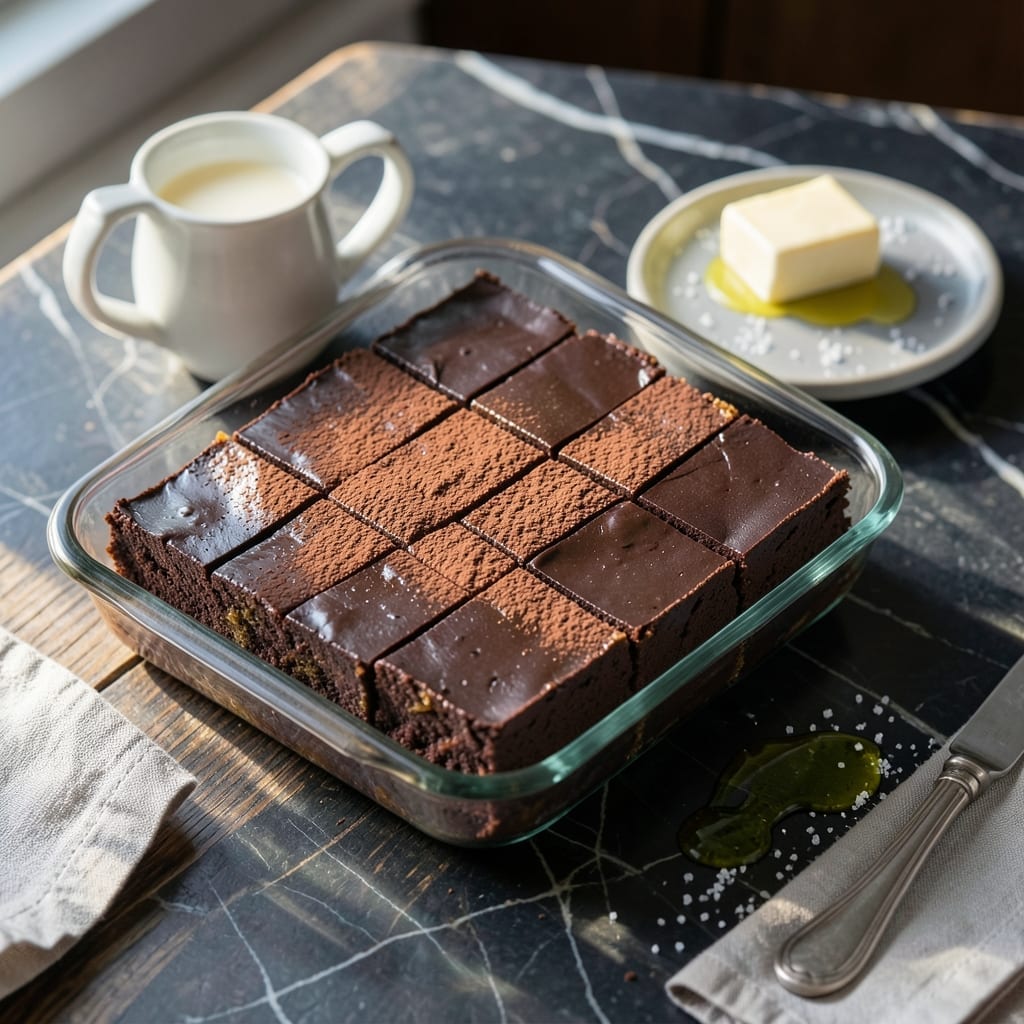
This rich chocolate sauce brings the nostalgic taste of soft-serve toppings to your kitchen with minimal effort. I’ve refined this recipe to achieve the signature thick, velvety texture that clings perfectly to ice cream or brownies.
The secret lies in balancing cocoa powder with just the right amount of sugar and butter, creating a sauce that’s deeply chocolatey without being overly sweet. A pinch of salt enhances the depth, making every bite taste more intense.
Use it warm for an indulgent drizzle or let it cool slightly for a decadent, spoonable topping. It keeps beautifully in the fridge for up to two weeks, ready to elevate any dessert.
Perfect for sundaes, milkshakes, or even as a dip for fresh fruit. This sauce delivers restaurant-quality flavor at home.
Ingredients for Dairy Queen Cocoa Fudge
Seven simple ingredients deliver that nostalgic soft-serve chocolate sauce you crave.
| Ingredient | Amount | Notes |
|---|---|---|
| Unsweetened Cocoa Powder 🍫 | ½ cup | Dutch-processed for smoother flavor |
| Granulated Sugar 🍚 | 1 cup | Fine white sugar preferred |
| Unsalted Butter 🧈 | ½ cup | Cut into small cubes |
| Evaporated Milk 🥛 | ½ cup | Canned, full-fat version |
| Vanilla Extract 🌿 | 1 tsp | Pure vanilla for best flavor |
| Salt 🧂 | ¼ tsp | Fine sea salt or table salt |
| Light Corn Syrup 🧴 | ¼ cup | Prevents crystallization |
The cocoa powder is key here. Hershey’s Special Dark (Dutch-processed) gives that deep, smooth flavor Dairy Queen is famous for. Most grocery stores carry it in the baking aisle. I grab mine from Walmart—consistent quality and always in stock. Don’t confuse it with natural cocoa; the Dutch kind dissolves better and tastes richer. Evaporated milk adds that creamy thickness without thinning the sauce.
No evaporated milk? Heavy cream at half the amount works in a pinch (but it’s richer). Out of corn syrup? Honey or agave can substitute, though the texture might differ slightly. Using salted butter? Skip the added salt—it’ll be plenty salty already. For a darker chocolate flavor, bump the cocoa up by a tablespoon and reduce sugar by the same.
This keeps in the fridge for 2 weeks easy—store it in a sealed jar. Reheat gently in the microwave or a saucepan with a splash of milk to thin if needed. Freezes for 3 months, but honestly it never lasts that long here.
Why You’ll Love This Recipe
- One Pot Magic: I just melt butter, cocoa, and sugar together—no fancy equipment, no fuss. Honestly, it’s easier than baking cookies.
- Rich Chocolate Fix: That deep cocoa flavor with vanilla’s warmth? It’s like biting into a Dairy Queen Blizzard in fudge form.
- Gift-Worthy Treats: I pack these in little boxes for teachers, neighbors, or a last-minute dessert swap. Between us, they disappear fast.
- Pantry Staples Only: No special trips to the store. I always have cocoa, sugar, and butter on hand—so I can whip this up on a whim.
Step-by-Step Instructions for Dairy Queen Cocoa Fudge
This method delivers smooth, rich chocolate sauce with minimal effort and maximum flavor.
Step 1: Melt Butter and Combine Dry Ingredients
In a medium saucepan, melt the 0.5 cup Unsalted Butter over medium heat. I cut mine into small cubes first so it melts evenly without burning. Watch for the foaming to subside—that’s your signal it’s ready.
While the butter melts, whisk together the 0.5 cup Unsweetened Cocoa Powder, 1 cup Granulated Sugar, and 0.25 tsp Salt in a separate bowl. The Dutch-processed cocoa gives that signature smooth flavor. Make sure there are no lumps before adding to the butter.
Step 2: Add Wet Ingredients and Bring to Boil
Gradually whisk the cocoa mixture into the melted butter until smooth. Then stir in the 0.5 cup Evaporated Milk and 0.25 cup Light Corn Syrup. The corn syrup is key here—it prevents the sugar from crystallizing and gives that glossy finish.
Increase heat to medium-high and bring the mixture to a full rolling boil, stirring constantly with a wooden spoon. You’ll notice the mixture thicken slightly as it heats. This usually takes about 3-5 minutes.
Step 3: Simmer to Perfect Consistency
Once boiling, reduce heat to maintain a gentle boil and let it cook undisturbed for exactly 5 minutes. I set a timer for this—it’s easy to get distracted and overcook. Stir occasionally to prevent sticking.
The sauce should look thick and glossy, coating the back of a spoon. If it seems too thin, let it boil for another 1-2 minutes, but don’t walk away. Chocolate can burn quickly at this stage.
Step 4: Finish with Vanilla and Cool
Remove the saucepan from heat and stir in the 1 tsp Vanilla Extract. The pure vanilla really shines in this simple recipe. The sauce will bubble up quite a bit when you add it—this is normal.
Let the fudge sauce cool for 10-15 minutes before transferring to a jar. It will thicken further as it cools. Real talk: it’s hard to wait, but the flavor develops beautifully during this time. Stir once more before serving to redistribute any butter that might have separated.
Pro Tips For Making Dairy Queen Cocoa Fudge
- Boil to Soft Ball: Cook the sugar, cocoa, butter, and evaporated milk mixture to 234°F on a candy thermometer—this is the soft-ball stage, and it’s non-negotiable for that classic Dairy Queen texture.
- Use Full-Fat Evaporated Milk: Skip the low-fat version; the richness of full-fat evaporated milk gives the fudge its creamy, melt-in-your-mouth quality.
- Resist Stirring While Boiling: I learned this the hard way—stirring after the mixture starts boiling can cause sugar crystals to form, leading to grainy fudge.
- Add Vanilla Off Heat: Stir in the vanilla extract only after removing the pot from the heat to preserve its flavor—high heat can make it taste bitter.
Serving Suggestions for dairy queen cocoa fudge
Classic Sundae Style
Drizzle 2-3 tablespoons of warm fudge sauce over vanilla soft-serve or scooped ice cream. The contrast between the cold cream and hot sauce creates that nostalgic Dairy Queen experience. I always add a few chopped pecans for crunch. 💛
Brownie Affogato
Pour ¼ cup of hot sauce over a warm brownie in a bowl, then add a scoop of ice cream on top. The sauce soaks into the brownie while melting the ice cream. Sea salt flakes sprinkled on top take it to another level.
Fruit Dip Platter
Serve slightly cooled sauce in a small bowl for dipping. Strawberries, banana slices, and pretzel rods all pair wonderfully. I find room temperature sauce has the best dipping consistency.
Milkshake Boost
Blend 2 tablespoons of fudge sauce into vanilla milkshakes for intense chocolate flavor. It’s also incredible swirled into chocolate milk for a quick treat. The sauce adds thickness and depth to any cold drink.
Cake Glaze
Thin the sauce slightly with 1-2 teaspoons milk and drizzle over pound cake or bundt cake. Let it set for 5 minutes before slicing. This works beautifully for angel food cake too.
Breakfast Treat
Drizzle over pancakes or waffles instead of syrup for a decadent morning indulgence. Pair with fresh berries to balance the richness. I confess this might be my favorite use. ✨
Nutrition Facts
Frequently Asked Questions
Can I use natural cocoa powder instead of Dutch-processed?
Natural cocoa works but may taste slightly sharper. Dutch-processed gives the smooth, rich flavor you expect. If substituting, add 1/8 tsp baking soda to neutralize acidity.
Why does my sauce turn grainy?
Graininess usually means the sugar crystallized. Prevent this by stirring constantly while boiling and using corn syrup as directed. If it happens, add 1-2 tsp hot water and whisk vigorously.
How do I thin the sauce after refrigeration?
Microwave in 10-second bursts or warm in a saucepan with 1 tsp milk per ¼ cup sauce. Stir well between heating. It’s ready when it drizzles smoothly.
Can I make this sauce dairy-free?
Yes! Swap butter for coconut oil and evaporated milk for coconut milk. Use dairy-free chocolate if needed. The texture will be slightly different but still delicious.

- BBQ Sausage Recipe Oven: Smoky Depth Without the Grill - September 28, 2026
- BBQ Chicken Bowl Recipe Rice: Smoky Sweetness Over Fluffy Grains - September 28, 2026
- Beef Cutlet Recipe Ideas: Crispy Breaded Patties With Bold Seasonings - September 28, 2026