
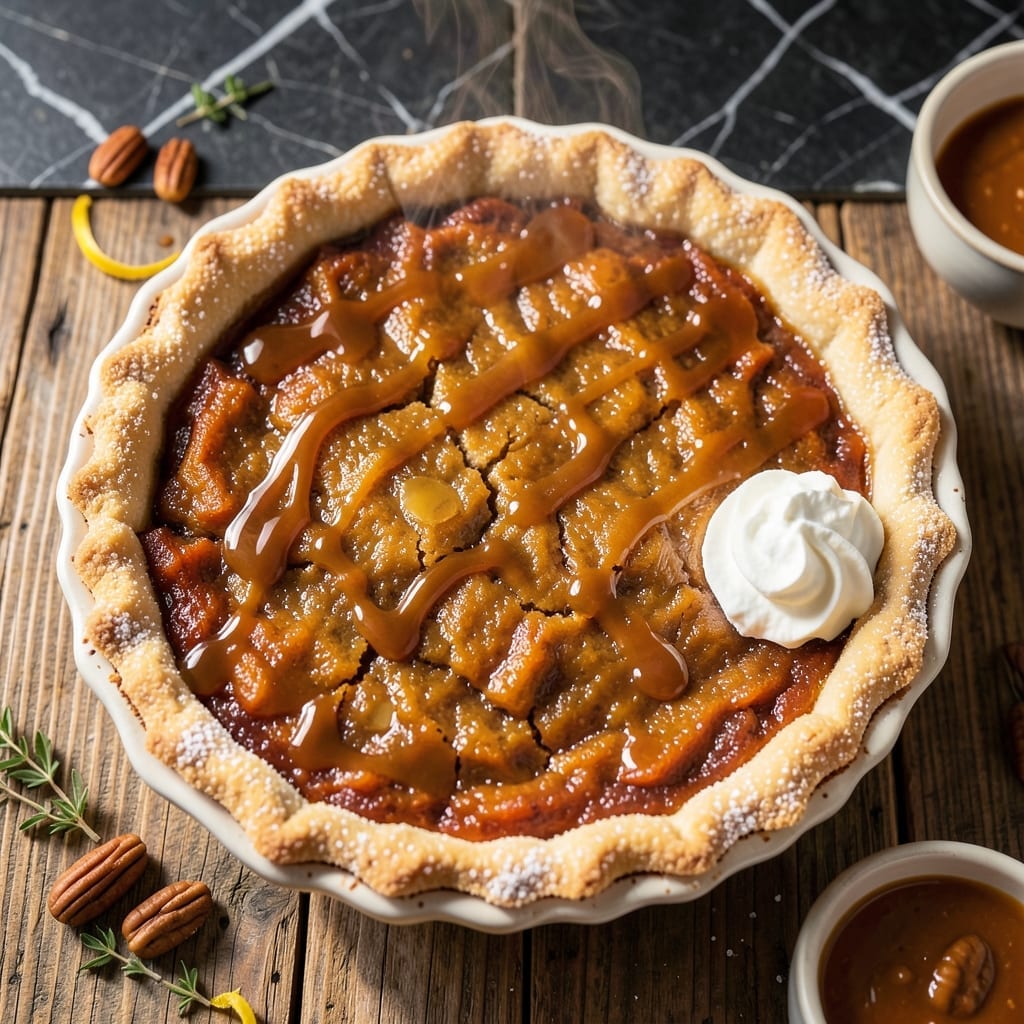
There’s nothing quite like a homemade sweet potato pie, with its velvety spiced filling and buttery crust that flakes at the touch. This from-scratch version captures the warmth of fall in every bite, built on simple ingredients and a foolproof method.
I’ve perfected the balance between sweet and spice, ensuring the filling stays rich without being cloying. The crust is tender yet sturdy enough to hold its own against the thick, creamy center. It’s the kind of dessert that feels nostalgic and impressive all at once.
Every slice delivers a perfectly spiced custard with a golden, crackly top. The homemade crust adds a buttery depth that store-bought simply can’t match. It’s a pie worth the effort, from the first roasted sweet potato to the final fluted edge.
Serve it warm or chilled—either way, it’ll be the star of your dessert table. Here’s how to make it right.
Ingredients for Pioneer Woman Sweet Potato Pie Recipe from Scratch
Homemade crust and velvety filling come together with pantry staples and a few fresh ingredients.
| Ingredient | Amount | Notes |
|---|---|---|
| Sweet Potatoes 🍠 | 2 ½ lb | Peeled and cubed for roasting |
| All-Purpose Flour 🌾 | 1 ½ cups | Plus extra for dusting surface |
| Unsalted Butter 🧈 | 1 cup | Cold and cubed for crust |
| Granulated Sugar 🍚 | 1 cup | Divided for filling and crust |
| Light Brown Sugar 🟤 | ½ cup | Packed for filling sweetness |
| Large Eggs 🥚 | 3 whole | Beaten for custard filling |
| Evaporated Milk 🥛 | 1 can | 12 oz can for creamy texture |
| Ground Cinnamon 🌿 | 1 ½ tsp | Fresh for warm spice flavor |
| Ground Nutmeg 🌰 | ½ tsp | Freshly grated preferred |
| Ground Ginger 🌿 | ½ tsp | For depth of spice |
| Salt 🧂 | ½ tsp | Divided for balance |
| Pure Vanilla Extract 🌿 | 1 tsp | For aromatic depth |
| Ice Water 💧 | ¼ cup | For flaky crust texture |
The sweet potatoes are the foundation here. Look for firm, deep orange ones—they roast up sweeter and creamier. Most grocery stores carry them year-round, but Trader Joe’s has a great organic option. The butter should be high-quality (I like Plugrá or Kerrygold), and keep it cold until you’re ready to use it. For the flour, all-purpose is standard, but a 50/50 mix with white whole wheat adds a nice nuttiness (worth a try).
Out of evaporated milk? Whole milk simmered down to 1 cup works in a pinch. No fresh nutmeg? Pre-ground at half the amount is fine. The spices can be adjusted to taste—add a pinch of cloves if you like complexity. For a richer filling, swap the brown sugar for maple syrup (use 2/3 cup). The crust can handle substitutions too—shortening for half the butter makes it extra flaky.
The pie keeps beautifully at room temperature for 2 days, or refrigerate for up to 5 days. Freeze slices (wrapped tightly) for 3 months. The crust can be made ahead—just keep it chilled until ready to roll. Leftovers taste even better the next day (if they last that long).
Why You’ll Love This Recipe
- Foolproof Steps: I love that I can roast the sweet potatoes ahead—just mash and mix with butter and sugars when ready.
- Rich Caramel Notes: The combo of granulated and light brown sugar gives it that deep, molasses-kissed sweetness.
- Holiday Starter: This pie’s my go-to for Thanksgiving, but honestly, it’s just as good on a random Sunday.
- Budget Winner: Sweet potatoes are cheap, and one pie feeds eight. Here’s what sold me—no fancy ingredients, just pantry staples.
Step-by-Step Instructions for Pioneer Woman Sweet Potato Pie From Scratch
This method delivers a flaky crust and velvety filling with warm spices in every bite.
Step 1: Prepare and Roast the Sweet Potatoes
Preheat your oven to 400°F. Peel the 2.5 lb Sweet Potatoes and cut them into 1-inch cubes. Spread them on a baking sheet lined with parchment paper, drizzle with a little oil, and roast for 25-30 minutes until tender and slightly caramelized.
You want the sweet potatoes soft enough to mash easily with a fork. Roasting deepens their natural sweetness and adds a subtle caramelized flavor that enhances the pie filling. Remove from the oven and let them cool slightly before mashing.
Step 2: Make the Homemade Pie Crust
In a large bowl, combine the 1.5 cups All-Purpose Flour and ½ tsp Salt. Cut in the 1 cup Unsalted Butter, which should be cold and cubed, using a pastry cutter or your fingers until the mixture resembles coarse crumbs with pea-sized butter pieces.
Gradually add the ¼ cup Ice Water, one tablespoon at a time, mixing just until the dough comes together. Overworking the dough will make it tough, so stop as soon as it holds when pressed. Shape into a disk, wrap in plastic, and chill for 30 minutes.
Step 3: Prepare the Spiced Filling
In a large mixing bowl, mash the roasted Sweet Potatoes until smooth. Add the 1 cup Granulated Sugar, ½ cup Light Brown Sugar, 1.5 tsp Ground Cinnamon, ½ tsp Ground Nutmeg, ½ tsp Ground Ginger, and remaining salt. Mix well to combine.
Stir in the 3 whole Large Eggs, 1 can Evaporated Milk, and 1 tsp Pure Vanilla Extract until the filling is silky and fully incorporated. The spices should be evenly distributed, and the mixture should have a rich, orange hue.
Step 4: Assemble and Bake the Pie
On a lightly floured surface, roll out the chilled pie crust to a 12-inch circle and transfer it to a 9-inch pie dish. Trim and crimp the edges, then pour in the sweet potato filling. The crust should be evenly pressed into the dish without stretching.
Bake at 350°F for 50-60 minutes until the filling is set and the crust is golden brown. A knife inserted near the center should come out clean. If the edges brown too quickly, cover them with aluminum foil.
Let the pie cool completely on a wire rack for at least 2 hours before slicing. This allows the filling to set fully and makes for cleaner slices.
Pro Tips For Making Pioneer Woman Sweet Potato Pie Recipe From Scratch
- Roast the Potatoes: Skip boiling—roast your sweet potatoes at 400°F until caramelized (about 45-60 minutes). I learned this the hard way: boiling makes them watery and dilutes the flavor, while roasting concentrates the natural sweetness.
- Brown the Butter: Melt the unsalted butter in a saucepan over medium heat until it turns golden and nutty (about 5-7 minutes). Sounds weird, but it works—this adds a deep, toasty richness to the filling that plain butter just can’t match.
- Don’t Overmix: Once you add the flour to the pie crust, mix just until it comes together. After burning three batches of tough crust, I finally figured out that overworking the dough makes it dense instead of flaky.
- Use Room-Temp Sugar: Let the granulated and light brown sugar sit out for 10-15 minutes before mixing. My grandmother swore by this, and she was right: room-temperature sugar blends more evenly into the filling, so you won’t get grainy pockets.
Essential Equipment for Perfect Results
Pie Dish Essentials
For a classic 9-inch pie, I recommend a glass or ceramic dish—they conduct heat evenly and let you monitor the crust’s browning. My go-to is the Pyrex 9-inch pie plate; it’s durable and budget-friendly at around $10. 💛
Pastry Tools
A pastry cutter makes quick work of blending cold butter into flour. I use the OXO Good Grips model—its comfortable handle and sharp blades cut through butter effortlessly. For rolling, a French-style rolling pin without handles gives you better control over the dough thickness.
Mixing Bowls
You’ll need at least two bowls: one for the crust and one for the filling. I prefer stainless steel mixing bowls with non-slip bases—they’re lightweight yet sturdy. A 3-quart bowl works perfectly for the filling, giving you plenty of room to mix without spills.
Measuring Accuracy
Precision matters in baking, so invest in a good set of measuring cups and spoons. I swear by Cuisinox stainless steel—they’re durable and nest neatly for storage. For the evaporated milk, a liquid measuring cup with clear markings ensures accuracy.
Cooling Rack
A wire cooling rack is essential for letting air circulate under the pie as it cools. This prevents the crust from becoming soggy. I use a simple stainless steel rack that fits over my countertop—it’s a small investment that makes a big difference. 💡
Bonus Gadgets
While not essential, a pie crust shield (around $8) prevents over-browning on the edges. A food processor can also speed up crust prep, though I prefer the control of doing it by hand. These little helpers can make the process even smoother.
Nutrition Facts
Frequently Asked Questions
Can I use canned sweet potatoes instead of fresh?
Yes, but drain and rinse them well first. Use 2 15-oz cans to replace 2.5 lb fresh. The texture may be slightly softer, but the flavor stays delicious.
Why did my filling crack on top?
This happens when the pie cools too quickly. Let it cool gradually at room temperature for 2 hours before refrigerating. A water bath during baking also helps prevent cracks.
Can I make the crust ahead of time?
The dough can be made and chilled for up to 2 days or frozen for 1 month. Thaw in the fridge overnight before rolling. This actually improves flavor and texture!
How do I know when it’s fully baked?
Insert a knife near the center—it should come out clean. The filling should jiggle slightly but not be liquid. Bake for 50-60 minutes at 350°F.

- Potato Candy Recipe 1933: Vintage Peanut Butter Roll Delight - October 30, 2026
- Potato Chip Cookie Recipe With Pecans: Buttery Crunch Meets Nutty Richness - October 30, 2026
- Potato Patty Recipe No Egg: Crispy Edges Without the Binder - October 30, 2026