
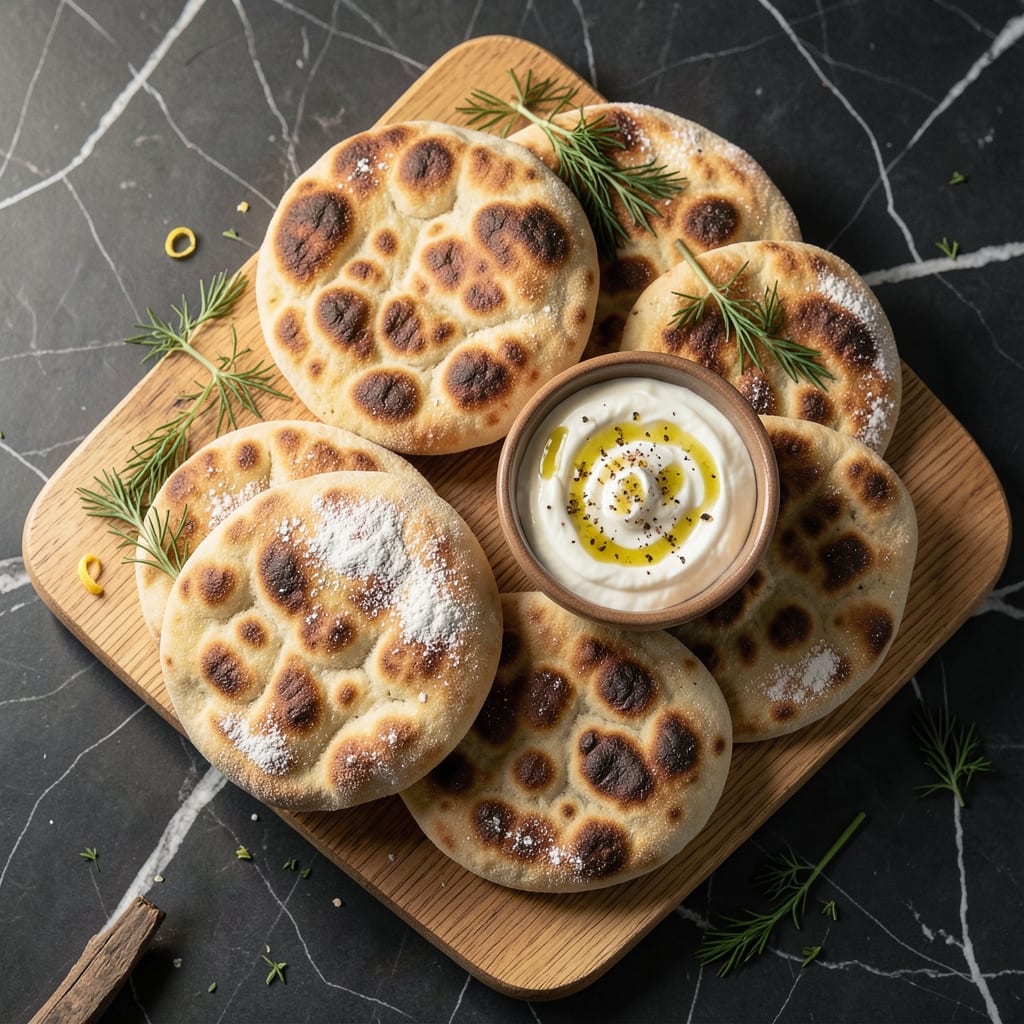
Making fresh pita at home is simpler than you think, and this method using Greek yogurt delivers exceptionally soft, pillowy results.
I discovered this technique while experimenting with leftover yogurt, and the tangy addition creates a more tender texture than traditional recipes.
The dough comes together quickly with basic pantry staples, and requires just 30 minutes of resting time before shaping.
You’ll end up with perfectly puffed flatbreads that stay soft for days, ideal for stuffing or serving with dips.
Ingredients for Pita Bread Recipe with Greek Yogurt
Just eight simple ingredients transform into warm, pillowy pita bread right at home.
| Ingredient | Amount | Notes |
|---|---|---|
| All-Purpose Flour 🌾 | 3 cups | Plus extra for dusting |
| Plain Greek Yogurt 🥛 | ¾ cup | Full-fat for best texture |
| Warm Water 💧 | ½ cup | Approximately 110°F |
| Active Dry Yeast 🍞 | 2 ¼ tsp | One 0.25 oz package |
| Granulated Sugar 🍚 | 1 tsp | To activate yeast |
| Olive Oil 🫒 | 2 tbsp | Extra-virgin preferred |
| Salt 🧂 | 1 tsp | Fine sea salt |
| Baking Powder 🧂 | 1 tsp | For extra lift |
| Honey 🍯 | 1 tbsp | Optional for sweetness |
The Greek yogurt is the game-changer here. Full-fat Fage or Chobani gives that tender, stretchy texture you want. I grab mine from Whole Foods or any grocery store with a good dairy section. Look for yogurt with live cultures—it’s not just for your gut, it helps the dough rise. The flour? Basic all-purpose is perfect (no need for bread flour). Just make sure it’s fresh, not that old dusty bag in the back of your pantry.
No Greek yogurt? Regular plain yogurt at the same amount works in a pinch, but drain it in a cheesecloth first to thicken it up. Out of honey? Maple syrup or sugar keeps it vegetarian. The olive oil can be swapped for any neutral oil, but don’t skip it—the fat keeps the pita soft. If your yeast is old, test it in the warm water with sugar first (should bubble within 5 minutes).
The dough rests for 30 minutes, so plan accordingly. Baked pitas keep 2-3 days in a sealed bag at room temp, or freeze for 1 month. Reheat in a dry skillet to refresh that just-baked warmth (the microwave makes them gummy, so avoid it).
Why You’ll Love This Recipe
- No-Fuss Dough: I mix the flour, yogurt, and warm water, and the yeast does the rest—no kneading, no stress.
- Tangy Softness: The Greek yogurt gives it that subtle tang and makes the pita so tender it tears like a dream.
- Freezer Friendly: I double the batch and freeze extras—they reheat in seconds for impromptu gyros or dips.
- Pocket Perfection: Between us, these puff up every time, creating the perfect pocket for stuffing with anything I have on hand.
Step-by-Step Instructions for Pita Bread With Greek Yogurt
Here’s how I make perfectly soft, pillowy flatbreads every time.
Step 1: Activate the Yeast
In a small bowl, combine the 2.25 tsp Active Dry Yeast, 1 tsp Granulated Sugar, and 0.5 cup Warm Water. The water should be approximately 110°F—any hotter and you’ll kill the yeast, any cooler and it won’t activate properly.
Let this mixture sit for 5-7 minutes until it becomes frothy and bubbly. This visual confirmation means the yeast is alive and ready to work. If you don’t see bubbles, your yeast may be expired—start over with fresh yeast.
Step 2: Mix and Knead the Dough
In a large bowl, combine the 3 cups All-Purpose Flour, 1 tsp Salt, and 1 tsp Baking Powder. Make a well in the center and add the 0.75 cup Plain Greek Yogurt, 2 tbsp Olive Oil, 1 tbsp Honey, and the activated yeast mixture.
Stir with a wooden spoon until a shaggy dough forms, then turn it out onto a lightly floured surface. Knead for 8-10 minutes until the dough is smooth and elastic. It should spring back slowly when pressed with your finger.
The Plain Greek Yogurt adds tenderness while the Baking Powder gives extra lift. Don’t be tempted to add more flour—the dough should be slightly tacky but not sticky.
Step 3: Let the Dough Rise
Place the dough in a lightly oiled bowl, cover with a damp towel, and let rise in a warm place for 1-2 hours or until doubled in size. I like to turn my oven on to its lowest setting for 2 minutes, then turn it off and place the bowl inside.
You’ll know it’s ready when it’s puffy and a finger pressed gently into the dough leaves a slight indentation. The Active Dry Yeast and Granulated Sugar work together to create a light, airy texture.
Step 4: Shape and Rest the Pitas
Divide the risen dough into 8 equal portions and roll each into a ball. On a lightly floured surface, roll each ball into a ¼-inch thick circle, about 6 inches in diameter. The dough might resist at first—let it rest for 2 minutes between rolls if it springs back.
Place the rolled pitas on a floured surface, cover with a towel, and let rest for 15-20 minutes. This final rest relaxes the gluten, making the pitas easier to roll thin and preventing them from shrinking during cooking.
Step 5: Cook the Pitas
Heat a cast iron skillet or griddle over medium-high heat until very hot. You’ll know it’s ready when a drop of water sizzles and evaporates immediately. Cook one pita at a time for 1-2 minutes per side until puffed and light golden brown in spots.
Press down gently with a spatula if the pita isn’t puffing. The Olive Oil in the dough helps create those beautiful charred spots. Transfer to a clean towel and cover to keep warm while cooking the remaining pitas.
Serve warm—they’ll stay soft for hours but are best straight from the pan. The Honey adds a subtle sweetness that balances the tang of the Plain Greek Yogurt beautifully.
Pro Tips For Making Pita Bread Recipe With Greek Yogurt
- Test the Yeast: Always proof your yeast in the warm water with sugar first—if it doesn’t bubble within 5 minutes, your pita won’t rise. I learned this the hard way after wasting a whole batch of yogurt dough.
- Use Thick Yogurt: Drain your Greek yogurt in a strainer for 10 minutes if it’s runny, or the dough will be sticky and hard to roll. Sounds tedious, but it saves you from adding extra flour later.
- Roll Evenly Thin: Aim for ¼-inch thickness when rolling the dough—any thicker and your pitas won’t puff properly in the pan. My first few looked like tortillas until I got the hang of it.
- Heat the Pan First: Get your skillet or griddle screaming hot before adding the pita—about 30 seconds per side on medium-high does the trick. A cool pan means flat, sad bread.
Wine and Beer Pairings for These Flavors
Crisp White Wines
A dry Assyrtiko from Santorini offers citrus notes that complement the yogurt’s tang. I also love Sauvignon Blanc from New Zealand—its grassy acidity cuts through the richness beautifully. 🍷
Light Beers
A Hefeweizen with its banana and clove notes pairs surprisingly well. For something crisper, try a Greek Mythos lager—its clean finish won’t overpower the pita’s delicate flavor.
Mediterranean Whites
Retsina from Greece might sound unusual, but its piney resin notes actually work. The Vermentino from Sardinia is another excellent choice with its bright minerality. 🌟
Non-Alcoholic Options
A sparkling water with lemon or cucumber makes a refreshing pairing. Iced mint tea with a squeeze of honey echoes the yogurt’s tang while cleansing your palate.
Nutrition Facts
Frequently Asked Questions
Can I use regular yogurt instead of Greek?
Yes, but drain it first. Regular yogurt has more moisture, so strain it through cheesecloth for 15 minutes to thicken. The texture won’t be identical, but it will still work well.
Why did my pita not puff up?
Usually, the dough needs more rest or the skillet isn’t hot enough. Ensure your pan is at medium-high heat and press gently with a spatula to encourage puffing.
How do I store leftovers?
Keep in an airtight container at room temperature for 2-3 days. To revive, warm in a dry skillet for 30 seconds per side. Avoid the microwave, as it makes them soggy.

- Potato Candy Recipe 1933: Vintage Peanut Butter Roll Delight - October 30, 2026
- Potato Chip Cookie Recipe With Pecans: Buttery Crunch Meets Nutty Richness - October 30, 2026
- Potato Patty Recipe No Egg: Crispy Edges Without the Binder - October 30, 2026