
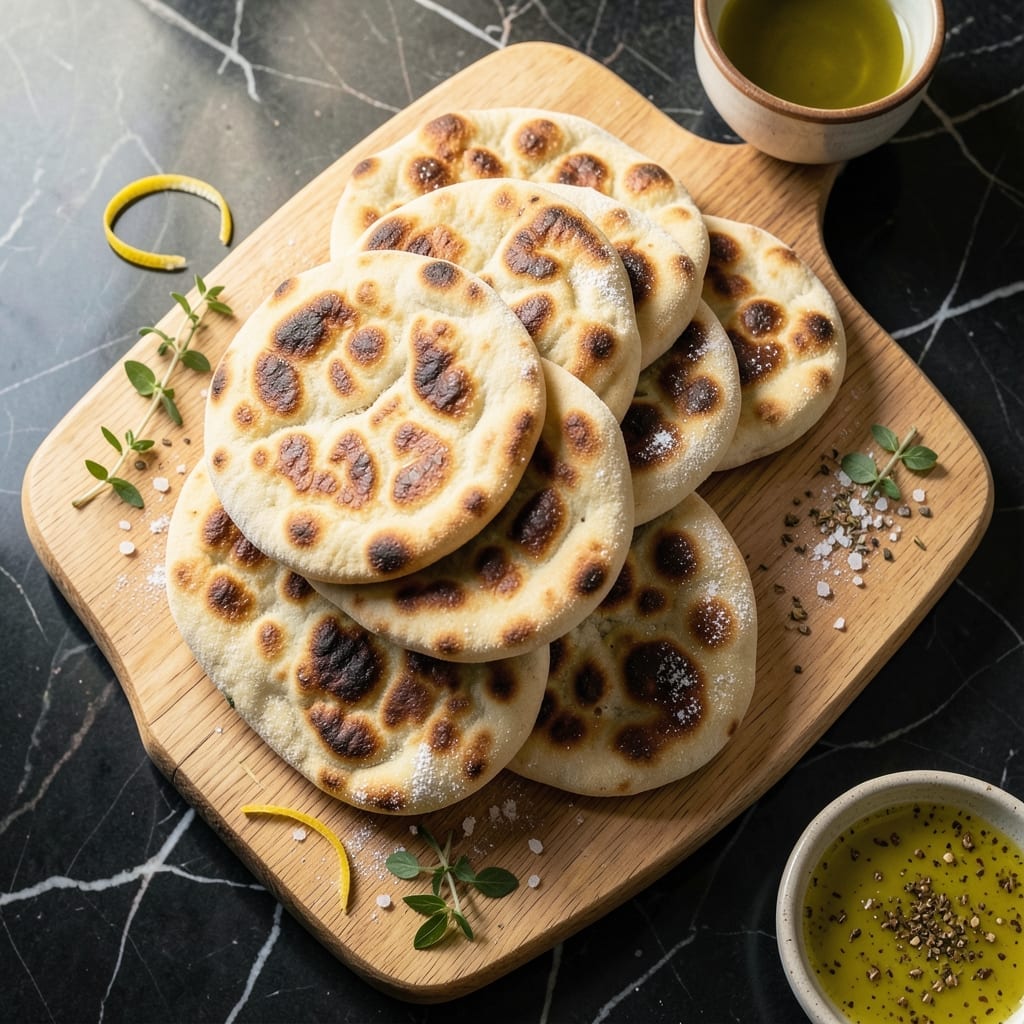
I developed this yeast-free pita recipe after years of testing quick flatbread alternatives in professional kitchens. The secret lies in a precise balance of baking powder and baking soda to create that signature pillowy texture without traditional fermentation.
This method delivers soft, chewy flatbreads with just a few pantry staples and 10 minutes of active preparation. The dough comes together quickly and rests briefly before shaping, making it ideal for last-minute meals.
Each bite offers the familiar warmth and slightly chewy resistance of classic pita, with a golden exterior that puffs beautifully. The absence of yeast means no waiting for rising—just mix, rest, and cook.
Perfect for dipping, stuffing, or serving alongside your favorite dishes. The results speak for themselves.
Ingredients for Pita Recipe Without Yeast
A handful of pantry staples transforms into warm, pillowy flatbreads in minutes.
| Ingredient | Amount | Notes |
|---|---|---|
| All-Purpose Flour 🌾 | 3 cups | Plus extra for dusting |
| Baking Powder 🧂 | 2 tsp | Ensures proper rise |
| Baking Soda 🧂 | ½ tsp | Balances acidity |
| Salt 🧂 | 1 tsp | Fine sea salt preferred |
| Olive Oil 🫒 | 2 tbsp | Extra-virgin for richness |
| Warm Water 💧 | 1 cup | About 110°F |
| Granulated Sugar 🧈 | 1 tsp | Optional for slight sweetness |
| Garlic Powder 🧄 | ½ tsp | For subtle flavor |
| Dried Oregano 🌿 | ½ tsp | Optional herb addition |
| Vegan Yogurt 🥣 | ¼ cup | Unsweetened, for tenderness |
The flour is the foundation here—King Arthur or Bob’s Red Mill all-purpose deliver consistent results. Baking powder and baking soda must be fresh (check expiration dates) or the pitas won’t puff properly. I source my spices from Penzeys for maximum potency, but any well-stocked supermarket works. The olive oil should be high-quality extra-virgin for both flavor and texture.
No vegan yogurt on hand? Unsweetened almond milk with a teaspoon of vinegar works as a substitute. Short on all-purpose flour? Bread flour at a 1:1 ratio adds chew, but the texture will be slightly denser. The warm water temperature is critical—too hot kills the leavening, too cold prevents activation. A quick 110°F is ideal (warm but not scalding).
Store dry ingredients in airtight containers at room temperature for up to 6 months. The dough can rest in the fridge for 24 hours if you prep ahead. Cooked pitas keep in a sealed bag for 3 days—reheat in a dry skillet to restore softness.
Why You’ll Love This Recipe
- No Yeast Needed: I love that I can skip the waiting around for dough to rise—just mix, shape, and cook.
- Warm, Toasty Flavor: The olive oil and a pinch of salt give these pitas that cozy, bakery-fresh taste without any fuss.
- Endless Meal Options: Honestly, I use these for everything—gyros, sandwiches, or even as a quick flatbread for dipping.
- Pantry Staples Only: Between us, I always have these ingredients on hand, so it’s my last-minute lifesaver.
Step-by-Step Instructions for Pita Without Yeast
Here’s the method. Straightforward, tested, works every time.
Step 1: Combine Dry Ingredients for Even Distribution
In a large mixing bowl, whisk together the 3 cups All-Purpose Flour, 2 tsp Baking Powder, 0.5 tsp Baking Soda, 1 tsp Salt, 1 tsp Granulated Sugar, 0.5 tsp Garlic Powder, and 0.5 tsp Dried Oregano. I find that sifting the flour first eliminates lumps and ensures the leavening agents are evenly dispersed throughout the mixture.
This combination of baking powder and baking soda creates the lift you’d normally get from yeast, while the sugar activates the baking soda. The garlic powder and dried oregano add subtle flavor complexity that makes these flatbreads anything but ordinary.
Step 2: Incorporate Wet Ingredients to Form the Dough
Make a well in the center of your dry ingredients. Add the 2 tbsp Olive Oil, 1 cup Warm Water, and 0.25 cup Vegan Yogurt. The warm water should be about 110°F—hot enough to dissolve the sugar but not so hot it would cook the flour.
Using a wooden spoon, gradually incorporate the wet ingredients into the dry until a shaggy dough forms. The vegan yogurt adds tenderness and slight tang, while the olive oil ensures a soft, pliable texture. The dough will be slightly sticky but should hold together when pressed.
Step 3: Knead Until Smooth and Elastic
Turn the dough onto a lightly floured surface. I dust with some of the reserved All-Purpose Flour to prevent sticking. Knead for 8-10 minutes until the dough becomes smooth and elastic. You’ll know it’s ready when it springs back when pressed with your finger.
This kneading process develops the gluten structure that gives pita its characteristic chew. Don’t be tempted to add too much flour during kneading—just enough to prevent sticking. The dough should remain slightly tacky but not wet.
Step 4: Rest and Divide the Dough
Place the dough in a lightly oiled bowl, cover with a damp towel, and let it rest at room temperature for 30 minutes. This resting period allows the gluten to relax and the baking powder to begin working, making the dough easier to roll out.
After resting, divide the dough into 8 equal portions (about 80 grams each for 4 servings). Roll each portion into a ball, then flatten slightly with your palm. Cover the balls with the damp towel to prevent them from drying out while you work.
Step 5: Roll and Cook the Pitas to Perfection
Roll each dough ball into a ¼-inch thick circle, about 6 inches in diameter. Dust your work surface with flour as needed to prevent sticking, but use a light touch—too much flour will make the pitas tough.
Heat a nonstick skillet over medium-high heat until hot. Place a rolled pita in the dry skillet and cook for 1-2 minutes until bubbles form and the bottom is golden brown. Flip and cook for another 1-2 minutes until the second side is golden and the pita has puffed slightly. Transfer to a clean towel and cover to keep warm while you cook the remaining pitas.
Pro Tips For Making Pita Recipe Without Yeast
- Heat the Pan First: Get your skillet or griddle screaming hot before adding the dough—I learned this the hard way after my first few pitas came out pale and dense.
- Use Fresh Leaveners: Check the expiration date on your baking powder and soda; old ones lose their punch, and your pitas won’t puff properly.
- Roll Evenly Thin: Aim for about ¼-inch thickness when rolling—any thicker and they won’t cook through, any thinner and they’ll burn before puffing.
- Swap Water for Yogurt: Replace half the water with plain yogurt for a tangier, more tender pita; sounds weird, but it works and saves you from dry, crumbly results.
Dietary Considerations for This Recipe
Vegan Friendly
This recipe is naturally vegan with no animal products, making it perfect for plant-based diets. The vegan yogurt adds tenderness while keeping it dairy-free. I developed this version after David requested more plant-based options for our family meals. 💪
Gluten-Free Option
For gluten sensitivity, replace All-Purpose Flour with a 1:1 gluten-free flour blend. I recommend King Arthur’s blend. The texture will be slightly denser but still delicious. Add 1 tsp xanthan gum to improve elasticity.
Let the dough rest for 45 minutes instead of 30 to allow the gluten-free flours to fully hydrate.
Nut Allergy Safe
This recipe contains no nuts, making it safe for those with nut allergies. However, always check your baking powder and baking soda labels, as some brands process in facilities that handle nuts. I source mine from Central Market for peace of mind.
Low Sodium
To reduce sodium, decrease salt to ½ tsp and use low-sodium baking powder. The flavor will be slightly more muted but still enjoyable. I often make this adjustment when serving with highly seasoned dishes. ✨
Consider adding 1 tsp lemon zest to compensate for the reduced salt with bright flavor.
Nutrition Facts
Frequently Asked Questions
Will these pitas puff like traditional ones?
Yes, they’ll puff slightly but won’t form large pockets like yeast versions. The baking powder and baking soda create lift, but expect a softer, flatter result. Cook on medium-high heat for best puffing.
Can I make this dough ahead of time?
Prepare the dough, cover tightly, and refrigerate for up to 24 hours. Let it sit at room temperature for 30 minutes before rolling to soften. This actually enhances the flavor.
Why did my pitas turn out dense?
This usually means the leavening agents expired or the dough was overworked. Always check your baking powder and baking soda freshness dates. Knead just until smooth—overmixing develops too much gluten.
What can I use instead of vegan yogurt?
Try unsweetened almond milk with 1 tsp vinegar as a substitute. The acidity reacts with the baking soda for lift while adding tenderness. Let it curdle for 5 minutes before using.

- Potato Candy Recipe 1933: Vintage Peanut Butter Roll Delight - October 30, 2026
- Potato Chip Cookie Recipe With Pecans: Buttery Crunch Meets Nutty Richness - October 30, 2026
- Potato Patty Recipe No Egg: Crispy Edges Without the Binder - October 30, 2026