
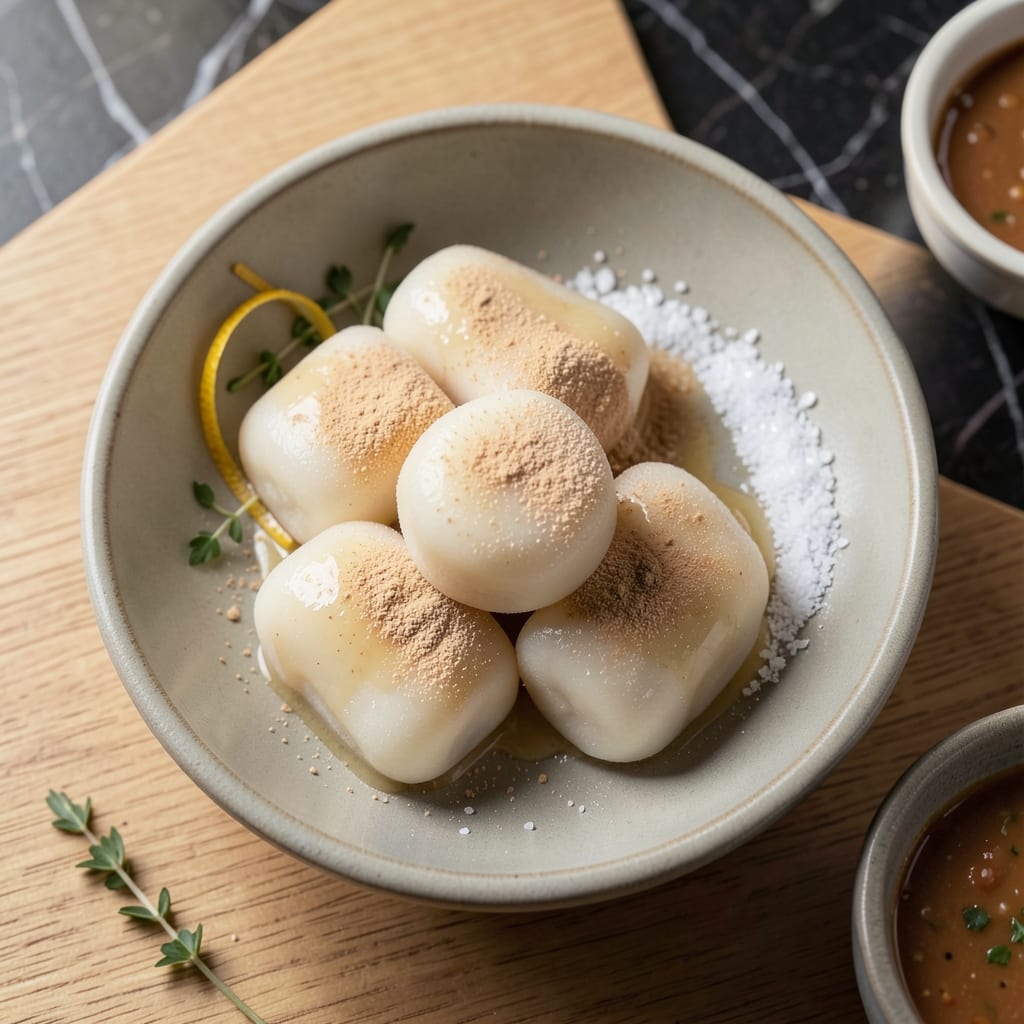
There’s something deeply satisfying about making mochi from scratch, transforming simple rice flour into those characteristic chewy pillows. This traditional method stays true to its Japanese roots while remaining accessible for home cooks.
The process requires just a few ingredients but demands precision with steaming and kneading. I discovered that working the dough while warm creates the perfect stretchy texture we all associate with authentic mochi.
What emerges is a delicate balance of sweetness and elasticity that’s both comforting and unique. The beauty lies in its simplicity—no artificial colors or flavors, just pure rice flour magic.
Serve dusted with cornstarch or kinako powder for a traditional finish. The result is a treat that’s as rewarding to make as it is to eat.
Ingredients for Plain Mochi Recipe with Rice Flour
Seven simple components transform into traditional chewy mochi with authentic texture and flavor.
| Ingredient | Amount | Notes |
|---|---|---|
| Glutinous Rice Flour 🌾 | 2 cups | Mochiko brand preferred |
| Granulated Sugar 🍚 | ½ cup | Fine grain for even distribution |
| Water 💧 | 1 ¼ cups | Filtered for best texture |
| Cornstarch 🌽 | ½ cup | For dusting work surface |
| Kinako Powder 🟤 | ¼ cup | Optional for dusting finish |
| Vanilla Extract 🌿 | 1 tsp | Pure for best flavor |
| Salt 🧂 | ¼ tsp | Fine sea salt preferred |
Glutinous rice flour is non-negotiable here—Mochiko brand is the gold standard for authentic texture. Look for it in the Asian foods aisle at Whole Foods or H-Mart. The sugar should be fine granulated (not coarse) to dissolve evenly during steaming. Kinako powder, while optional for dusting, adds that traditional nutty finish—find it at Japanese specialty stores or online retailers like Weee!.
No kinako powder? Toasted soybean flour works as a substitute, or simply use more cornstarch. For a sweeter variation, powdered sugar at half the amount can replace the granulated. The vanilla extract can be omitted for a purer rice flavor, but it adds a subtle depth. If your dough feels too sticky during kneading, a light dusting of cornstarch will help—just don’t overdo it.
Store rice flour in an airtight container in a cool, dark place for up to 1 year. Mochi is best eaten the same day but keeps for 2-3 days in an airtight container at room temperature. Freeze for up to 1 month (thaw before serving).
Why You’ll Love This Recipe
- One Bowl Wonder: I just dump glutinous rice flour, sugar, and water in a bowl, mix, and microwave—no fancy tools.
- Chewy Sweet Bliss: That soft, stretchy texture with a hint of sugar is pure comfort in every bite.
- Dust and Serve: Kinako powder and cornstarch make it ready for snacking, gifting, or dessert in minutes.
- Pocket-Friendly Treat: Five affordable pantry staples, and it makes a big batch that keeps for days.
Step-by-Step Instructions for Plain Mochi
Master the technique for perfectly chewy mochi with this precise, time-tested method.
Step 1: Combine and Steam the Base
In a microwave-safe bowl, whisk together the 2 cups Glutinous Rice Flour, 0.5 cup Granulated Sugar, and 0.25 tsp Salt until no lumps remain. The fine grain of the sugar ensures even distribution throughout the mixture.
Gradually add the 1.25 cups Water while whisking continuously until smooth. The batter should resemble thin pancake batter, pourable but not watery. Add the 1 tsp Vanilla Extract and whisk once more to incorporate evenly.
Step 2: Cook the Mochi Dough
Cover the bowl with plastic wrap, leaving a small vent for steam to escape. Microwave on high for 2 minutes. After this initial cook, you’ll notice the mixture has thickened but remains slightly translucent in the center.
Stir the dough with a wet spatula (this prevents sticking), then recover and microwave for another 1 to 1.5 minutes. The dough is ready when it becomes completely translucent and pulls away from the sides of the bowl. If it’s still sticky in the center, cook in 30-second increments until done.
Step 3: Knead the Dough to Achieve Elasticity
Dust a clean work surface generously with 0.5 cup Cornstarch. Using a cornstarch-dusted spatula, transfer the hot dough onto the prepared surface. The cornstarch prevents sticking and makes handling easier.
Knead the dough for 5 to 7 minutes until smooth and elastic. Initially, it will be extremely sticky, but as you work it, the texture will transform. The dough should bounce back slightly when pressed and have a glossy, slightly tacky surface. If it sticks to your hands, wet them with water or dust with more cornstarch.
Step 4: Shape and Portion the Mochi
Divide the dough into 4 equal portions for consistent servings. Roll each portion into a log about 1 inch in diameter. Using a sharp knife dusted with cornstarch, cut each log into 1-inch pieces to create individual mochi balls.
Roll each piece between your palms to form a smooth sphere. The surface should be uniform and free of cracks. If the dough starts to stick, re-dust your hands with cornstarch. The finished mochi should have a slightly firm exterior with a soft, pliable interior.
Step 5: Finish and Store
Lightly dust each mochi ball with additional cornstarch to prevent sticking. For an authentic finish, optionally roll them in 0.25 cup Kinako Powder, which adds a nutty flavor and traditional appearance. The kinako should adhere lightly to the surface without overwhelming the mochi.
Let the mochi cool completely at room temperature for about 30 minutes before serving. Store in an airtight container at room temperature for up to 3 days, with parchment paper between layers to prevent sticking. Consume within this timeframe for optimal texture, as mochi hardens over time.
Pro Tips For Making Plain Mochi Recipe With Rice Flour
- Steam Evenly: Use a bamboo steamer lined with parchment paper to cook the mochi dough—this prevents sticking and guarantees uniform heat so the center doesn’t stay gummy.
- Weigh the Flour: After ruining a batch with packed cups, I now use a scale: 200g glutinous rice flour to 50g sugar gives the right chew every time.
- Cornstarch Generously: Dust your work surface and hands with cornstarch before handling the dough, or it’ll stick like glue and tear as you shape it.
- Rest Before Shaping: Let the steamed dough cool for 10 minutes under a damp towel—I learned this the hard way when my first mochi cracked from being too hot to handle.
Creative Variations of This plain mochi recipe with rice flour
Matcha Green Tea
Add 1 tbsp matcha powder to the dry ingredients before mixing with water. This creates a vibrant green color and earthy flavor that pairs beautifully with the sweetness. I recommend ceremonial-grade matcha for the best results. 🌿
Strawberry Swirl
After rolling the mochi into balls, flatten each slightly and add ½ tsp strawberry jam in the center before sealing. Use seedless jam to prevent texture issues. The sweet-tart filling adds a delightful surprise with every bite.
Chocolate Drizzle
Melt ½ cup dark chocolate and drizzle over cooled mochi. For extra flair, sprinkle with crushed pistachios or sea salt before the chocolate sets. This adds a modern twist while keeping the traditional chewy texture.
Coconut Delight
Replace ¼ cup of water with coconut milk in the batter for a subtle tropical flavor. Roll the finished mochi in shredded coconut instead of cornstarch. The coconut adds texture and complements the rice flour base perfectly. ✨
Black Sesame
Mix 2 tbsp black sesame paste into the dough after the initial microwave cooking. The nutty, slightly bitter flavor of sesame pairs wonderfully with the sweetness. Knead thoroughly to distribute the sesame evenly throughout the dough.
Savory Option
Omit the sugar and vanilla, then fill each mochi with 1 tsp red bean paste or crumbled feta cheese before sealing. This traditional Japanese variation, called daifuku, offers a delightful contrast to the sweet versions.
Nutrition Facts
Frequently Asked Questions
Can I use regular rice flour instead?
No, regular rice flour won’t work. You need glutinous rice flour (like Mochiko brand) for the right chewy texture. Regular rice flour lacks the necessary elasticity.
Why did my mochi turn out hard?
Overcooking or under-kneading causes this. Microwave in 30-second bursts after the initial 2 minutes, and knead for a full 5-7 minutes while warm.
How do I store leftovers?
Keep in an airtight container with parchment between layers at room temperature for up to 3 days. Freeze for up to 1 month, thawing before serving.
Can I make it without a microwave?
Yes! Steam the batter in a bamboo steamer for 20-25 minutes over boiling water. The texture will be slightly different but still delicious.

- Potato Candy Recipe 1933: Vintage Peanut Butter Roll Delight - October 30, 2026
- Potato Chip Cookie Recipe With Pecans: Buttery Crunch Meets Nutty Richness - October 30, 2026
- Potato Patty Recipe No Egg: Crispy Edges Without the Binder - October 30, 2026