
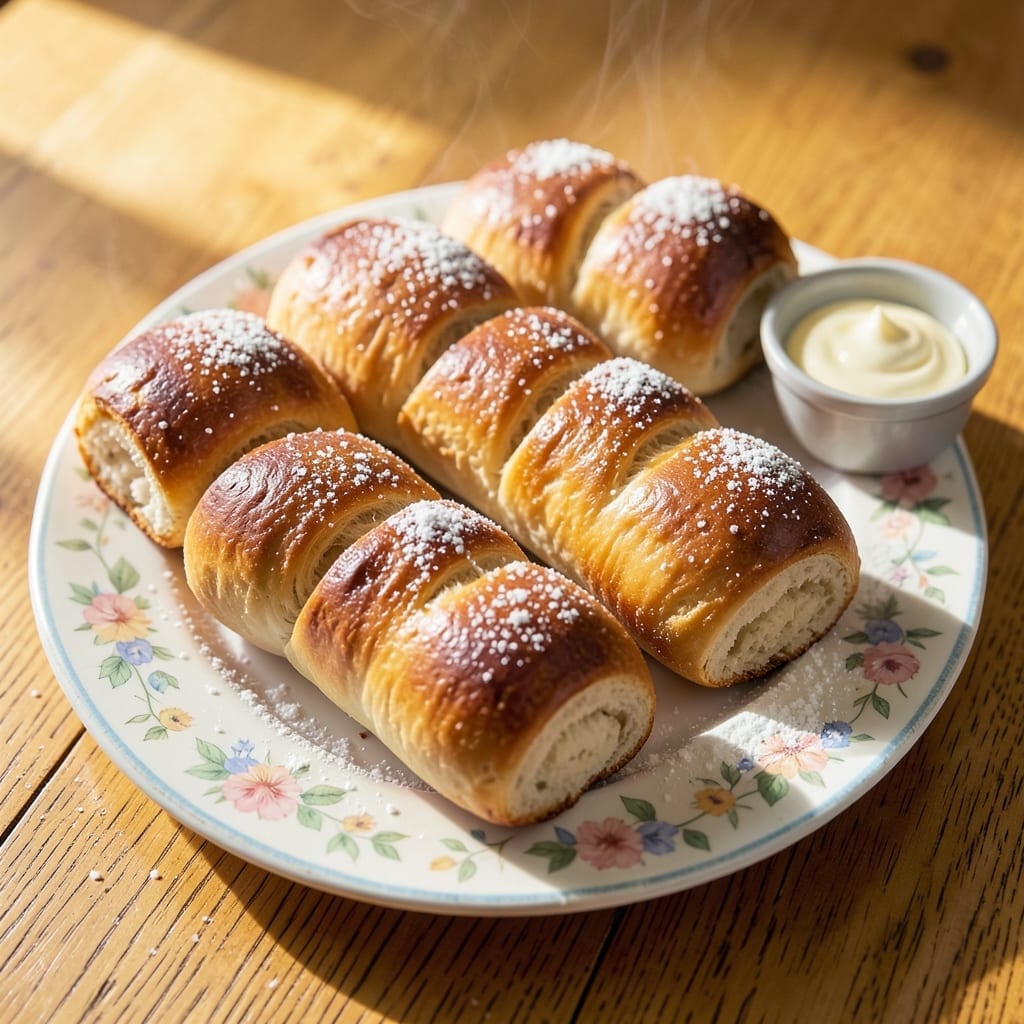
There’s a reason Spanish bread remains a beloved staple in Pinoy bakeries—its soft, buttery dough and sweet coconut filling create an irresistible combination. This recipe captures that classic bakery taste with a foolproof method for home bakers.
The dough comes together with simple ingredients, then rests to develop its signature light texture. Rolling and shaping the dough around the coconut filling ensures each bite delivers a perfect balance of richness and sweetness.
After proofing, the rolls bake to a golden brown, filling your kitchen with the warm, comforting aroma of freshly baked bread. The result is a treat that’s as satisfying to make as it is to eat.
Serve warm or at room temperature for a snack that feels like a taste of home. Here’s how to make it.
Ingredients for Pinoy Cooking Recipe Spanish Bread
Simple pantry staples plus a few special touches create this bakery favorite at home.
| Ingredient | Amount | Notes |
|---|---|---|
| All-Purpose Flour 🌾 | 4 cups | Plus extra for dusting |
| Granulated Sugar 🍚 | ½ cup | Divided for dough and filling |
| Active Dry Yeast 🍞 | 2 ¼ tsp | One packet, proofed in warm water |
| Whole Milk 🥛 | 1 cup | Warm, about 110°F |
| Unsalted Butter 🧈 | ½ cup | Softened, divided for dough and filling |
| Large Eggs 🥚 | 1 whole | Room temperature, for dough |
| Salt 🧂 | 1 tsp | Fine sea salt preferred |
| Vanilla Extract 🌿 | 1 tsp | Pure extract for best flavor |
| Sweetened Shredded Coconut 🥥 | 1 cup | For filling, lightly packed |
| Brown Sugar 🍯 | ½ cup | For coconut filling |
| Breadcrumbs 🍞 | ½ cup | For filling, optional thickener |
| Egg Wash 🥚 | 1 whole | 1 egg beaten with 1 tbsp water |
The flour is your foundation—King Arthur or Gold Medal all-purpose both work beautifully. Yeast freshness is non-negotiable; check the expiration date and proof it in warm milk to ensure it’s active. Whole milk gives the dough its signature tenderness, but 2% works in a pinch (avoid skim). Butter should be softened but not melted—leave it out for about an hour before starting.
No shredded coconut? Finely chop a block of sweetened coconut or use desiccated coconut (soak it in warm water for 10 minutes first). Brown sugar can be swapped for white sugar plus 1 tbsp molasses. For a richer filling, add 1 tbsp condensed milk to the mix. The egg wash is optional but gives that classic golden-brown bakery finish—skip it for a matte look.
Dough can be made a day ahead—cover tightly and refrigerate. Baked rolls stay fresh for 2-3 days in an airtight container. Freeze unfrosted rolls for up to 1 month (reheat straight from frozen).
Why You’ll Love This Recipe
- No Fuss Dough: Honestly, the yeast does all the work—just mix, knead, and let it rise while I prep the filling.
- Buttery Sweetness: That combo of soft bread, buttery dough, and sugary filling? Pure comfort in every bite.
- Breakfast or Merienda: I make a big batch on Sunday and we grab them all week—great with coffee or as an afternoon snack.
- Budget-Friendly Batch: A few pantry staples and I’ve got dozens of rolls ready. Leftovers? They disappear fast.
Step-by-Step Instructions for Pinoy Spanish Bread
Master the art of these fluffy coconut-filled rolls with my tested method.
Step 1: Activate Yeast and Mix Dough
Proof the 2.25 tsp Active Dry Yeast in warm 1 cup Whole Milk until frothy, about 5-7 minutes. You’ll see bubbles forming on the surface—that’s how you know it’s active and ready to work its magic.
In a large bowl, combine the 4 cups All-Purpose Flour, 0.5 cup Granulated Sugar, 1 tsp Salt, 1 whole Large Eggs, 0.25 cup Unsalted Butter, and the yeast mixture. I use my hands for this—it gives me better control over the texture.
Mix until a shaggy dough forms. It should pull away from the bowl but still feel slightly sticky. Resist the urge to add more flour at this stage.
Step 2: Knead and First Rise
Turn the dough onto a lightly floured surface and knead for 8-10 minutes until smooth and elastic. You’ll notice it changes from rough and sticky to silky and supple—that’s when you know it’s properly developed.
Place the dough in a greased bowl, cover with a damp towel, and let it rise in a warm place until doubled in size, about 1-1.5 hours. I like to turn on my oven light to create a warm environment. The dough should spring back slowly when pressed with a finger.
Step 3: Prepare Coconut Filling
In a separate bowl, mix together the 1 cup Sweetened Shredded Coconut, 0.5 cup Brown Sugar, 0.25 cup Unsalted Butter, and 0.5 cup Breadcrumbs. The mixture should hold together when pressed between your fingers.
This filling is what gives these rolls their signature sweet, nutty flavor. The breadcrumbs help absorb some of the moisture from the coconut, preventing a soggy filling.
Step 4: Shape and Second Rise
Punch down the risen dough and divide it into 12 equal pieces. Roll each piece into a ¼-inch thick oval. Place 1 tablespoon of the coconut filling in the center of each oval.
Roll up tightly, pinching the edges to seal. Place seam-side down on a baking sheet lined with parchment paper. Cover and let rise for another 30-45 minutes until puffy.
They should look noticeably larger but not quite doubled. This second rise ensures your rolls will be light and airy.
Step 5: Bake to Golden Perfection
Preheat your oven to 350°F. Brush the risen rolls with 1 whole Egg Wash and bake for 20-25 minutes until golden brown on top. You’ll know they’re done when they sound hollow when tapped on the bottom.
Remove from the oven and let cool on the baking sheet for 5 minutes before transferring to a wire rack. The egg wash gives them that beautiful, glossy finish that’s characteristic of authentic Pinoy Spanish bread.
Serve warm for the best experience—the butter in the dough and filling will be at its most delicious, gooey state.
Pro Tips For Making Pinoy Cooking Recipe Spanish Bread
- Activate the Yeast: Warm your whole milk to about 110°F—too hot kills the yeast, too cold won’t wake it up. I learned this the hard way after three failed batches that refused to rise.
- Knead Until Smooth: Work the dough for at least 10 minutes until it’s elastic and stops sticking. Sounds tedious, but it’s the only way to get that soft, pillowy texture Spanish bread is known for.
- Chill Before Rolling: Let the dough rest in the fridge for 30 minutes after the first rise—it makes the butter easier to spread and prevents it from melting into the dough.
- Use Room-Temp Butter: Take your unsalted butter out of the fridge 1 hour before starting. Cold butter tears the dough, and melted butter just makes a greasy mess.
Essential Equipment for This Recipe
Mixing Essentials
Start with a large mixing bowl—I use my 5-quart stainless steel from Cuisinart for reliable dough development. A wooden spoon helps incorporate ingredients initially, but don’t underestimate the value of clean hands for the final mixing stage. 💡
Kneading Tools
A clean, flat surface is crucial for kneading. My maple wood cutting board provides the perfect non-stick surface. If you prefer less mess, a stand mixer with dough hook (like my KitchenAid Classic) does the work in 6-8 minutes on low speed.
Rolling and Shaping
A French rolling pin (without handles) gives me better control for rolling the dough to an even ¼-inch thickness. For portioning, a dough scraper helps divide the dough into 12 equal pieces cleanly. I keep a small kitchen scale nearby for precision.
Proofing Setup
Create a warm environment with a damp kitchen towel covering your dough. I turn on my oven light for consistent warmth. A glass or ceramic bowl (lightly greased) prevents sticking during the first rise. The dough should double in 1-1.5 hours in this setup.
Baking Equipment
A half-sheet baking pan with parchment paper ensures even baking and easy cleanup. I prefer Nordic Ware pans for their durability. A pastry brush is essential for applying the egg wash evenly before baking at 350°F.
Cooling Tools
Always transfer baked rolls to a wire cooling rack after 5 minutes on the pan. This prevents the bottoms from getting soggy. I use a stainless steel rack that fits perfectly over my sink for easy cleanup. The rolls will firm up as they cool to room temperature.
Nutrition Facts
Frequently Asked Questions
Can I use instant yeast instead of active dry?
Yes, swap in the same amount of instant yeast. Skip the proofing step and mix it directly with the dry ingredients. Reduce the milk temperature to 100°F to avoid killing the yeast.
Why did my rolls turn out dense?
Underproofed dough or insufficient kneading are common causes. Ensure the dough doubles in size during both rises and kneads to a smooth, elastic texture. 8-10 minutes of kneading is ideal.
Can I make the filling ahead?
Prepare the coconut filling up to 2 days in advance. Store it in an airtight container at room temperature. Mix well before using to restore its texture.
How do I store leftovers?
Keep in an airtight container at room temperature for 2-3 days. For longer storage, freeze for up to 1 month. Reheat in the oven at 300°F for 5-10 minutes.

- Potato Candy Recipe 1933: Vintage Peanut Butter Roll Delight - October 30, 2026
- Potato Chip Cookie Recipe With Pecans: Buttery Crunch Meets Nutty Richness - October 30, 2026
- Potato Patty Recipe No Egg: Crispy Edges Without the Binder - October 30, 2026