
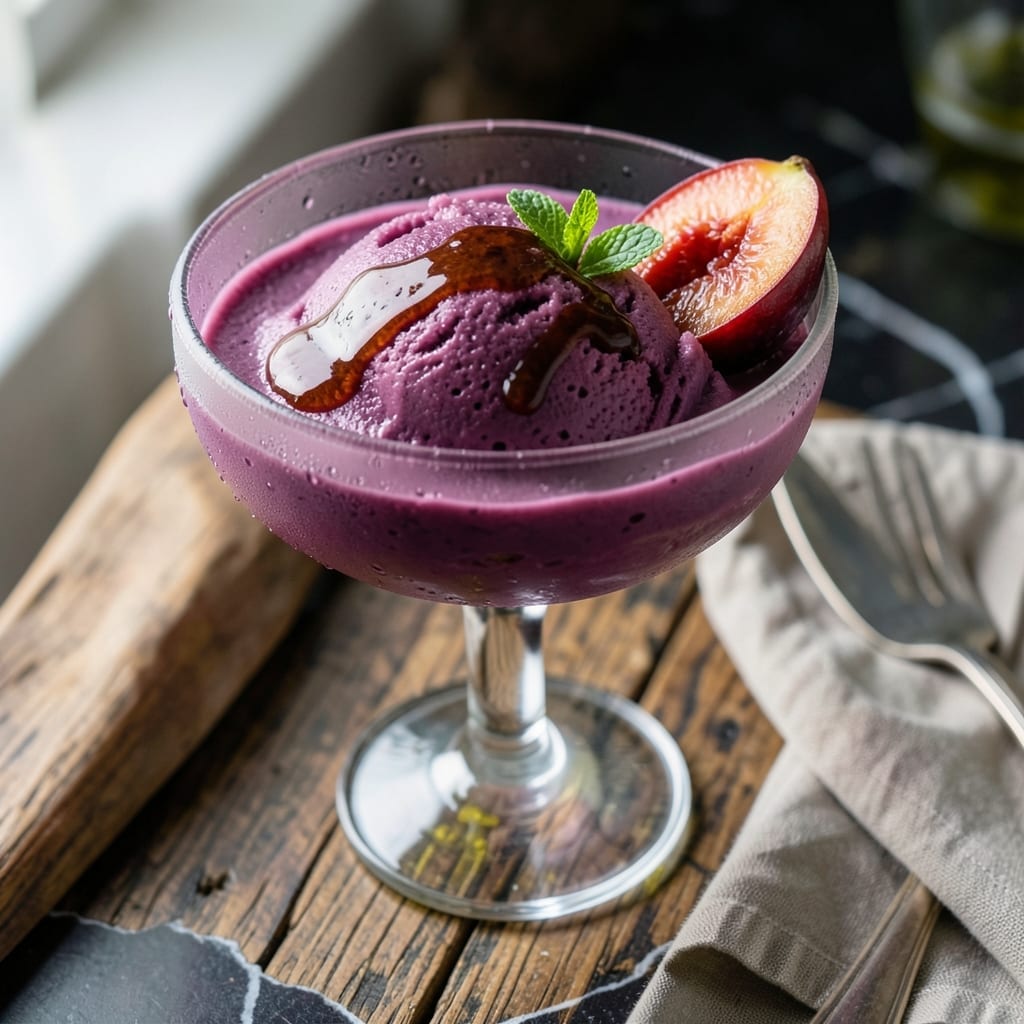
This plum sorbet delivers pure, vibrant fruit flavor in a refreshing frozen treat. The ice cream maker creates a smooth, silky texture that highlights the natural sweetness of ripe plums.
With just a few simple ingredients, this recipe transforms fresh fruit into a sophisticated dessert. The process requires minimal prep, and the machine handles most of the work for you.
What emerges is a dairy-free sorbet with intense plum character and a perfectly scoopable consistency. The color alone makes it a showstopper at any gathering.
Serve it as a palate cleanser or a light finish to any meal. This creation proves that simple ingredients can produce extraordinary results.
Ingredients for Plum Sorbet Recipe Ice Cream Maker
Ripe plums and a few pantry staples transform into this vibrant, dairy-free frozen delight.
| Ingredient | Amount | Notes |
|---|---|---|
| Fresh Plums 🍑 | 2 lb | Ripe, pitted and quartered |
| Granulated Sugar 🍚 | ¾ cup | Adjust to taste and plum sweetness |
| Fresh Lemon Juice 🍋 | 2 tbsp | Brightens the fruit flavor |
| Water 💧 | ¼ cup | For blending consistency |
| Plum Liqueur 🍷 | 1 tbsp | Optional, enhances fruit depth |
| Vanilla Extract 🌿 | ½ tsp | Pure extract for best flavor |
| Pinch of Salt 🧂 | 1 pinch | Balances sweetness |
The plums are everything here. Seek out ripe but firm fruit—overripe plums turn mushy, underripe ones lack sweetness. Farmer’s markets often have the best selection in late summer, but well-stocked Whole Foods or Trader Joe’s will carry good options. Look for varieties like Santa Rosa or Stanley for intense flavor. Avoid canned or frozen; fresh is non-negotiable for that vibrant color and pure taste.
No plum liqueur? Skip it—the sorbet will still shine. Substitute 1 tbsp lemon juice if you want extra brightness. For a different twist, swap plums for ripe peaches or nectarines (use the same weight). The sugar can be reduced by 25% if your plums are exceptionally sweet, but don’t eliminate it entirely—it’s key for texture. Agave or maple syrup work at a 1:1 ratio if avoiding refined sugar.
Best eaten the day it’s made, but it’ll hold in the freezer for up to 1 week. Let it sit at room temperature for 10-15 minutes before scooping for that perfect silky texture. Store in an airtight container with parchment pressed directly on the surface to prevent ice crystals.
Why You’ll Love This Recipe
- I’ll be real: leftovers keep beautifully, so I always double the batch for spontaneous dessert cravings.
- No-Fuss Blending: I just pit the plums, toss everything in, and let the ice cream maker do the work—no fancy techniques.
- Tart Meets Sweet: The lemon juice cuts through the plum’s richness, and that splash of liqueur? Deep, complex flavor in every bite.
- Dinner Party Hero: Between us, it feels fancy but takes zero effort—great for impressing guests without the stress.
Step-by-Step Instructions for Plum Sorbet
Follow this precise method to transform fresh plums into a silky, refreshing frozen dessert with vibrant fruit flavor.
Step 1: Prepare and Cook the Plum Base
Begin by pitting and quartering the 2 lb fresh plums. I use a sharp paring knife to score each plum along its natural seam, then twist it open to remove the pit cleanly. The fruit should yield easily to gentle pressure when ripe—this ensures maximum sweetness and flavor.
Combine the quartered plums with 0.75 cup granulated sugar, 0.25 cup water, and 1 pinch pinch of salt in a medium saucepan. Cook over medium heat for 8-10 minutes, stirring frequently, until the plums soften and release their juices. You’ll notice the mixture thicken slightly as the fruit breaks down and the sugar dissolves.
Step 2: Blend and Strain for Silky Texture
Remove the saucepan from heat and stir in 2 tbsp fresh lemon juice, 1 tbsp plum liqueur, and 0.5 tsp vanilla extract. The lemon juice brightens the plum flavor, while the liqueur adds depth—omit it if preferred, but the vanilla is essential for rounding out the sweetness.
Transfer the warm plum mixture to a blender and process until completely smooth, about 1-2 minutes. For the silkiest texture, pass the puree through a fine-mesh strainer to remove any remaining skins or fibers. This step ensures your sorbet has that luxurious, professional-quality mouthfeel without any graininess.
Step 3: Chill Thoroughly Before Churning
Pour the strained puree into a shallow container or bowl and refrigerate until completely cold, at least 4 hours or preferably overnight. This chilling step is critical—attempting to churn warm mixture will result in a dense, icy sorbet rather than a light, airy one.
I like to cover the surface directly with plastic wrap to prevent a skin from forming. The mixture should be the temperature of a well-chilled beverage before proceeding. If you’re short on time, an ice bath can speed this up, but don’t rush it; patience here guarantees the best texture.
Step 4: Churn in Ice Cream Maker
Pour the chilled plum puree into your ice cream maker and churn according to the manufacturer’s instructions, typically 20-25 minutes. The sorbet is ready when it reaches the consistency of soft-serve and holds its shape when scooped.
If your machine has a freezer bowl, ensure it’s been frozen for at least 12 hours beforehand. The sorbet will appear slightly slushy at first but will firm up significantly during the final freezing step. Avoid overfilling the machine—leave at least 1 inch of space at the top to allow for expansion as air incorporates.
Step 5: Freeze to Perfect Consistency
Transfer the churned sorbet to a lidded container and freeze for at least 4 hours to firm up completely. The ideal serving texture is achieved when the sorbet holds its shape when scooped but still melts creamily on the tongue.
For best results, let the sorbet sit at room temperature for 5-10 minutes before serving to soften slightly. This makes scooping easier and enhances the flavor. The finished sorbet should have a vibrant plum color and a smooth, refreshing taste that’s neither too sweet nor too tart.
Pro Tips For Making Plum Sorbet Recipe Ice Cream Maker
- Chill the Base: Always refrigerate your plum puree mixture for at least 2 hours before churning—I learned this the hard way after ending up with a soupy mess my first three tries.
- Pit and Peel: Remove all plum skins and pits completely, as even small bits can create an unpleasant texture in the finished sorbet.
- Balance the Sweetness: Taste your plum mixture before churning and adjust sugar if needed—some plums are tart enough to require an extra tablespoon or two.
- Add Liqueur Last: Stir in the plum liqueur just before churning to preserve its flavor, as alcohol can evaporate if added too early in the process.
Dietary Considerations for This plum sorbet recipe ice cream maker
Vegan and Dairy-Free
This sorbet is naturally 100% vegan and contains no animal products whatsoever. The recipe relies solely on fruit, sugar, and a few flavor enhancers, making it perfect for plant-based diets. I love sharing this with vegan friends who appreciate a sophisticated frozen dessert.
Gluten-Free Friendly
Since this creation contains no wheat, barley, or rye ingredients, it’s inherently gluten-free. All components are naturally free from gluten, so those with celiac disease or gluten sensitivity can enjoy it safely. Always double-check your plum liqueur if using, as some brands may contain trace gluten.
Nut-Free Option
The base recipe contains no nuts or nut-derived ingredients. However, if you’re serving guests with severe nut allergies, verify that your vanilla extract is processed in a nut-free facility. I use Nielsen-Massey for guaranteed purity.
Low-Fat and Cholesterol-Free
With zero fat and no cholesterol, this sorbet is an excellent light dessert option. The entire recipe contains fewer than 0.5g fat per serving. It’s a guilt-free treat that satisfies sweet cravings without compromising dietary goals.
Sugar Variations
For refined sugar-free versions, substitute ¾ cup agave nectar or maple syrup at a 1:1 ratio. These alternatives maintain the proper sweetness and texture. I’ve tested both with excellent results, though maple adds a subtle depth. 💡
Allergen Note
The primary allergen concern comes from potential cross-contamination in shared equipment. If severe allergies are a concern, ensure your ice cream maker and all utensils are thoroughly cleaned before use. This simple step guarantees a safe, worry-free dessert experience.
Nutrition Facts
Frequently Asked Questions
Can I make this without an ice cream maker?
You can, but texture will differ. Freeze the mixture in a shallow pan, stirring vigorously with a fork every 30-45 minutes for 3-4 hours to break up ice crystals. The result will be grainier than machine-churned.
Why strain the plum puree?
Straining removes skins and fibers for a silky smooth texture. This step takes 2 minutes and makes a noticeable difference in mouthfeel. Skip it only if you prefer a rustic, pulpy consistency.
How do I store leftovers?
Press plastic wrap directly on the surface, then seal in an airtight container. It keeps for 1 week but is best within 3 days. Let sit at room temperature for 10 minutes before scooping.

- Potato Candy Recipe 1933: Vintage Peanut Butter Roll Delight - October 30, 2026
- Potato Chip Cookie Recipe With Pecans: Buttery Crunch Meets Nutty Richness - October 30, 2026
- Potato Patty Recipe No Egg: Crispy Edges Without the Binder - October 30, 2026