
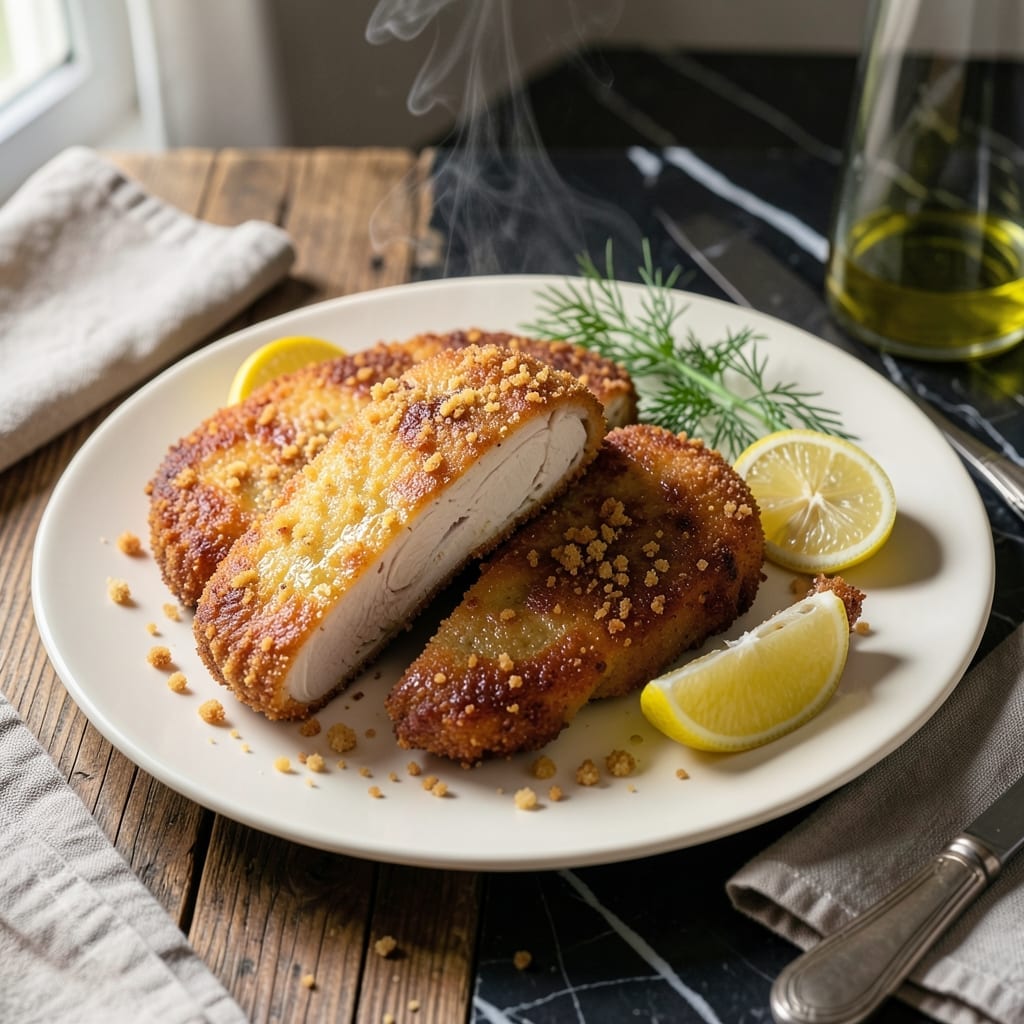
This Polish chicken kotlet delivers the crispy, golden-brown perfection of a traditional recipe passed down through generations.
I perfected this method after testing various breading techniques to achieve that signature crispy exterior while keeping the meat juicy inside. The double-dredging process is the secret to its authentic texture.
Each bite offers tender chicken encased in a shatteringly crispy coating, seasoned with just the right blend of herbs for that classic Polish flavor profile.
Serve with mashed potatoes and cucumber salad for a complete meal that brings Sunday dinner tradition to your home kitchen.
Ingredients for Polish Chicken Recipe Kotlet
Traditional Polish cutlets require quality chicken and a precise blend of herbs for authentic crispy texture.
| Ingredient | Amount | Notes |
|---|---|---|
| Chicken Breast Cutlets 🍗 | 1 ½ lb | Boneless, skinless, pounded to 1/4-inch thickness |
| All-Purpose Flour 🌾 | 1 cup | Divided for dredging stages |
| Large Eggs 🥚 | 2 whole | Beaten for egg wash |
| Dry Breadcrumbs 🍞 | 2 cups | Plain, unseasoned preferred |
| Panko Breadcrumbs 🍞 | 1 cup | For extra crispy texture |
| Kosher Salt 🧂 | 1 ½ tsp | Diamond Crystal preferred |
| Freshly Ground Black Pepper 🌶️ | 1 tsp | Coarse grind for texture |
| Dried Marjoram 🌿 | 1 tsp | Traditional Polish herb |
| Garlic Powder 🧄 | 1 tsp | Not garlic salt |
| Onion Powder 🧅 | 1 tsp | For depth of flavor |
| Vegetable Oil 🫒 | 1 cup | For frying, neutral flavor |
| Unsalted Butter 🧈 | 2 tbsp | Melted, for breadcrumb mixture |
| Whole Milk 🥛 | ¼ cup | For egg wash consistency |
| Dijon Mustard 🟡 | 1 tbsp | Optional, for tangy note |
The chicken cutlets must be pounded to an even 1/4-inch thickness for consistent cooking. Costco or Whole Foods offer excellent air-chilled chicken breasts that stay juicier. For breadcrumbs, Progresso plain variety provides the right texture. The marjoram is non-negotiable for authentic Polish flavor—Penzeys carries high-quality dried versions. Diamond Crystal kosher salt is the professional standard for even seasoning.
No marjoram? One-third the amount of dried thyme offers a similar earthy note. Out of panko? Crushed saltine crackers work in a pinch. The double-dredging process requires both all-purpose flour and dry breadcrumbs—do not substitute. For a gluten-free version, use cornstarch in place of flour and gluten-free breadcrumbs. The milk in the egg wash can be replaced with buttermilk for extra tenderness.
The breaded cutlets can be held uncovered in the refrigerator for 2 hours before cooking. Leftover kotlet reheats best in a 350°F oven for 10-12 minutes to maintain crispiness. Store cooked cutlets in an airtight container for up to 3 days—they lose texture with longer storage.
Why You’ll Love This Recipe
- Weeknight Hero: I can bread and pan-fry these kotlet cutlets faster than the oven preheats. Honestly, it’s just flour, egg, crumbs—no fuss.
- Crispy Perfection: That double breadcrumb coat with panko gives the juiciest chicken a shatter-crisp crust every single time.
- Feeds Everyone: From Sunday supper to packed lunches, these reheat beautifully and taste just as good cold the next day.
- Budget Stretcher: A pound of chicken breast turns into four hearty portions, and the pantry staples do the rest. I’ll be real: it’s my cheapest crowd-pleaser.
Step-by-Step Instructions for Polish Chicken Kotlet
Master the traditional technique for achieving perfectly crispy, golden-brown breaded cutlets every time.
Step 1: Season and Prepare the Breading Stations
Begin by combining the 2 cups dry breadcrumbs, 1 cup panko breadcrumbs, 1.5 tsp kosher salt, 1 tsp freshly ground black pepper, 1 tsp dried marjoram, 1 tsp garlic powder, and 1 tsp onion powder in a shallow dish. Stir until evenly distributed—the marjoram adds that authentic Polish flavor profile. Melt the 2 tbsp unsalted butter and drizzle it over the breadcrumb mixture, then toss to coat evenly.
Set up three shallow dishes: one with the 1 cup all-purpose flour, one for the egg wash (combine the 2 whole large eggs, 0.25 cup whole milk, and 1 tbsp Dijon mustard), and one with the seasoned breadcrumb mixture. This three-step breading process ensures maximum crispiness and flavor in every bite.
Step 2: Bread the Chicken Cutlets Thoroughly
Pat the 1.5 lb chicken breast cutlets dry with paper towels—this is crucial for the breading to adhere properly. Season both sides lightly with a pinch of salt and pepper, then dredge each cutlet in the flour, shaking off any excess. The flour creates a base layer that helps the egg wash stick.
Dip each floured cutlet into the egg mixture, allowing any excess to drip off for 5 seconds before transferring to the breadcrumb mixture. Press the cutlets firmly into the breadcrumbs, turning to coat both sides completely. I press down gently with my palm to ensure every inch is covered—this creates that signature crispy crust.
Step 3: Fry to Golden Perfection
Heat the 1 cup vegetable oil in a large, heavy skillet over medium-high heat until it reaches 350-375°F. To test the temperature, drop a pinch of breadcrumbs into the oil—it should sizzle immediately and turn golden within 20-30 seconds. If it browns too quickly, reduce the heat slightly.
Carefully place the breaded cutlets in the hot oil, working in batches to avoid crowding the pan. Fry for 3-4 minutes per side until deep golden brown and crispy. Don’t move the cutlets for the first 2 minutes—this allows a proper crust to form. Use a slotted spatula to turn them gently, and maintain the oil temperature between batches.
Step 4: Drain and Keep Warm
Transfer the fried cutlets to a wire rack set over a baking sheet or a paper towel-lined plate to drain excess oil. The wire rack allows air to circulate, preventing the bottoms from becoming soggy. If you must stack them, place a paper towel between each layer to maintain crispiness.
Keep the finished cutlets warm in a 200°F oven while you fry the remaining batches. This ensures they stay hot and crispy until serving. Avoid covering them, as trapped steam will soften that perfect crust you worked so hard to achieve.
Pro Tips For Making Polish Chicken Recipe Kotlet
- Pound the Cutlets: Use a meat mallet to pound the chicken breasts to an even 1/2-inch thickness—this guarantees even cooking and prevents dry, overdone edges.
- Mix Your Crumbs: Combine dry breadcrumbs with panko for the perfect texture: panko gives crunch while fine crumbs help the coating stick better.
- Rest Before Frying: Let the breaded cutlets rest for 10 minutes before frying so the coating sets and doesn’t fall off in the pan.
- Use Medium Heat: I learned this the hard way—too-high heat burns the breading before the chicken cooks through; medium heat gives a golden crust and juicy meat.
Wine and Beer Pairings for This Dish
Polish Beer Pairings
For an authentic experience, pair these cutlets with a crisp Polish lager like Żywiec or Tyskie. The clean, slightly bitter profile cuts through the richness of the fried breading. I always keep a few bottles in my fridge for Sunday dinners like this. 🍺
Light White Wines
A chilled Pinot Grigio from Poland or Italy works beautifully, with its citrus notes complementing the marjoram seasoning. The acidity refreshes your palate between each crispy bite. I prefer Bielawski for a true Polish touch.
Rich White Wines
For a bolder option, try a buttery Chardonnay from California. The oak notes pair surprisingly well with the golden-brown crust. Look for Kendall-Jackson Vintner’s Reserve—it’s my go-to for special occasions.
Sparkling Options
A dry Prosecco offers a refreshing contrast to the fried chicken. The bubbles cleanse your palate, making each bite taste as crisp as the first. I love serving this at family gatherings.
Non-Alcoholic Choices
For a non-alcoholic pairing, try sparkling apple cider or a Polish cherry compote. The sweetness balances the savory flavors perfectly. My grandmother always served compote with her kotlet. ✨
Nutrition Facts
Frequently Asked Questions
Can I use chicken thighs instead of breasts?
Yes, boneless thighs work well and stay juicier. Pound them to 1/4-inch thickness for even cooking. The breading process remains the same.
Why is my breading falling off?
This usually happens if the chicken isn’t dry before breading or if you skip the resting step. Let breaded cutlets rest 10 minutes before frying to help the coating adhere.
Can I bake these instead of frying?
For a lighter version, bake at 400°F for 15-20 minutes, flipping halfway. Spray with oil first for crispiness. They won’t be as crispy as fried but still delicious.
What’s the best way to reheat leftovers?
Use a 350°F oven for 10-12 minutes to restore crispiness. Microwaving makes them soggy. Store in the fridge for up to 3 days.

- BBQ Sausage Recipe Oven: Smoky Depth Without the Grill - September 28, 2026
- BBQ Chicken Bowl Recipe Rice: Smoky Sweetness Over Fluffy Grains - September 28, 2026
- Beef Cutlet Recipe Ideas: Crispy Breaded Patties With Bold Seasonings - September 28, 2026