
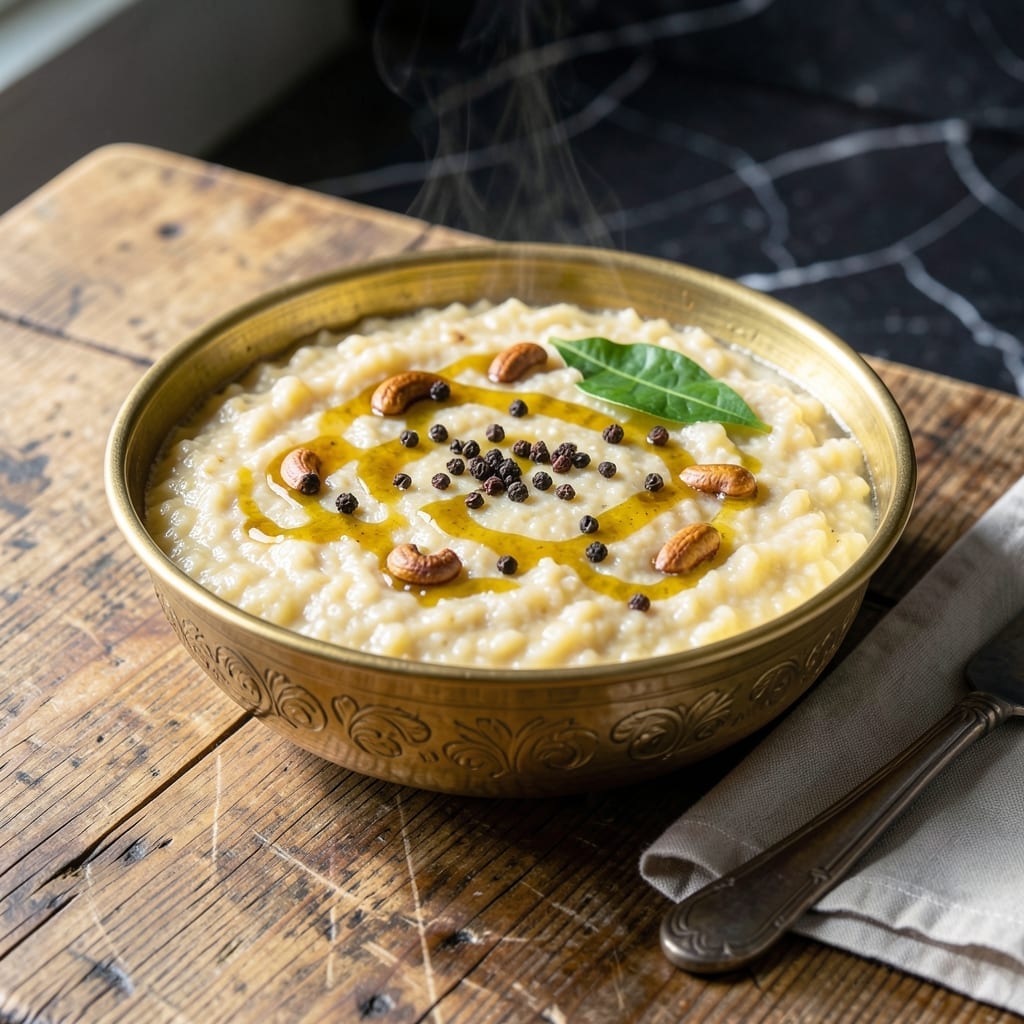
This pressure cooker method transforms humble rice and lentils into a creamy, comforting South Indian classic with minimal effort.
I’ve refined this technique to ensure the perfect texture every time—soft, porridge-like, and infused with cumin and ginger. The pressure cooker cuts cooking time dramatically while preserving authentic flavor.
What you’ll love most is how effortlessly the ingredients meld together, creating a dish that’s rich, satisfying, and deeply comforting. No constant stirring required.
Ideal for busy mornings or a heartwarming meal anytime. Let’s begin.
Ingredients for Pongal Recipe in Pressure Cooker
Simple pantry staples create this creamy, comforting South Indian pressure cooker classic with ease.
| Ingredient | Amount | Notes |
|---|---|---|
| Raw Rice 🍚 | 1 cup | Short-grain preferred for creaminess |
| Yellow Moong Dal 🌾 | ½ cup | Split and washed thoroughly |
| Water 💧 | 4 cups | Adjust for desired consistency |
| Ghee 🧈 | 2 tbsp | Clarified butter for authentic flavor |
| Cumin Seeds 🌿 | 1 tsp | Whole, for tempering |
| Black Peppercorns 🌶️ | 1 tsp | Lightly crushed for warmth |
| Fresh Ginger 🌿 | 1 whole | Peeled and grated finely |
| Green Chili 🌶️ | 1 whole | Slit lengthwise for heat |
| Curry Leaves 🍃 | 8 pieces | Fresh for aromatic depth |
| Asafoetida 🌿 | ¼ tsp | Hing, optional for authenticity |
| Salt 🧂 | 1 tsp | Adjust to taste preference |
| Cashews 🥜 | ¼ cup | Broken, for garnish richness |
| Fresh Cilantro 🌿 | 2 tbsp | Chopped, for fresh garnish |
The rice and moong dal are the backbone of this dish. Short-grain rice is ideal for that signature porridge-like texture, while split yellow moong dal cooks quickly and adds protein. Source these from Indian grocery stores or the international aisle at Whole Foods. The ghee is non-negotiable for authentic flavor—Patel Brothers or Haldiram’s brands are reliable. Fresh curry leaves and asafoetida elevate the dish but can be omitted if unavailable.
For substitutions, basmati rice works but may require slightly more water. No moong dal? Split pigeon pea lentils (toor dal) are a good alternative, though cooking time may vary. Vegetable oil can replace ghee in a pinch (use one-third more), but the flavor will differ. For heat control, reduce or omit the green chili—black pepper alone provides gentle warmth.
Store dry rice and dal in airtight containers for up to 6 months. Fresh ginger keeps in the freezer for 3 months. This dish tastes even better the next day as flavors meld. Refrigerate leftovers for up to 3 days or freeze for 1 month.
Why You’ll Love This Recipe
- One Pot Magic: The pressure cooker does all the work—just toss in rice, moong dal, and water, then let it steam while I sip my tea.
- Ghee & Spice Heaven: That first bite with golden ghee, toasted cumin, and soft dal? I’ll be real: it’s the kind of taste that lingers all day.
- Breakfast to Dinner: Honestly, it’s my go-to for lazy Sunday brunches or a quick weeknight dinner when I need comfort food fast.
- Budget Stretcher: A handful of pantry staples feeds my family for pennies, and leftovers? They taste even better the next morning.
Step-by-Step Instructions for Pongal in Pressure Cooker
This method delivers perfectly creamy results with minimal effort and maximum flavor.
Step 1: Rinse and Prepare the Base Ingredients
Thoroughly rinse the 1 cup Raw Rice and 0.5 cup Yellow Moong Dal together under cold water until the water runs clear. This removes excess starch and prevents a gummy texture. Drain completely in a fine-mesh strainer.
While the rice and dal drain, finely grate the Fresh Ginger and slit the Green Chili lengthwise. Having these aromatics ready ensures a seamless cooking process once the pressure cooker is in use.
Step 2: Temper the Spices for Maximum Flavor
Set your pressure cooker to sauté mode and add 2 tbsp Ghee. Once the ghee melts and becomes fragrant, add 1 tsp Cumin Seeds, 1 tsp Black Peppercorns, 8 pieces Curry Leaves, and 0.25 tsp Asafoetida. Sauté for 30-45 seconds until the cumin seeds sizzle and the curry leaves become aromatic.
Add the grated ginger and slit green chili to the cooker and sauté for another 20-30 seconds. The spices should be fragrant but not browned—this builds a rich, layered foundation for the dish without bitterness.
Step 3: Pressure Cook to Creamy Perfection
Add the drained rice and dal to the cooker, stirring to coat them in the tempered spices and ghee. Pour in the 4 cups Water and add 1 tsp Salt. Stir well to combine, ensuring no grains stick to the bottom of the pot.
Secure the lid and set the cooker to high pressure for 6 minutes. Once the cooking cycle completes, allow the pressure to release naturally for 10 minutes, then carefully quick-release any remaining pressure. The natural release ensures the rice and dal cook evenly and absorb all the flavors, resulting in a creamy texture.
Step 4: Finish with Garnishes for Richness
Open the lid and give the pongal a gentle stir. If it seems too thick, add a splash of hot water to reach your desired consistency. The mixture should be soft, creamy, and slightly porridge-like.
In a small pan, heat a little extra ghee and lightly toast the 0.25 cup Cashews until golden brown. Stir the toasted cashews into the pongal, along with 2 tbsp Fresh Cilantro. The cashews add a delightful crunch, while the cilantro provides a fresh, bright finish to balance the dish.
Pro Tips For Making Pongal Recipe In Pressure Cooker
- Rinse the dal well: Soak the yellow moong dal for 10 minutes, then rinse until the water runs clear—this removes bitterness and ensures a smooth texture.
- Use the right ratio: Stick to a 1:2 rice-to-water ratio (1 cup rice + 1/2 cup dal to 4 cups water) for perfect pressure cooker pongal every time.
- Temper cumin properly: Heat ghee on medium, add cumin seeds, and let them sizzle for 10-15 seconds until fragrant before adding to the cooked pongal.
- Avoid overcooking: After 4 whistles on medium heat, turn off the stove—overcooking turns pongal mushy, and it’ll continue cooking in residual heat.
Perfect Pairings for This Dish
Traditional Sides
Serve with coconut chutney for a cooling contrast—the nutty sweetness complements the savory pongal perfectly. I also love pairing it with sambar, a tangy lentil stew that adds protein and depth. 🥥
Fresh Accompaniments
A simple cucumber raita with ½ cup yogurt and ¼ cup grated cucumber balances the warmth of the dish. Add 1 tsp roasted cumin powder for extra flavor. Fresh banana chips on the side add a satisfying crunch.
Beverage Pairings
A hot cup of South Indian filter coffee with its bold, frothy texture cuts through the creaminess. For a lighter option, masala chai with 1 tsp cardamom and ½ tsp cinnamon enhances the meal’s aromatic profile. ☕
Spicy Additions
For heat lovers, serve with tomato onion chutney or a side of pickled green chilies. These add a tangy, fiery kick that contrasts beautifully with the mild, creamy pongal. A sprinkle of sev on top adds crunch and texture.
Sweet Balance
End the meal with payasam (rice pudding) for a traditional sweet finish. Or keep it simple with fresh mango slices—their natural sweetness cleanses the palate after the savory richness of the dish. 💛
Nutrition Facts
Frequently Asked Questions
Can I use brown rice instead?
Yes, but increase water to 5 cups and pressure cook for 12 minutes with a 15-minute natural release. Brown rice needs more time to soften properly.
Why did my pongal turn out mushy?
Overcooking or too much water causes this. Stick to 6 minutes high pressure and 4 cups water for standard rice. Stir gently after cooking to check consistency.
Can I make this without ghee?
Use 3 tbsp oil instead, but ghee adds authentic flavor. Toast cashews separately in oil for best results. The dish will still be creamy and delicious.

- Potato Candy Recipe 1933: Vintage Peanut Butter Roll Delight - October 30, 2026
- Potato Chip Cookie Recipe With Pecans: Buttery Crunch Meets Nutty Richness - October 30, 2026
- Potato Patty Recipe No Egg: Crispy Edges Without the Binder - October 30, 2026