
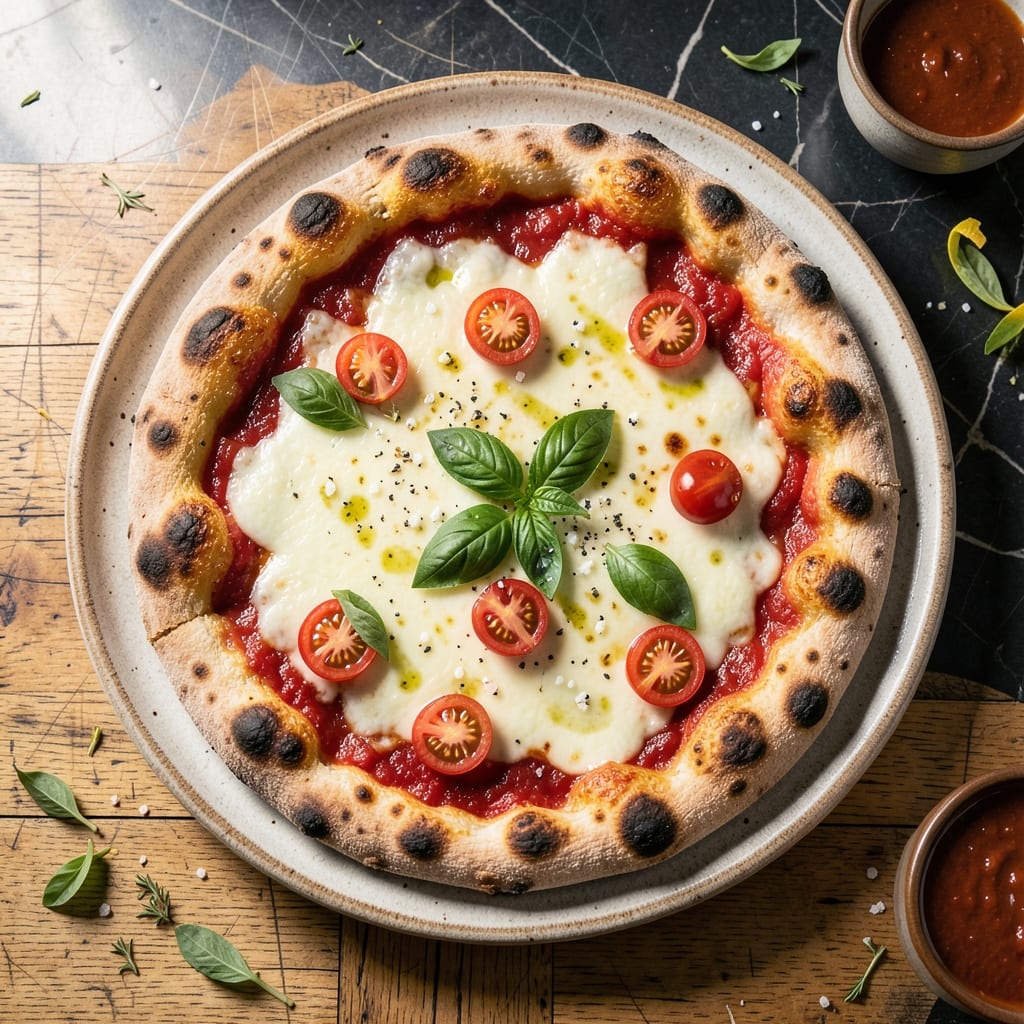
Homemade pizza night just reached new heights with this no-knead dough recipe using instant yeast. The process couldn’t be simpler, yet it delivers professional-quality results with minimal effort.
This method eliminates the traditional kneading step while still producing a light, airy crust with perfect texture. The instant yeast activates quickly, allowing the dough to rise efficiently without the long wait of active dry yeast.
You’ll achieve a golden, crispy exterior with a chewy interior—exactly what makes artisanal pizza so special. The dough comes together in minutes and can be used the same day or refrigerated overnight for even better flavor.
This is the foundation for endless pizza variations, from classic margherita to loaded specialty pies. The quality will rival your favorite pizzeria.
Ingredients for Pizza Recipe Instant Yeast
Pantry staples plus fresh toppings. Simple stuff, big flavor on the table.
| Ingredient | Amount | Notes |
|---|---|---|
| Bread Flour 🌾 | 3 ½ cups | All-purpose works in a pinch |
| Instant Yeast 🍞 | 2 ¼ tsp | One packet plus a quarter |
| Kosher Salt 🧂 | 1 ½ tsp | Diamond Crystal preferred |
| Granulated Sugar 🧈 | 1 tsp | Feeds the yeast for activation |
| Olive Oil 🫒 | 2 tbsp | Extra-virgin for flavor |
| Warm Water 💧 | 1 ½ cups | 110-115°F ideal temperature |
| Cornmeal 🌽 | ¼ cup | For dusting baking surface |
| Pizza Sauce 🍅 | 1 cup | Homemade or quality jarred |
| Fresh Mozzarella Cheese 🧀 | 8 oz | Tear into pieces by hand |
| Parmesan Cheese 🧀 | ½ cup | Freshly grated from block |
| Fresh Basil Leaves 🌿 | ¼ cup | For garnish after baking |
| Garlic Cloves 🧄 | 2 cloves | Minced for sauce if desired |
| Red Pepper Flakes 🌶️ | ½ tsp | Optional for heat lovers |
The flour sets the foundation here. King Arthur Bread Flour is my go-to for that perfect chew, but all-purpose from any grocery store works (just expect a slightly denser crust). Instant yeast is non-negotiable—SAF or Fleischmann’s are reliable brands. For the water, use a thermometer if you’re unsure (too hot kills the yeast, too cold slows it down). 110-115°F is the sweet spot.
No bread flour? Swap in all-purpose plus 1 tbsp vital wheat gluten to mimic the protein content. Out of instant yeast? Active dry yeast at 25% more quantity works but requires proofing first. The cornmeal can be fine semolina if that’s what you have. For the mozzarella, low-moisture from a block melts better than pre-shredded (which has anti-caking agents).
Dough keeps 2-3 days in the fridge—actually improves with time. Freeze pre-portioned balls for up to 3 months. Toppings? Prep them while the dough rises (or the night before). The basil wilts fast, so add it fresh after baking.
Why You’ll Love This Recipe
- No Fuss Dough: I toss the instant yeast straight in with the flour—no proofing, no waiting, just mix and go.
- Crisp Chewy Magic: That combo of olive oil and bread flour gives me a crust that’s golden outside, pillowy inside.
- Weeknight Hero: I’ve served this for lazy Fridays, kids’ parties, even a makeshift date night.
- Budget Stretch: Five ingredients, most of which I already have, and it feeds four with slices to spare.
Step-by-Step Instructions for Homemade Pizza with Instant Yeast
Here’s my foolproof method for no-knead pizza dough that delivers bakery-quality results at home.
Step 1: Activate the Yeast and Mix the Dough
In a large bowl, whisk together the 1.5 cups warm water, 1 tsp granulated sugar, and 2.25 tsp instant yeast. Let it sit for 5 minutes until it becomes foamy and cloudy—that’s how you know the yeast is active and ready to work.
Add the 2 tbsp olive oil, 1.5 tsp kosher salt, and 3.5 cups bread flour. Stir with a wooden spoon until a shaggy dough forms. It’ll look rough at first, but that’s exactly what you want. The dough should pull away from the sides of the bowl but still be slightly sticky to the touch.
Step 2: Let the Dough Rise for Maximum Flavor
Cover the bowl with a damp kitchen towel or plastic wrap and let it rise in a warm spot for 1.5 to 2 hours. I like to place mine near a sunny window or on top of the refrigerator where it’s slightly warmer. The dough should double in size and look puffy with a few bubbles on the surface.
This is where the magic happens. The long rise time allows the yeast to develop complex flavors in the dough, giving you that authentic bakery taste. If your kitchen is cool, the rise might take a bit longer—that’s totally normal. Just be patient and let the dough do its thing.
Step 3: Shape and Pre-Bake the Crust
Preheat your oven to 475°F with a baking sheet or pizza stone inside. Dust a clean surface with 0.25 cup cornmeal to prevent sticking and add a nice crunch to the crust. Turn the risen dough onto the dusted surface and gently stretch it into your desired shape.
Carefully transfer the shaped dough onto the preheated baking sheet or stone. Bake for 5-7 minutes until the crust is just set but not browned. This pre-baking step ensures a crispy base that won’t get soggy when you add the toppings.
Step 4: Add Toppings and Finish Baking
Spread the 1 cup pizza sauce evenly over the pre-baked crust, leaving a small border for the edges. If you’re using the 2 cloves garlic cloves, mince them finely and sprinkle over the sauce for extra flavor. Add the 8 oz fresh mozzarella cheese torn into pieces and sprinkle with 0.5 cup parmesan cheese.
Bake for another 10-12 minutes until the cheese is bubbly and golden brown in spots. For some heat, sprinkle the 0.5 tsp red pepper flakes over the pizza before baking. The edges of the crust should be deeply browned and crispy.
Step 5: Garnish and Serve Immediately
Remove the pizza from the oven and let it cool for 2 minutes before slicing. This brief rest allows the cheese to set slightly so it doesn’t all slide off when you cut into it. Tear the 0.25 cup fresh basil leaves over the top for a pop of freshness and color.
Slice into wedges and serve while hot. The crust should be crispy on the outside with a chewy interior, and the cheese should be perfectly melted and gooey. This is homemade pizza at its finest.
Pro Tips For Making Pizza Recipe Instant Yeast
- Warm the Water: Use water around 110°F—hot enough to activate the instant yeast but not so hot it kills it. I learned this the hard way after a few flat, sad doughs.
- Measure Flour Right: Spoon bread flour into your measuring cup and level it off—don’t scoop directly from the bag, or you’ll end up with dense, tough crust every time.
- Skip the Over-Kneading: Mix just until the dough comes together, then stop. Overworking it develops too much gluten, and your pizza will taste like a chewy hockey puck.
- Oil the Bowl Well: Coat the rising bowl with about a tablespoon of olive oil before adding the dough. It prevents sticking and makes cleanup a breeze—sounds simple, but it works.
Pro Cooking Tips for This Dish
Yeast Activation
Always use 110-115°F water for instant yeast—too hot kills it, too cold slows activation. I test with my finger: it should feel warm but not uncomfortable. The foam should appear within 5 minutes if the yeast is fresh. 🌡️
Dough Handling
Don’t overwork this no-knead dough. Stir just until it comes together—it’ll be sticky, but that’s normal. If it’s too wet, add flour 1 tbsp at a time. Let the gluten develop during the rise, not by kneading.
Rise Environment
For consistent results, place your dough in a turned-off oven with the light on. This creates a stable 80-85°F environment, ideal for even rising. I avoid drafty spots like near AC vents.
Pre-Baking Secret
Pre-baking the crust for 5-7 minutes prevents soggy bottoms. Use a pizza stone or inverted baking sheet for even heat distribution. Dust with cornmeal for extra crunch and easy transfer. 🔥
Cheese Tips
Tear fresh mozzarella by hand instead of slicing for better melt. Pat it dry first to avoid excess moisture. For extra browning, sprinkle Parmesan directly on the sauce before adding mozzarella.
Oven Position
Bake on the lowest rack for a crispier crust. Rotate the pizza halfway through for even browning. If your oven runs hot, reduce temperature to 450°F and extend baking time slightly.
Nutrition Facts
Frequently Asked Questions
What water temperature works best for this?
Use water between 110-115°F to activate the yeast without killing it. Test with your finger—it should feel warm but comfortable to touch.
Can I make the dough ahead of time?
Yes! The dough keeps in the fridge for 2-3 days and actually develops more flavor over time. Let it come to room temperature before shaping.
Why pre-bake the crust first?
Pre-baking for 5-7 minutes creates a firm base that prevents soggy bottoms when toppings are added. It’s the secret to a crispy crust.
How do I know when it’s done?
The crust should be golden brown with cheese fully melted and bubbly. The edges will look crispy and slightly charred in spots.

- Potato Candy Recipe 1933: Vintage Peanut Butter Roll Delight - October 30, 2026
- Potato Chip Cookie Recipe With Pecans: Buttery Crunch Meets Nutty Richness - October 30, 2026
- Potato Patty Recipe No Egg: Crispy Edges Without the Binder - October 30, 2026