
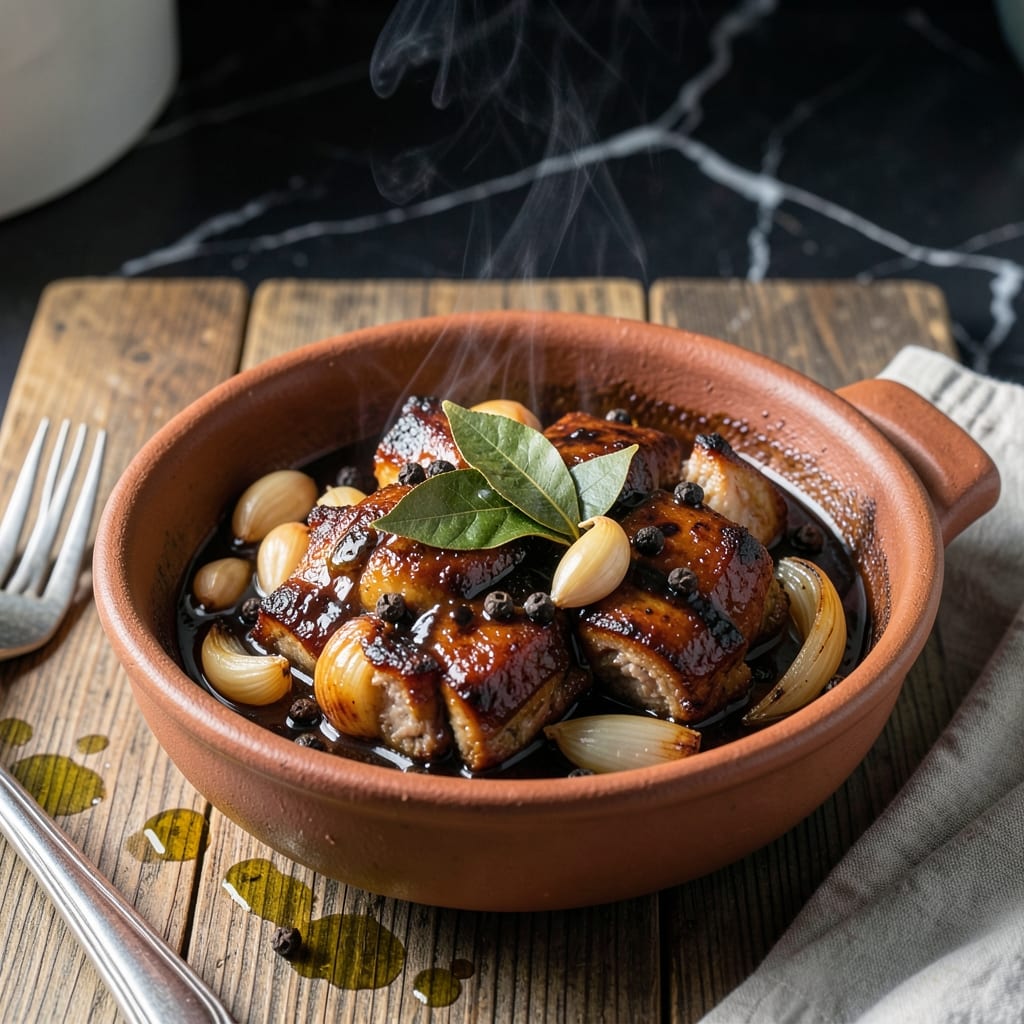
This dish brings the heart of Filipino home cooking to your kitchen table with its perfect balance of tangy and savory flavors.
I developed this version after testing multiple ratios of vinegar to soy, focusing on the traditional braising method that makes the pork fall-apart tender. The bay leaves add an aromatic depth that’s distinctly Pinoy.
What emerges is pork so rich and flavorful it tastes like it’s been simmering for hours, even with a one-hour cook time. The sauce reduces to a glossy, finger-licking consistency that clings to every piece.
Serve it with steamed rice to soak up every drop of that incredible sauce. This is comfort food that feels like a warm embrace.
Ingredients for Pork Adobo Recipe Pinoy
Ten simple ingredients. One pot. That signature tangy-savory Filipino magic.
| Ingredient | Amount | Notes |
|---|---|---|
| Pork Shoulder 🥩 | 2 lb | Cut into 2-inch pieces |
| Soy Sauce 🥫 | ¾ cup | Regular or light variety |
| White Vinegar 🧪 | ½ cup | Or cane vinegar for authenticity |
| Garlic Cloves 🧄 | 8 cloves | Minced or crushed |
| Bay Leaves 🍃 | 3 pieces | Dried or fresh |
| Whole Black Peppercorns 🌶️ | 1 tbsp | Lightly crushed |
| Brown Sugar 🍚 | 1 tbsp | Optional, balances acidity |
| Water 💧 | 1 cup | To deglaze the pan |
| Vegetable Oil 🫒 | 2 tbsp | For browning pork |
| Onion 🧅 | 1 whole | Sliced into rings |
| Salt 🧂 | 1 tsp | Adjust to taste |
The pork is key here. Pork shoulder gives you that melt-in-your-mouth texture—pork belly works too if you want extra richness. I grab mine from local Asian markets when I can (better marbling, often cheaper). Bay leaves are non-negotiable for that authentic Pinoy aroma—look for Turkish bay leaves if you want the good stuff. Avoid the old, dusty ones at the back of your spice rack (they lose flavor fast).
No white vinegar? Cane vinegar is ideal (more authentic), but apple cider vinegar works in a pinch. Out of soy sauce? Tamari at a 1:1 ratio—just watch the salt. Brown sugar isn’t traditional but one tablespoon rounds out the sharpness. If you’re feeling fancy, a splash of coconut aminos adds depth. The garlic can be doubled if you’re a fan (and honestly, who isn’t?).
This tastes even better the next day—2-3 days in the fridge, 3 months frozen. Reheat gently to keep the pork tender. The sauce thickens as it cools, so add a splash of water when reheating. Pro tip: Save that extra sauce for drizzling over rice.
Why You’ll Love This Recipe
- One Pot Magic: I just brown the pork, dump everything in, and let it simmer—no fancy techniques.
- Savory Tangy Bite: The soy sauce and vinegar mix hits that perfect sweet-salty-sour balance every time.
- Feeds the Gang: I make a big batch for Sunday lunch, and it’s just as good reheated for dinner.
- Budget Stretcher: Pork shoulder is cheap, and the simple pantry staples keep costs low without sacrificing flavor.
Step-by-Step Instructions for Pork Adobo Pinoy
Here’s how I make this iconic dish with perfect balance every time.
Step 1: Brown the Pork Shoulder
Heat the 2 tbsp vegetable oil in a large pot over medium-high heat. Add the 2 lb pork shoulder pieces in batches, being careful not to overcrowd the pot. Brown them on all sides for 3-4 minutes per batch until golden brown.
This browning step develops deep flavor and renders some fat, which enhances the sauce. Don’t skip it—even if it seems tedious. The pork should release easily from the pot when it’s properly browned. Remove the pork and set aside.
Step 2: Sauté Aromatics and Build the Base
In the same pot, add the sliced onion and cook for 2-3 minutes until softened. Then add the 8 cloves garlic and cook for another 30 seconds until fragrant. Be careful not to burn the garlic—it can turn bitter quickly.
Next, pour in the 0.75 cup soy sauce, 0.5 cup white vinegar, 1 cup water, 3 pieces bay leaves, 1 tbsp whole black peppercorns, and 1 tsp salt. Stir well to combine, scraping up any browned bits from the bottom of the pot.
Step 3: Braise the Pork Until Tender
Return the pork to the pot, ensuring it’s mostly submerged in the liquid. Add the 1 tbsp brown sugar and stir to dissolve. Bring the mixture to a boil, then reduce the heat to low, cover, and let it simmer for 1 to 1.5 hours.
You’ll know it’s done when the pork is fork-tender and the liquid has reduced slightly. I check the pork after 1 hour—if it’s still tough, let it cook longer. The sauce should be tangy and rich, with the flavors of garlic and bay leaves infusing every bite.
The pork should easily pull apart with a fork when done.
Step 4: Reduce the Sauce and Serve
Once the pork is tender, uncover the pot and increase the heat to medium. Let the sauce reduce for 10-15 minutes until it thickens and coats the back of a spoon. Stir occasionally to prevent sticking.
Taste and adjust the seasoning if needed—you might want to add a bit more salt or brown sugar to balance the flavors. Remove the bay leaves before serving. This dish tastes even better the next day as the flavors meld together. Serve hot over steamed rice.
Pro Tips For Making Pork Adobo Recipe Pinoy
- Simmer Low and Slow: I learned this the hard way—boiling the vinegar too hard makes the pork tough. Keep it at a gentle simmer for at least 45 minutes to let the flavors meld without drying out the meat.
- Crush the Garlic: Sounds weird, but it works: lightly crushing the garlic cloves (peeled) before adding them releases way more flavor than whole cloves. Just don’t burn them—I’ve ruined a batch by sautéing too long.
- Skip the Early Taste Test: Resist the urge to taste the sauce before it’s done. The raw vinegar needs time to mellow, and the adobo won’t taste right until at least 30 minutes in. My grandmother swore by this, and she was right.
- Use extra soy for depth: After burning a batch by using just enough soy sauce to cover, I now add an extra 2 tablespoons at the start. The pork absorbs it, and the sauce reduces to a richer, stickier consistency.
Dietary Considerations for This Dish
Gluten-Free Adaptations
Traditional soy sauce contains wheat, but you can easily make this gluten-free. I use tamari at a 1:1 ratio instead of soy sauce—it’s naturally gluten-free and has a similar depth of flavor. Just double-check the label for 100% soy to be safe. 💡
Low-Sodium Option
For anyone watching their sodium intake, swap regular soy sauce for low-sodium soy sauce and reduce the added salt by ½ tsp. The vinegar and garlic will still provide plenty of flavor without the extra sodium.
Dairy-Free by Nature
This dish is naturally dairy-free, so no modifications are needed. The rich, savory sauce comes entirely from the pork, soy, and vinegar combination. Perfect for anyone with lactose intolerance or dairy allergies.
Sugar-Free Variation
If you’re avoiding sugar, simply omit the brown sugar—the dish will still be delicious. The vinegar’s tanginess and the pork’s natural sweetness will balance the flavors. I often skip it when I’m in the mood for a sharper taste.
Keto and Low-Carb Friendly
This recipe is naturally low-carb and keto-friendly. With 2 lb pork shoulder as the base, it fits perfectly into a keto diet. Just skip the brown sugar to keep carbs minimal. Serve it over cauliflower rice instead of regular rice for a complete keto meal. 💪
Allergy Considerations
Be mindful of common allergens in soy sauce. If you or your guests have a soy allergy, use coconut aminos as a substitute. It has a similar umami flavor and works well in this dish. Always verify ingredient labels for potential cross-contamination.
Nutrition Facts
Frequently Asked Questions
Can I use a different cut of pork?
Yes! While pork shoulder is ideal for its tenderness, pork belly works well for extra richness. Avoid lean cuts like tenderloin, as they can dry out during the 1-1.5 hour braise.
Why does the vinegar taste too strong at first?
The sharpness mellows as it simmers. The 30-45 minute braise blends the vinegar with soy and pork juices, creating a balanced tangy-savory sauce. Never skip the reduction step!
How do I fix overly salty adobo?
Add 1-2 tbsp brown sugar or a splash of water to dilute. For prevention, use low-sodium soy sauce and adjust salt gradually.
What’s the best way to store leftovers?
Keep in an airtight container for up to 3 days in the fridge or 3 months frozen. Reheat gently with a splash of water to revive the sauce.

- Potato Chip Cookie Recipe With Pecans: Buttery Crunch Meets Nutty Richness - October 30, 2026
- Potato Patty Recipe No Egg: Crispy Edges Without the Binder - October 30, 2026
- Paula Deen’s Potato Chip Cookies Recipe: Salty-Sweet Crunch in Every Bite - October 30, 2026