
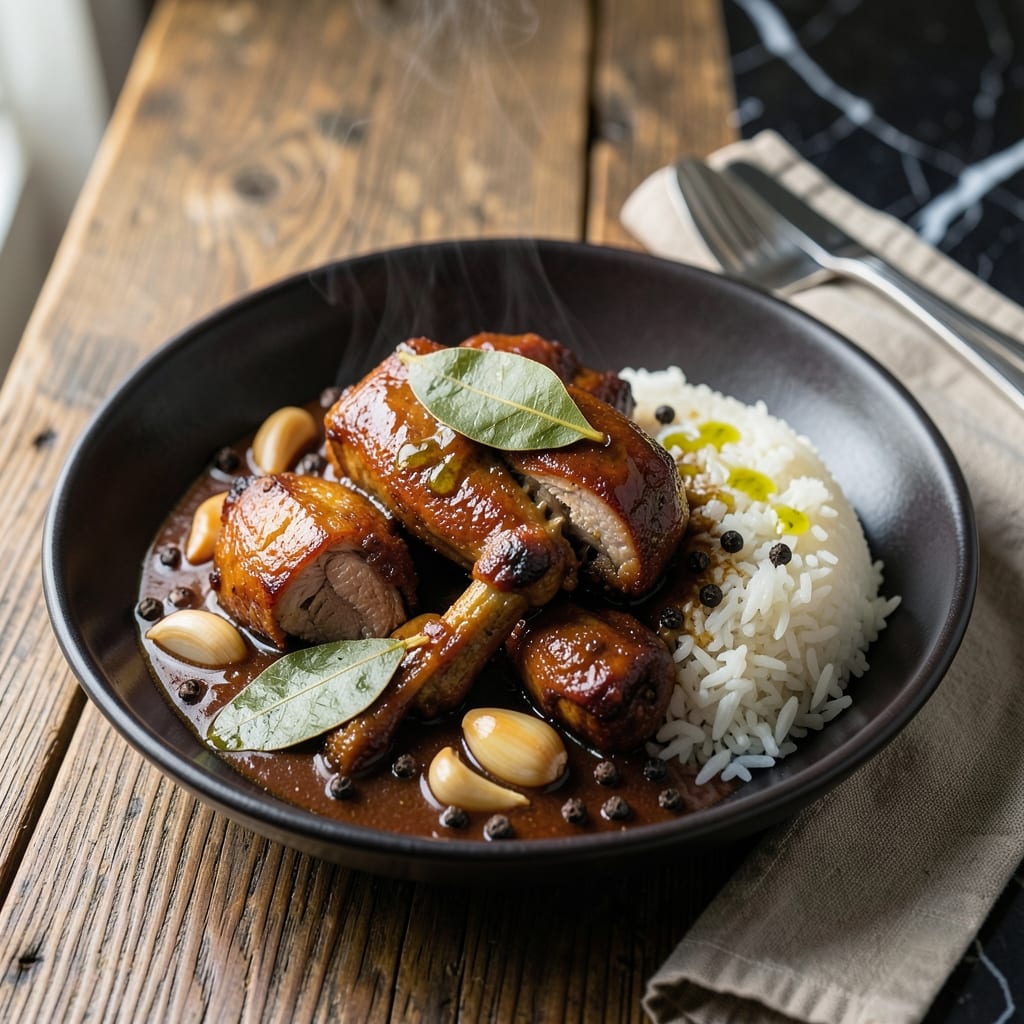
This Filipino classic combines tender pork with a perfect balance of tangy and savory flavors. I developed my method after testing countless variations to capture the authentic taste my grandmother always achieved.
The key is in the braising liquid—a simple mixture of soy sauce, vinegar, and garlic that transforms into a rich, flavorful sauce. I learned the hard way that the vinegar should never be added until after the pork has browned, or it will toughen the meat.
What you get is fall-apart tender pork in a glossy, deeply flavorful sauce that’s perfect over rice. The aroma while it simmers is absolutely irresistible, and the taste is even better the next day.
Serve this traditional dish with steamed rice to soak up every drop of the delicious sauce. Here’s how to make it.
Ingredients for Pork Adobo Recipe Step by Step
These bold ingredients create that signature tangy-savory balance everyone loves in this dish.
| Ingredient | Amount | Notes |
|---|---|---|
| Pork Shoulder 🥩 | 2 lb | Cut into 2-inch pieces, bone-in preferred |
| Soy Sauce 🫙 | ¾ cup | Filipino brands like Silver Swan preferred |
| White Vinegar 🧪 | ½ cup | Cane vinegar ideal for authenticity |
| Garlic Cloves 🧄 | 10 cloves | Peeled and smashed |
| Bay Leaves 🌿 | 3 pieces | Dried, whole leaves |
| Black Peppercorns 🌶️ | 1 tsp | Freshly cracked for best flavor |
| Brown Sugar 🍚 | 2 tbsp | Optional for balancing acidity |
| Onion 🧅 | 1 whole | Large, sliced into rings |
| Cooking Oil 🫒 | 2 tbsp | Neutral oil like vegetable or canola |
| Water 💧 | 1 cup | For adjusting sauce consistency |
| Salt 🧂 | ½ tsp | Adjust to taste at end |
The pork is everything here—pork shoulder (sometimes called pork butt) gives that melt-in-your-mouth texture. Bone-in pieces stay juicier, but boneless works fine too. I grab mine from Costco or a good butcher shop—they’ll often cut it into stew-sized chunks for free. Look for pieces with good marbling (those white fat streaks) for maximum flavor. Filipino markets often carry pre-cut pork specifically for adobo.
No Filipino soy sauce? Use low-sodium regular soy sauce and add a pinch of salt to compensate. Cane vinegar is traditional, but white vinegar or apple cider vinegar work in a pinch. Don’t have bay leaves? A tiny pinch of ground bay leaf (if you can find it) or just skip it—the garlic and soy carry the flavor. The sugar balances the acidity, but you can substitute honey or coconut sugar if preferred.
This tastes even better the next day. Keeps in the fridge for 4-5 days and freezes beautifully for 3 months. The sauce thickens as it cools, so thin with a splash of water when reheating. Always serve with extra sauce spooned over the top.
Why You’ll Love This Recipe
- One Pot Wonder: I love that everything goes into a single pan—pork, soy sauce, vinegar, garlic, and bay leaves—then simmers while I do something else.
- Tangy Garlic Bomb: The mix of soy sauce, vinegar, and garlic creates this rich, tangy-savory sauce that soaks right into the pork shoulder.
- Feeds the Crew: It’s my go-to for family dinners, and the leftovers taste even better the next day over rice.
- Budget Stretcher: Pork shoulder is affordable, and with just a few pantry staples, I get a hearty meal that feels way more special than the cost.
Step-by-Step Instructions for Filipino Braised Pork in Tangy Soy Sauce
This method delivers the perfect balance of tangy, savory, and slightly sweet flavors every time.
Step 1: Sear the Pork Shoulder to Lock in Flavor
Heat the 2 tbsp cooking oil in a large pot or Dutch oven over medium-high heat. When the oil shimmers, add the 2 lb pork shoulder pieces in a single layer, working in batches if necessary to avoid crowding.
Sear the pork for 3-4 minutes per side until deep golden brown on all sides. This step builds a flavorful foundation and prevents the meat from drying out during the long braise. Don’t rush—you want that rich, caramelized crust.
Step 2: Build the Aromatic Base
Once all pork is browned, remove it from the pot and set aside. In the same pot, add the 1 whole onion (sliced into rings) and the 10 cloves garlic cloves (peeled and smashed). Sauté for 2-3 minutes until the garlic is fragrant and the onions soften slightly.
Next, add the 3 pieces bay leaves and 1 tsp black peppercorns to the pot. Stir for 30 seconds to toast the spices lightly—this wakes up their flavors. The kitchen should start smelling incredible at this point.
Step 3: Deglaze and Add the Braising Liquid
Pour in the 0.75 cup soy sauce and 0.5 cup white vinegar, using a wooden spoon to scrape up all the browned bits from the bottom of the pot. These bits, called fond, will dissolve into the liquid and add incredible depth to your sauce.
Add the 2 tbsp brown sugar and stir until it dissolves completely. Then pour in the 1 cup water. The liquid should come about halfway up the pork when you return it to the pot.
Step 4: Braise Until Fork-Tender
Return all the pork to the pot along with any accumulated juices. Bring the mixture to a boil, then reduce the heat to low. Cover and let it simmer gently for 1.5 to 2 hours, stirring occasionally.
You’ll know it’s done when the pork is fork-tender and the sauce has thickened slightly. If the sauce reduces too much during cooking, add a splash of water to maintain the right consistency. The pork should easily pull apart with a fork when pressed.
Step 5: Adjust Seasoning and Serve
Once the pork is tender, taste the sauce and adjust the seasoning with the 0.5 tsp salt if needed. Remember that soy sauce is already salty, so go easy at first. The flavors should be bold but balanced—tangy from the vinegar, savory from the soy sauce, with a hint of sweetness.
Discard the bay leaves and black peppercorns before serving. The sauce should be thick enough to cling to the pork. Serve hot over steamed rice, with extra sauce spooned over the top. This dish tastes even better the next day as the flavors meld together.
Pro Tips For Making Pork Adobo Recipe Step By Step
- Simmer Low and Slow: Keep the heat at a gentle simmer—too high and the vinegar will evaporate too fast, leaving your adobo dry and overly salty. I learned this the hard way after my first batch tasted like soy sauce concentrate.
- Crush the Garlic: Smash the garlic cloves with the flat of your knife before mincing—it releases more flavor into the sauce. Sounds weird, but it works: the adobo tastes noticeably richer.
- Skip Pre-Salting: Resist the urge to season the pork before browning since soy sauce already brings plenty of salt. Pre-salting just makes the dish unbalanced.
- Use More Vinegar: Add a splash extra vinegar at the end if the sauce tastes flat—it brightens the whole dish. My grandmother swore by this, and she was right: it cuts through the richness perfectly.
Storing and Reheating This Dish
Refrigerator Storage
Let the adobo cool completely before transferring to airtight containers. It’ll keep in the fridge for 4-5 days. I always use glass containers—they don’t absorb odors like plastic. The sauce thickens as it chills, so stir in 1-2 tbsp water when reheating. ❄️
Freezer Storage
This freezes beautifully for up to 3 months without losing quality. Portion into freezer-safe bags or containers, leaving ½ inch headspace for expansion. I like to freeze in individual servings for easy weeknight meals.
Stovetop Reheating
My preferred method: warm in a saucepan over medium-low heat for 8-10 minutes, stirring occasionally. Add a splash of water if it seems dry. The flavors actually deepen after freezing, just like my grandmother always said.
Microwave Reheating
For quick meals, microwave covered in 30-second intervals, stirring between each. It usually takes 1.5-2 minutes total. I recommend covering with a damp paper towel to prevent drying out.
Sauce Consistency Tip
If the sauce separates or thickens too much, whisk in ¼ cup hot water while reheating. The emulsion will come back together beautifully. This trick saved many of my early attempts at perfect adobo.
Nutrition Facts
Frequently Asked Questions
Can I use chicken instead of pork?
Yes! Chicken thighs work beautifully with the same cooking method. Reduce braising time to 30-40 minutes as chicken cooks faster. The sauce pairs perfectly with poultry too.
Why do you add vinegar after browning?
Adding vinegar too early can toughen the meat. We brown first to develop flavor, then add the acid to tenderize during the long simmer. This timing creates the perfect texture.
How do I fix too-salty adobo?
Add 1/4 cup water and a splash of vinegar to balance. Simmer for 10 minutes to mellow flavors. Never add sugar to fix saltiness—it won’t work.

- Potato Candy Recipe 1933: Vintage Peanut Butter Roll Delight - October 30, 2026
- Potato Chip Cookie Recipe With Pecans: Buttery Crunch Meets Nutty Richness - October 30, 2026
- Potato Patty Recipe No Egg: Crispy Edges Without the Binder - October 30, 2026