
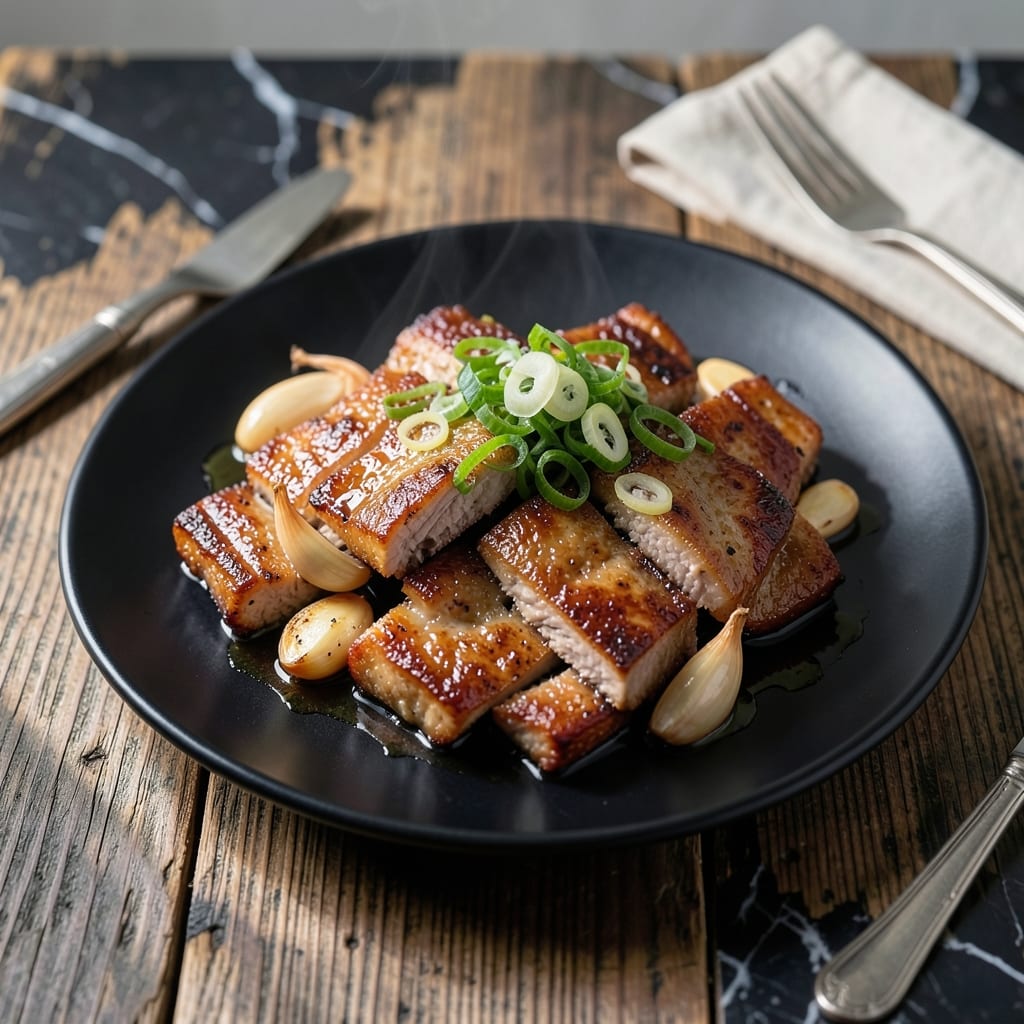
This is the pork belly recipe I wish I’d had years ago. My grandmother’s handwritten card just said “cook until tender,” but I’ve decoded the Japanese approach for melt-in-your-mouth results.
The secret is patience—low heat transforms the fat into something almost buttery. Soy sauce, sake, and a touch of sugar create that deep umami flavor that makes this dish irresistible.
What emerges is tender pork with a sticky, caramelized exterior that falls apart at the touch of your fork. The aroma alone will have everyone gathering in the kitchen.
Serve it over rice with pickled vegetables for the full experience. This is comfort food elevated to an art form.
Ingredients for Pork Belly Recipe Japanese Style
Rich, umami-packed ingredients transform pork belly into a tender, caramelized masterpiece in no time.
| Ingredient | Amount | Notes |
|---|---|---|
| Pork Belly 🥩 | 2 lb | Skin-on, cut into 2-inch chunks |
| Soy Sauce 🫒 | ¾ cup | Japanese variety preferred |
| Sake 🍶 | ½ cup | Dry cooking sake works best |
| Granulated Sugar 🍚 | ¼ cup | Balances the umami flavors |
| Garlic Cloves 🧄 | 6 cloves | Smashed, not minced |
| Fresh Ginger 🌿 | 1 whole | Sliced into thick coins |
| Green Onions 🧅 | 4 whole | Cut into 2-inch pieces |
| Water 💧 | 1 ½ cups | For braising liquid |
| Rice Vinegar 🍯 | 2 tbsp | Adds brightness to the sauce |
| Sesame Oil 🫒 | 1 tbsp | Toasted for finishing |
| Cooked White Rice 🍚 | 4 cups | For serving with the pork |
| Pickled Vegetables 🥬 | 1 cup | For garnish, optional |
The pork belly is everything here. Look for skin-on cuts at Asian markets or specialty butchers—the skin crisps up beautifully. I grab mine from H Mart whenever I’m stocking up on other Japanese staples. The fat should be well-marbled, not lean. For the soy sauce, Kikkoman or Yamasa are reliable, but any Japanese brand will deliver that deep, savory base you need.
No sake on hand? Dry white wine plus a splash of rice vinegar gets you 90% there. If you’re missing fresh ginger, ground ginger at half the amount works in a pinch (but fresh is worth the effort). The green onions can be swapped for leeks—just slice them thick. For the pickles, quick-pickled cucumbers or daikon add that perfect tangy contrast without extra effort.
This keeps surprisingly well. Store leftovers in their braising liquid for up to 5 days in the fridge—they reheat beautifully. The sauce thickens as it cools, so thin with a splash of water when warming. Freezes for 3 months (the texture changes slightly but still delicious).
Why You’ll Love This Recipe
- One Pan Wonder: I toss everything in a pan, let the soy and sake work their magic, and the pork belly practically cooks itself.
- Sweet-Savory Magic: The sugar caramelizes with the soy and sake into this sticky, umami glaze that clings to every bite.
- Weeknight Hero: Honestly, it’s fancy enough for guests but simple enough for a Tuesday when I’m craving takeout flavors at home.
- Leftovers Gold: The flavors deepen overnight—cold pork belly straight from the fridge is my secret snack when no one’s looking.
Step-by-Step Instructions for Pork Belly Japanese Style
Here’s how I achieve that melt-in-your-mouth texture with layers of rich umami flavor.
Step 1: Sear the Pork Belly to Build Flavor
Heat a large pot or Dutch oven over medium-high heat. Add the 2 lb Pork Belly chunks skin-side down and sear undisturbed for 5-7 minutes until the fat renders and the skin turns deep golden brown.
Flip the pieces and sear the other sides for another 3-4 minutes. This step is crucial—it creates a flavorful fond at the bottom of the pot that will deepen the braising liquid. Don’t rush it; you want that skin to crisp up nicely before braising.
Step 2: Build the Braising Liquid with Aromatics
Add the 6 cloves Garlic Cloves, 1 whole Fresh Ginger slices, and 4 whole Green Onions to the pot with the pork. Pour in the 0.75 cup Soy Sauce, 0.5 cup Sake, 0.25 cup Granulated Sugar, 1.5 cups Water, and 2 tbsp Rice Vinegar. Stir to combine all the ingredients.
Bring the mixture to a boil, then reduce the heat to low. The liquid should just barely simmer—you’ll see small bubbles breaking the surface occasionally. This gentle heat ensures the pork cooks evenly without becoming tough.
Step 3: Braise Until Fork-Tender
Cover the pot and let the pork belly braise for 1.5 to 2 hours. Check occasionally to ensure the liquid hasn’t reduced too much—if it’s getting low, add a splash of water. The pork is done when it’s fork-tender and the skin can be pierced easily with a fork.
During the last 30 minutes of cooking, remove the lid to allow the liquid to reduce slightly and the pork to develop a glossy, caramelized exterior. The aroma at this stage will be intoxicating—rich, savory, and slightly sweet.
Step 4: Finish and Serve with Traditional Accompaniments
Once the pork is tender, transfer it to a serving dish. Skim any excess fat from the surface of the braising liquid, then pour the sauce over the pork. Drizzle with the 1 tbsp Sesame Oil and let it rest for 5-10 minutes to absorb the flavors.
Serve the pork belly over 4 cups Cooked White Rice to soak up the delicious sauce. Garnish with 1 cup Pickled Vegetables on the side for a bright, tangy contrast. The combination of tender pork, rich sauce, and fluffy rice is pure comfort in every bite.
Pro Tips For Making Pork Belly Recipe Japanese Style
- Sear Pork First: I learned this the hard way—brown the pork belly in a hot pan before braising to lock in flavor and get that sticky, caramelized crust.
- Use Fresh Garlic: Skip the pre-minced stuff; fresh garlic cloves crushed just before cooking add a sharper, brighter punch to the soy-sake braise.
- Watch the Sugar: Granulated sugar burns easily, so stir the sauce often once it starts reducing—otherwise, you’ll end up with a bitter, charred mess.
- Rest Before Slicing: After braising, let the pork belly sit for 10 minutes before cutting, or the juices will spill out and leave the meat dry.
Storing and Reheating Leftovers
Refrigerator Storage
Let the pork belly cool in its braising liquid for no more than 2 hours before transferring to airtight containers. I use glass containers with locking lids to preserve the rich flavors. The dish keeps beautifully in the fridge at 40°F or below for up to 5 days. ❄️
Freezer Storage
For longer storage, freeze the pork belly in its sauce in freezer-safe bags or containers. I prefer flat freezer bags to save space. Leave 1-inch headspace for expansion and label with the date. It maintains quality for up to 3 months.
Stovetop Reheating
This is my preferred method. Transfer the pork and sauce to a pot, add ¼ cup water to thin the sauce, and heat over medium-low heat for 8-10 minutes. Stir occasionally to prevent sticking. The flavors actually deepen when reheated this way. 🔥
Microwave Reheating
For quick meals, place individual portions in a microwave-safe dish with a splash of water. Cover with a damp paper towel and heat on 70% power for 2-3 minutes. Stir and continue in 30-second intervals until reaching 165°F.
Nutrition Facts
Frequently Asked Questions
What can I use instead of sake?
Dry white wine plus a splash of rice vinegar works perfectly. The combination mimics sake’s acidity and depth. Avoid sweet wines, as they’ll alter the dish’s balance.
How do I know when it’s done?
The pork is ready when it’s fork-tender and the skin pierces easily. Expect 1.5-2 hours of braising. The meat should fall apart with minimal pressure.
Can I make this ahead?
The flavors deepen overnight. Refrigerate in its liquid for up to 5 days or freeze for 3 months. Reheat gently to maintain texture.
Why is my sauce too salty?
This usually happens with reduced soy sauces. Balance it with a splash of water or a teaspoon of sugar. Always taste before serving—adjustments are easy!

- Potato Chip Cookie Recipe With Pecans: Buttery Crunch Meets Nutty Richness - October 30, 2026
- Potato Patty Recipe No Egg: Crispy Edges Without the Binder - October 30, 2026
- Paula Deen’s Potato Chip Cookies Recipe: Salty-Sweet Crunch in Every Bite - October 30, 2026