
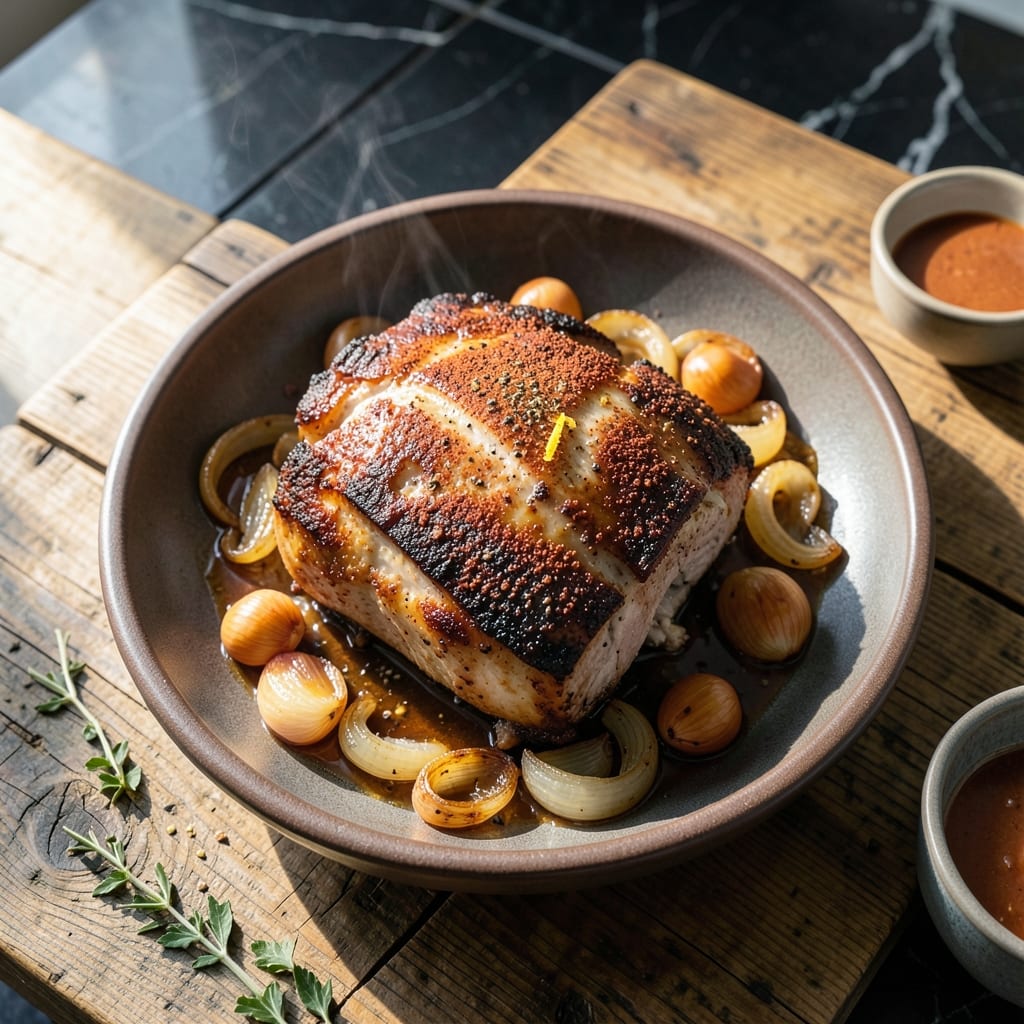
Achieving pull-apart tender pork butt in the oven requires patience and the right technique. I developed this method after years of testing, focusing on low heat and proper seasoning.
The key is slow-roasting at 275°F until the internal temperature reaches 195°F. This breaks down the collagen, transforming tough meat into succulent, fall-apart perfection.
What emerges is juicy pork with a crisp exterior bark, ready to shred for sandwiches or tacos. The meat retains its moisture while developing deep, complex flavors.
This approach delivers consistent results every time, making it ideal for feeding a crowd or meal prepping for the week.
Ingredients for Pork Butt Roast Recipe Oven
Slow-roasted pork butt with deep, complex flavors from a simple, potent seasoning blend.
| Ingredient | Amount | Notes |
|---|---|---|
| Pork Butt 🥩 | 4 lb | Bone-in preferred for flavor |
| Kosher Salt 🧂 | 2 tbsp | Diamond Crystal preferred |
| Coarse Black Pepper 🌶️ | 1 tbsp | Freshly ground for best results |
| Garlic Powder 🧄 | 1 tbsp | Not garlic salt |
| Onion Powder 🧅 | 1 tbsp | Balances the seasoning blend |
| Smoked Paprika 🌶️ | 1 tbsp | Adds depth and color |
| Brown Sugar 🍚 | ½ cup | Light or dark works |
| Yellow Mustard 🟡 | ¼ cup | Helps form the bark |
| Apple Cider Vinegar 🍏 | ¼ cup | Balances the richness |
| Olive Oil 🫒 | 2 tbsp | For searing and moisture |
| Low-Sodium Chicken Stock 💧 | 1 cup | Adds moisture during roasting |
| Fresh Rosemary 🌿 | 2 sprigs | Optional for aromatic depth |
The pork butt is non-negotiable here. Bone-in, well-marbled yields the most tender results. Costco or a trusted butcher are ideal sources—look for pieces with a good fat cap. The fat renders down during the long cook, basting the meat from within. Diamond Crystal kosher salt is my go-to for its clean flavor and even distribution.
Short on time? Pork shoulder works as a substitute, though it’s slightly leaner. No smoked paprika? Regular paprika plus a pinch of cayenne mimics the smokiness. Brown sugar can be swapped for honey or maple syrup, but the texture will differ slightly. The vinegar is key—don’t skip it—as it tenderizes the meat.
Store the pork butt in the fridge for up to 3 days before cooking. Leftovers keep for 5 days refrigerated or freeze for 3 months. Reheat gently to preserve moisture.
Why You’ll Love This Recipe
- Set It and Forget: I rub the pork butt with salt, pepper, and those powders, then let the oven do the work for hours—no babysitting required.
- Crispy and Tender: The slow roast gives you that perfect bark outside with fall-apart meat inside, and the garlic-onion crust is honestly addictive.
- Feeds a Crowd: One pork butt makes enough for Sunday dinner, leftovers for sandwiches, and maybe even a taco night later in the week.
- Budget Hero: Pork butt is cheap, and with just a few pantry staples, I turn it into a meal that tastes way fancier than the cost.
Step-by-Step Instructions for Pork Butt Roast Oven
This method delivers melt-in-your-mouth results with a caramelized bark and perfect tenderness.
Step 1: Prepare the Pork Butt with Dry Rub
Pat the 4 lb Pork Butt dry with paper towels to ensure the rub adheres properly. In a small bowl, combine the 2 tbsp Kosher Salt, 1 tbsp Coarse Black Pepper, 1 tbsp Garlic Powder, 1 tbsp Onion Powder, 1 tbsp Smoked Paprika, and 0.5 cup Brown Sugar.
Rub this mixture evenly over all surfaces of the pork, pressing firmly to create a thick crust. The brown sugar will caramelize during cooking, forming a sticky, flavorful bark. Let the seasoned pork sit at room temperature for 30 minutes while you preheat the oven.
Step 2: Create a Flavorful Sear and Mop
In a small bowl, whisk together the 0.25 cup Yellow Mustard, 0.25 cup Apple Cider Vinegar, and 2 tbsp Olive Oil. This tangy mixture will baste the pork as it roasts, adding moisture and depth.
Heat a large Dutch oven over medium-high heat. Sear the pork on all sides until deeply browned, about 3-4 minutes per side. This step builds a flavor foundation and kickstarts the bark formation.
Step 3: Slow-Roast to Tenderness
Preheat your oven to 300°F. Place the seared pork in the Dutch oven, then add the 1 cup Low-Sodium Chicken Stock and 2 sprigs Fresh Rosemary to the pot. Cover tightly with a lid.
Roast in the oven for 4-5 hours, or until the internal temperature reaches 195-205°F. At this temperature, the collagen breaks down, yielding that signature pull-apart texture. Baste with the mop mixture every 60-90 minutes to keep the exterior moist and flavorful.
Step 4: Rest and Shred
Remove the pork from the oven and let it rest, covered, for 30-45 minutes. This rest allows the juices to redistribute, ensuring every bite is moist and flavorful.
Discard the fresh rosemary sprigs and shred the pork using two forks. It should come apart effortlessly, with a rich, caramelized exterior and juicy interior. Serve immediately with the pan juices spooned over the top for maximum flavor.
Pro Tips For Making Pork Butt Roast Recipe Oven
- Season Overnight: I learned this the hard way—rub the pork butt with kosher salt, black pepper, garlic powder, and onion powder the night before. The extra time lets the seasoning penetrate deep into the meat.
- Start Low, Finish Hot: Cook it at 275°F for most of the time, then crank the oven to 450°F for the last 20 minutes to get that perfect crust. Sounds weird, but it works.
- Don’t Rush the Rest: After pulling it from the oven, tent it with foil and let it rest for at least 30 minutes. I used to skip this and wondered why my pork was dry.
- Skip the Marinade: With pork butt, a dry rub is all you need—no fancy marinades. My grandmother swore by this, and she was right: it keeps the flavor bold and simple.
Make-Ahead Tips for pork butt roast recipe oven
Overnight Dry Rub
For maximum flavor penetration, I apply the dry rub up to 12 hours before cooking. Simply mix the 2 tbsp Kosher Salt, 1 tbsp Coarse Black Pepper, and other spices as directed, then rub it all over the pork. Wrap tightly in plastic and refrigerate overnight. The salt has time to work its magic deep into the meat. 💡
Morning Prep Strategy
If starting in the morning, prep everything the night before: measure all spices, mix the mop sauce, and even sear the pork. Store the seasoned meat and sauce separately in the fridge. In the morning, just add the 1 cup Low-Sodium Chicken Stock and roast as usual. This saves 20 minutes of active prep time.
Partial Cook Method
For even more convenience, cook the pork at 275°F for 3 hours the day before, then refrigerate it in the Dutch oven with all the juices. The next day, finish cooking at 300°F for 1.5-2 hours. The flavors concentrate overnight, and you’ll still get that perfect 195°F internal temp.
Shredding Ahead
Once fully cooked and rested, shred the pork and store it in its juices in an airtight container. It keeps beautifully for 4-5 days in the fridge. When ready to serve, reheat gently on the stove with a splash of chicken stock to restore moisture. This is my go-to for busy weeks with Tom and Lily.
Freezing Portions
Portion the shredded pork into freezer bags with some juices—2 cups per bag works well for our family. It freezes for up to 3 months without losing quality. Thaw overnight in the fridge, then reheat slowly on the stove. Perfect for those Portland winter nights when cooking feels like too much. ❄️
Nutrition Facts
Frequently Asked Questions
What temperature should the oven be set to?
Set your oven to 300°F for slow-roasting. This low and steady heat allows the collagen to break down gradually. The internal temperature should reach 195-205°F for perfect tenderness.
How long does it take to cook?
Plan for 4-5 hours of cooking time for a 4 lb cut. Baste every 60-90 minutes to keep it moist. The exact time depends on your oven and the pork’s size.
Can I use a different cut of pork?
Pork shoulder works as a substitute, though it’s slightly leaner. For best results, choose a well-marbled, bone-in piece. Avoid lean cuts like tenderloin, as they won’t achieve the same texture.
Why is resting important after cooking?
Resting for 30-45 minutes lets juices redistribute throughout the meat. Skipping this step can result in dry pork, as the juices will spill out when you slice or shred it.

- Potato Chip Cookie Recipe With Pecans: Buttery Crunch Meets Nutty Richness - October 30, 2026
- Potato Patty Recipe No Egg: Crispy Edges Without the Binder - October 30, 2026
- Paula Deen’s Potato Chip Cookies Recipe: Salty-Sweet Crunch in Every Bite - October 30, 2026