
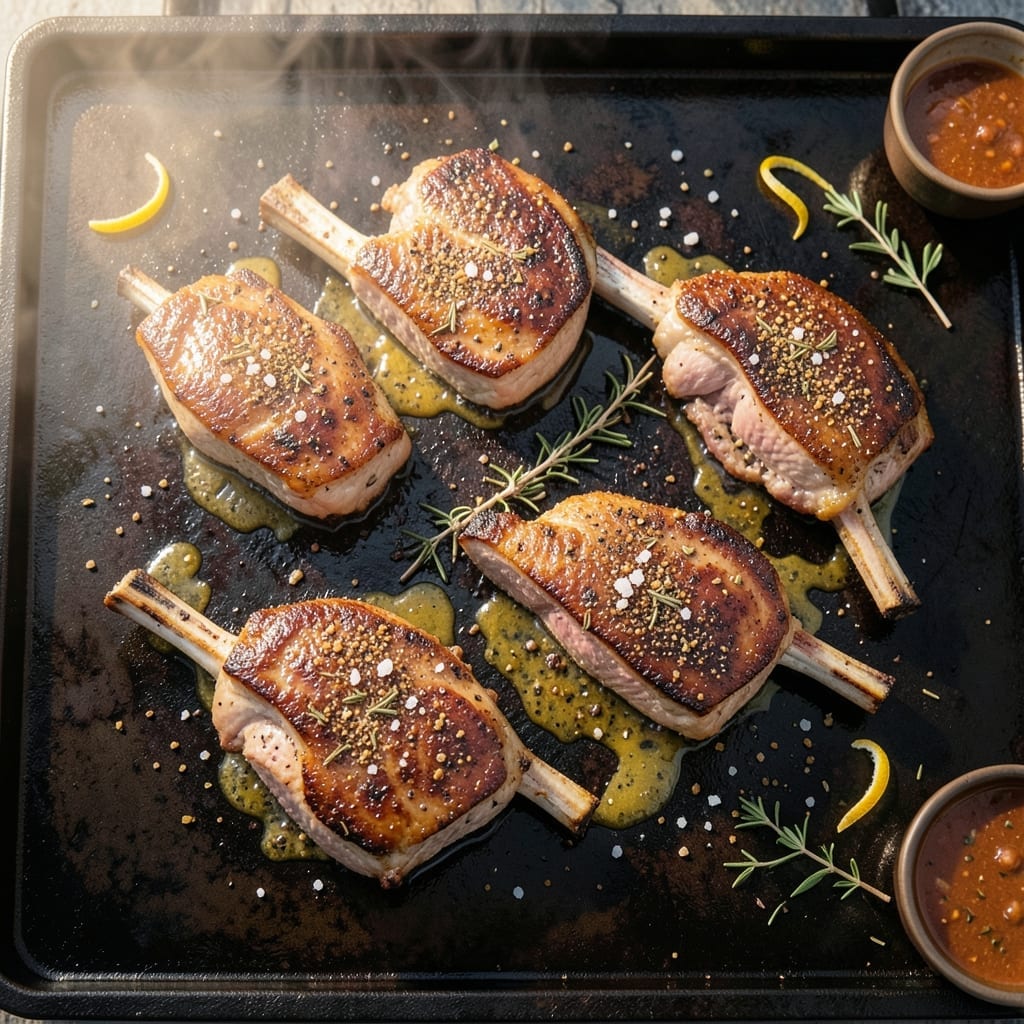
Nothing beats the smoky char of pork chops cooked on a Blackstone grill. The flat-top surface creates an even sear while locking in juices, giving each bite a perfectly caramelized crust.
I developed this method after years of perfecting my grill technique, combining simple seasonings with precise heat control. The result is tender, flavorful pork with that signature Blackstone kiss of smoke.
The key is high heat and patience—let the chops develop a deep crust before flipping. A quick rest after cooking ensures the juices redistribute, delivering herb-infused tenderness in every bite.
Pair with grilled vegetables or a fresh salad for a complete meal. This technique works for any cut, from bone-in to boneless.
Ingredients for Pork Chop Recipe on Blackstone Grill
High-quality pork chops plus a handful of seasonings deliver that signature Blackstone char and juiciness.
| Ingredient | Amount | Notes |
|---|---|---|
| Bone-In Pork Chops 🥩 | 4 whole | 1 to 1.5 inches thick |
| Kosher Salt 🧂 | 2 tsp | Diamond Crystal preferred |
| Black Pepper 🌶️ | 1 ½ tsp | Freshly ground, coarse |
| Garlic Powder 🧄 | 1 tsp | Not garlic salt |
| Smoked Paprika 🌶️ | 1 tsp | Sweet or hot variety |
| Dried Thyme 🍃 | 1 tsp | Or 1 tbsp fresh |
| Dried Rosemary 🌿 | 1 tsp | Crushed between fingers |
| Olive Oil 🫒 | ¼ cup | High smoke point variety |
| Unsalted Butter 🧈 | 4 tbsp | For basting chops |
| Fresh Garlic Cloves 🧄 | 3 cloves | Minced, for herb butter |
| Fresh Parsley 🌿 | ¼ cup | Chopped, for garnish |
| Lemon Wedges 🍋 | 4 pieces | For serving and brightness |
The pork chops are non-negotiable—bone-in, 1 to 1.5 inches thick ensures they stay juicy under high heat. Costco or ButcherBox are reliable for well-marbled cuts. Look for a light pink color with visible fat streaks. The thickness matters: too thin and they’ll dry out before developing that caramelized crust. If you’re starting with frozen, thaw them completely in the fridge overnight.
No smoked paprika? Regular paprika plus a pinch of chipotle powder works in a pinch. Fresh herbs can replace dried—use three times the amount since they’re less concentrated. The butter is key for basting; if avoiding dairy, avocado oil handles high heat well. Avoid pre-minced garlic in jars—it lacks the punch of fresh.
Leftovers keep in the fridge for 3-4 days but are best eaten fresh. Reheat gently in a skillet with a splash of water to prevent drying out. Freezing isn’t ideal—pork chops can turn tough when thawed. Always bring chops to room temperature before cooking for even doneness.
Why You’ll Love This Recipe
- I’ll be real: these taste even better the next day in a sandwich or chopped into fried rice. No waste, just more flavor.
- One Pan Wonder: I love that I can cook these pork chops on the Blackstone with just salt, pepper, and spices—no extra pans or complicated steps.
- Smoky Depth: The smoked paprika and garlic powder create this rich, almost campfire-like flavor that makes the chops taste way fancier than they are.
- Weeknight Hero: Honestly, it’s my go-to for busy evenings when I need something hearty on the table fast—bone-in chops stay juicy every time.
Step-by-Step Instructions for Pork Chops on Blackstone Grill
Master the technique for achieving restaurant-quality sear and herb-infused flavor on your griddle.
Step 1: Season the Chops with a Robust Dry Rub
Pat the 4 whole bone-in pork chops dry with paper towels to ensure optimal browning. In a small bowl, combine the 2 tsp kosher salt, 1.5 tsp black pepper, 1 tsp garlic powder, 1 tsp smoked paprika, 1 tsp dried thyme, and 1 tsp dried rosemary. I crush the dried rosemary between my fingers to release its aromatic oils.
Rub this spice blend generously over all surfaces of the pork chops, pressing it into the meat. This creates a flavorful crust and ensures every bite is well-seasoned. Let the chops sit at room temperature for 15-20 minutes while you preheat the griddle—this promotes even cooking and better flavor development.
Step 2: Preheat and Prepare the Blackstone Griddle
Turn all burners on your Blackstone to medium-high heat and allow the surface to preheat for 10-12 minutes. The griddle is ready when a drop of water sizzles and evaporates immediately upon contact. Distribute the 0.25 cup olive oil evenly across the cooking surface using a paper towel or griddle scraper.
You want the oil to shimmer but not smoke. This creates the perfect non-stick surface for achieving that coveted sear. I always check for hot spots by testing different areas with a small piece of food—adjust the heat as needed to maintain an even temperature across the entire surface.
Step 3: Sear the Chops to Perfection
Place the pork chops on the hot griddle, leaving at least 2 inches between each piece to prevent steaming. Cook undisturbed for 4-5 minutes until a deep brown crust forms and the chops release easily from the surface. Resist the urge to move them—this is how you get those beautiful grill marks.
Flip the chops and immediately add 1 tbsp of the 4 tbsp unsalted butter to each chop. As the butter melts, baste the chops continuously with the foamy butter for 1-2 minutes. This basting technique adds rich flavor and helps cook the chops evenly through.
For the final touch, add the minced 3 cloves fresh garlic cloves to the griddle around the chops during the last 30 seconds of cooking. The residual heat will soften the garlic without burning it, infusing the butter with aromatic flavor.
Step 4: Rest and Serve with Fresh Garnishes
Transfer the chops to a cutting board or warm platter. Tent loosely with foil and let them rest for 5-8 minutes—this allows the juices to redistribute throughout the meat, ensuring every bite is moist and flavorful. The internal temperature should reach 145°F during this rest period.
Garnish with the 0.25 cup fresh parsley, chopped, and serve immediately with the 4 pieces lemon wedges on the side. The acidity from the lemon cuts through the richness of the butter and pork, balancing each bite perfectly. Serve with your favorite sides and enjoy the smoky, herb-infused results of your Blackstone mastery.
Pro Tips For Making Pork Chop Recipe On Blackstone Grill
- Preheat the Stone: Crank that Blackstone to high for at least 10 minutes before cooking. I learned this the hard way—cold spots mean uneven searing on those bone-in chops.
- Dry the Chops: Pat those pork chops bone-dry with paper towels before seasoning. Sounds weird, but it works: moisture is the enemy of a good crust.
- Skip the Overcrowding: Leave space between chops—about 2 inches—so they sear, not steam. After burning three batches, I finally figured out that steam ruins the smoked paprika flavor.
- Rest Before Serving: Pull the chops at 140°F and let them rest 5 minutes under foil. My grandmother swore by this, and she was right: it locks in the juices better than any trick I’ve tried.
Essential Equipment for This Recipe
Blackstone Griddle
Invest in a quality 36-inch Blackstone griddle for even heat distribution. The thick steel surface retains heat perfectly for searing. I use the 4-burner model for versatility with larger cuts. 🔥
Griddle Tools
A metal spatula and griddle scraper are non-negotiable for flipping chops and maintaining your surface. I prefer the Blackstone-branded tools—they’re built to last. Keep a paper towel holder nearby for quick oil application.
Thermometer
An instant-read digital thermometer ensures perfect doneness. I trust my ThermoWorks Thermapen for accuracy within 1°F. Check the thickest part of each chop to hit that ideal 145°F internal temperature.
Heat Source
Use propane tanks with at least 20,000 BTU output per burner for consistent high heat. I always keep a backup tank on hand for longer cooking sessions. The even flame distribution is key for that perfect sear.
Oil Applicator
A silicone brush or oil bottle with a pour spout helps distribute oil evenly across the hot surface. I use a high smoke point oil like avocado or refined coconut oil to prevent burning.
Resting Surface
Have a warm platter or cutting board ready for resting your chops. I line mine with a wire rack to allow airflow underneath, preventing the crust from getting soggy during the 5-8 minute rest. 💡
Nutrition Facts
Frequently Asked Questions
What thickness works best for griddle cooking?
1-1.5 inch bone-in cuts provide ideal results. Thinner chops dry out too quickly on the hot surface, while thicker ones may not cook through evenly before the outside burns.
How do I prevent the chops from sticking?
Ensure your griddle is fully preheated to medium-high heat and properly oiled. Only flip when the chops release easily—this means a good crust has formed. Use a metal spatula for clean releases.
Can I use boneless chops instead?
Yes, but reduce cooking time by 1-2 minutes per side. Boneless chops cook faster and can dry out more easily. They’ll still develop good flavor but may lack the juiciness of bone-in cuts.
What’s the best way to check doneness?
Use an instant-read thermometer inserted into the thickest part. Remove from heat at 140°F—the temperature will rise to 145°F during the 5-8 minute rest. Avoid cutting into the meat to check.

- Potato Chip Cookie Recipe With Pecans: Buttery Crunch Meets Nutty Richness - October 30, 2026
- Potato Patty Recipe No Egg: Crispy Edges Without the Binder - October 30, 2026
- Paula Deen’s Potato Chip Cookies Recipe: Salty-Sweet Crunch in Every Bite - October 30, 2026