
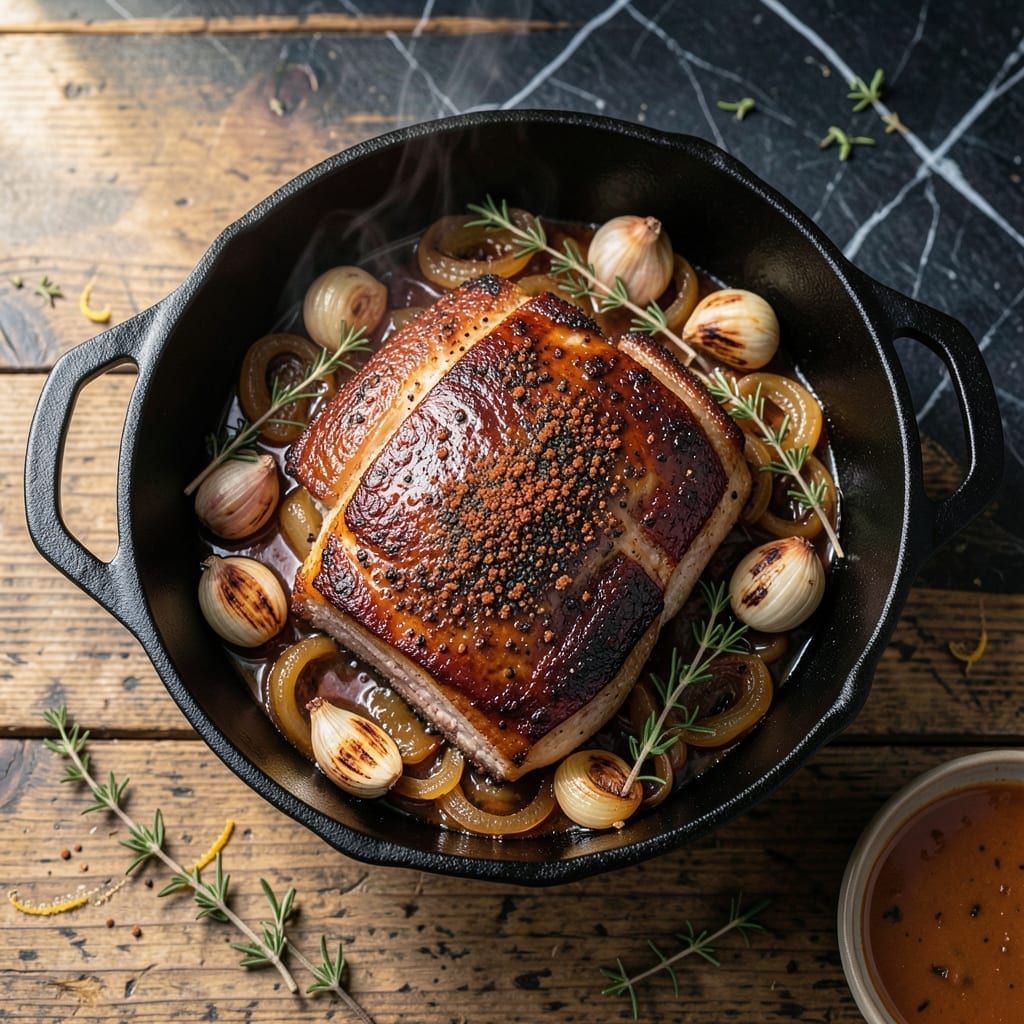
This oven-roasted pork collar delivers juicy meat with crispy edges every time. I developed this method after years of testing to perfect the balance between tender interior and golden crust.
The secret lies in slow-roasting at a moderate temperature, allowing the fat to render while keeping the meat moist. A simple dry rub enhances the natural pork flavor without overpowering it.
What emerges is a cut that falls apart at the touch of a fork, with a caramelized exterior that crackles with each bite. The slow roast transforms this affordable cut into something truly special.
Serve with roasted vegetables or mashed potatoes to soak up the pan juices. This technique works for any pork collar cut.
Ingredients for Pork Collar Recipe Oven
Simple dry rub and slow roasting transform this affordable cut into juicy perfection.
| Ingredient | Amount | Notes |
|---|---|---|
| Pork Collar 🥩 | 2 lb | Bone-in, skin-on preferred |
| Kosher Salt 🧂 | 1 ½ tbsp | Diamond Crystal preferred |
| Black Pepper 🌶️ | 1 tbsp | Freshly ground for best flavor |
| Brown Sugar 🍚 | 2 tbsp | Light or dark variety |
| Smoked Paprika 🌶️ | 1 tbsp | Adds depth and color |
| Garlic Powder 🧄 | 1 tbsp | Not garlic salt |
| Onion Powder 🧅 | 1 tbsp | Balances the dry rub |
| Dried Thyme 🍃 | 1 tsp | Crushed between fingers |
| Olive Oil 🫒 | 2 tbsp | For searing and moisture |
| Yellow Onion 🧅 | 1 whole | Large, roughly chopped |
| Carrots 🥕 | 3 whole | Peeled and cut into chunks |
| Celery Stalks 🌿 | 2 whole | Cut into large pieces |
| Chicken Stock 🥣 | 1 cup | Low-sodium preferred |
The pork collar is key here. Ask your butcher for bone-in, skin-on—it renders fat better and keeps the meat moist. I’ve had luck at Whole Foods and local markets, but most supermarkets carry it too (sometimes labeled as pork neck). Look for pieces with good marbling and a thick fat cap. The skin will crisp up beautifully in the oven.
No smoked paprika? Regular paprika plus a pinch of chipotle powder gets you close. Brown sugar can be swapped for maple syrup (about one-third less since it’s liquid). The veggies under the meat are flexible—potatoes or parsnips work just as well. If you’re out of chicken stock, water with a bouillon cube in a pinch, but the stock adds depth.
Leftovers keep in the fridge for 4-5 days or freeze for up to 3 months. The meat reheats well, but the skin loses some crispness—just pop it under the broiler for a minute to revive it. Always bring pork to room temp before roasting for even cooking.
Why You’ll Love This Recipe
- Set It and Forget: I rub the pork collar with salt, pepper, sugar, and smoked paprika, pop it in the oven, and let the heat do the work.
- Caramelized Crust: That brown sugar and paprika mix turns into a sticky, smoky-sweet crust that’s irresistible.
- Feeds My Crew: One big cut serves a family dinner or a casual get-together without breaking the bank.
- Leftovers for Days: The meat stays juicy, so I slice it thin for sandwiches or dice it for tacos the next day.
Step-by-Step Instructions for Pork Collar Oven Roast
This method ensures tender meat with crispy edges every single time.
Step 1: Prepare the Dry Rub and Season the Pork Collar
In a small bowl, combine the 1.5 tbsp Kosher Salt, 1 tbsp Black Pepper, 2 tbsp Brown Sugar, 1 tbsp Smoked Paprika, 1 tbsp Garlic Powder, 1 tbsp Onion Powder, and 1 tsp Dried Thyme. Crush the dried thyme between your fingers as you add it to release its aroma.
Pat the 2 lb Pork Collar dry with paper towels, then rub it all over with the spice mixture. Press firmly so the rub adheres to every surface. The sugar in the mix will help create that coveted caramelized crust. Let the seasoned pork collar sit at room temperature for 30 minutes while you preheat the oven.
Step 2: Sear the Pork Collar for Maximum Flavor
Place a large oven-safe pot or Dutch oven over medium-high heat. Add the 2 tbsp Olive Oil and swirl to coat the bottom. When the oil shimmers, add the pork collar skin-side down and sear undisturbed for 4-5 minutes until deeply browned.
Flip the pork collar and sear the other side for another 4-5 minutes. The skin should develop a rich, golden-brown color. This searing step builds a flavor foundation and helps render some of the fat, which keeps the meat juicy during roasting. Remove the pork collar and set it aside temporarily.
Step 3: Add Vegetables and Begin Roasting
Reduce the heat to medium and add the 1 whole Yellow Onion (roughly chopped), 3 whole Carrots (peeled and cut into chunks), and 2 whole Celery Stalks (cut into large pieces) to the pot. Cook for 3-4 minutes, stirring occasionally, until the vegetables begin to soften and brown slightly.
Return the pork collar to the pot, skin-side up, and pour in the 1 cup Chicken Stock. The liquid should come about halfway up the pork collar but not submerge it. This creates a moist environment that prevents drying while allowing the top to crisp.
Step 4: Slow-Roast to Perfection
Cover the pot and transfer it to a preheated 325°F oven. Roast for 2 hours, then remove the lid and increase the oven temperature to 400°F. Roast uncovered for an additional 30-45 minutes until the skin is crispy and the internal temperature reaches 195-200°F.
The pork collar is done when it’s fork-tender and the skin has developed a deep, crackling crust. The collagen in this cut breaks down beautifully during the long cook, creating that meltingly tender texture. Baste the pork collar with the pan juices once or twice during the uncovered roasting to enhance the flavor and crispiness.
Step 5: Rest and Serve
Transfer the pork collar to a cutting board and let it rest for 15-20 minutes. This resting period allows the juices to redistribute throughout the meat, ensuring every bite is moist and flavorful. The vegetables will have absorbed the rich pork flavors and can be served alongside.
Slice the pork collar against the grain into thick pieces. The meat should pull apart easily with a fork, while the skin remains crisp. Serve with some of the pan juices spooned over the top for extra moisture and flavor.
Pro Tips For Making Pork Collar Recipe Oven
- Preheat the Oven: Crank it to 425°F first—pork collar needs that initial blast of heat to render the fat and crisp the skin before you drop the temp for slow roasting.
- Score the Fat: Cut 1/4-inch crosshatches into the fat cap so the salt, sugar, and smoked paprika penetrate deep, and you get more crackling surface area.
- Don’t Rush the Rest: After pulling it from the oven, tent it loosely with foil and let it sit 15 minutes; the juices redistribute, and the collagen has time to set so it doesn’t spill out when you slice.
- Use a Wire Rack: sounds weird, but it works: Elevating the pork on a rack over a sheet tray keeps it out of its own fat so the bottom doesn’t steam—just pure, even browning all around.
Perfect Pairings for This Dish
Side Dish Pairings
Roasted root vegetables complement this dish beautifully. Toss diced potatoes and parsnips with olive oil, salt, and rosemary, then roast at 400°F for 30-40 minutes. Their earthy sweetness balances the savory pork perfectly.
Creamy Complements
I love serving this with creamy mashed potatoes or polenta to soak up the rich pan juices. For extra indulgence, stir ¼ cup grated Parmesan into your mashed potatoes. The contrast of textures makes every bite exciting. 💛
Fresh Contrasts
A crisp green salad with a tangy vinaigrette cuts through the richness. Try mixed greens with sliced apples, walnuts, and a Dijon mustard dressing. The acidity refreshes your palate between bites of pork.
Bread Options
Warm crusty bread or dinner rolls are perfect for mopping up the flavorful juices. I prefer sourdough from my local Portland bakery—its tangy flavor pairs wonderfully with the pork’s richness.
Vegetable Medleys
For a lighter option, try sautéed green beans with garlic and lemon zest. The bright citrus notes complement the deep flavors of the slow-roasted pork collar. 🥕
Fruit Accompaniments
Stewed apples or pears add a sweet contrast that works surprisingly well. Simmer 2 diced apples with 1 tbsp brown sugar and ½ tsp cinnamon until tender—about 15 minutes.
Nutrition Facts
Frequently Asked Questions
What internal temperature should I aim for?
Target 195-200°F internally. This higher temperature ensures the collagen breaks down completely, giving you that fall-apart tenderness. Use a meat thermometer for accuracy.
Can I use a boneless cut instead?
Yes, but bone-in adds more flavor and helps keep the meat moist. If using boneless, reduce cooking time by 20-30 minutes and watch closely to avoid drying out.
Why does the skin sometimes stay chewy?
For crispy skin, ensure it’s very dry before roasting and uncover the pot during the final 30-45 minutes at 400°F. Patting dry and high heat are key.

- Potato Chip Cookie Recipe With Pecans: Buttery Crunch Meets Nutty Richness - October 30, 2026
- Potato Patty Recipe No Egg: Crispy Edges Without the Binder - October 30, 2026
- Paula Deen’s Potato Chip Cookies Recipe: Salty-Sweet Crunch in Every Bite - October 30, 2026