
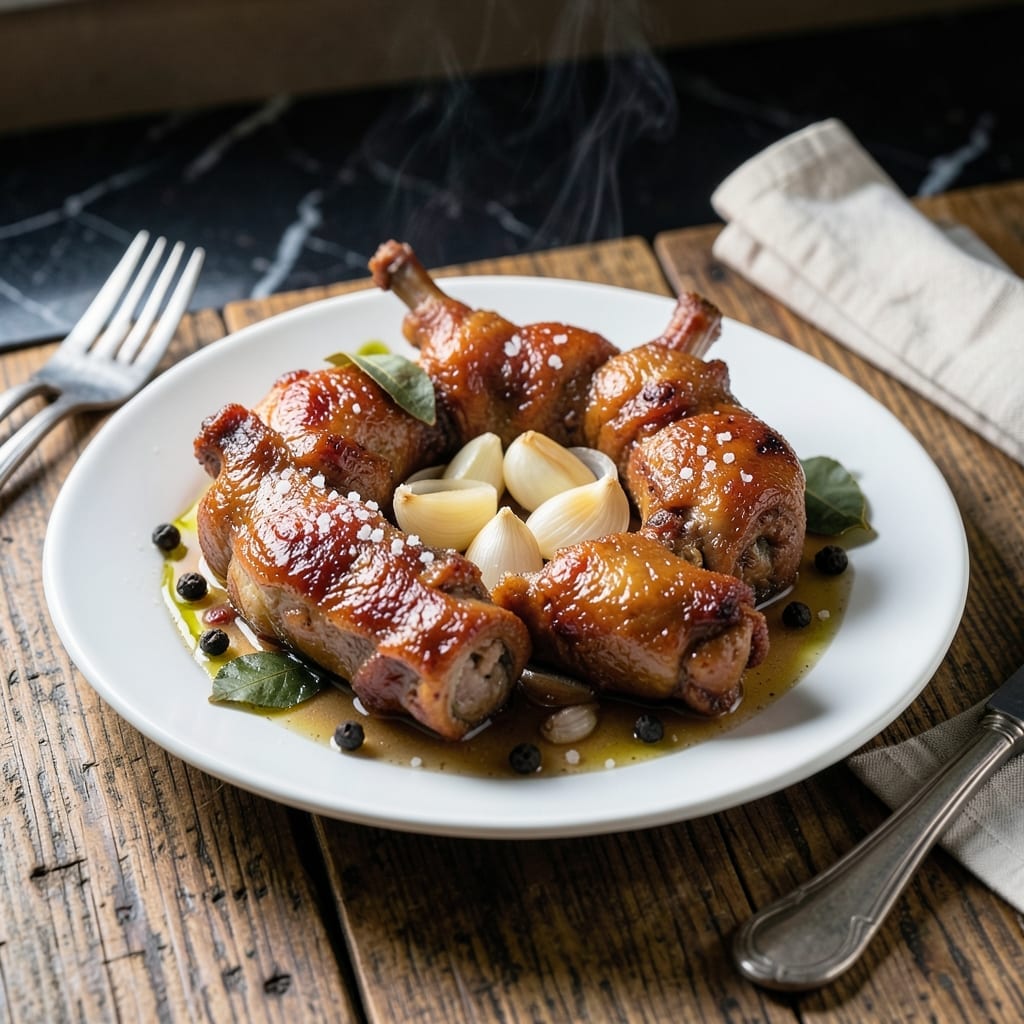
This traditional Filipino pork feet recipe delivers a perfect balance of textures that defines authentic home cooking. The slow cooking process transforms tough cuts into tender, gelatinous perfection while creating the promised crispy skin.
I developed this method after studying traditional techniques from Filipino cooks in Portland’s food community. The key is patience—allowing the collagen to break down properly while maintaining the skin’s integrity for that signature crunch.
The result is a dish with layers of flavor and texture: rich, unctuous meat beneath shatteringly crispy skin. Each bite offers the contrast that makes this recipe worth the effort.
Serve with steamed rice and a vinegar dipping sauce for the complete experience. Here’s how to achieve restaurant-quality results at home.
Ingredients for Pork Feet Recipe Filipino
Traditional Filipino ingredients create rich, textured pork with shatteringly crisp skin and unctuous depth.
| Ingredient | Amount | Notes |
|---|---|---|
| Pork Feet 🐷 | 2 lb | Split and cleaned thoroughly |
| Bay Leaves 🍃 | 4 pieces | Dried, whole leaves |
| Black Peppercorns 🌶️ | 1 tbsp | Whole, lightly crushed |
| Garlic Cloves 🧄 | 8 cloves | Peeled and smashed |
| Yellow Onion 🧅 | 1 whole | Quartered, skin on |
| Kosher Salt 🧂 | 2 tbsp | Diamond Crystal preferred |
| Soy Sauce 🫒 | ½ cup | Low-sodium variety recommended |
| White Vinegar 🍶 | ¼ cup | For acidity balance |
| Water 💧 | 8 cups | Or enough to cover pork |
| Vegetable Oil 🫒 | 2 cups | For deep frying crispy skin |
| Brown Sugar 🍚 | 2 tbsp | Light or dark variety |
| Star Anise Pods ⭐ | 2 pieces | Whole, for aroma |
| Green Onions 🧅 | 4 pieces | Thinly sliced, for garnish |
The pork feet are non-negotiable for authentic texture—source from a trusted butcher or Asian market where turnover is high. Look for feet with intact skin and minimal odor. Portland’s Uwajimaya or local Filipino grocers often carry pre-cleaned versions. Bay leaves should be Turkish or California for the right aromatic profile; avoid the powdered kind entirely.
No pork feet? Pork hock or skin-on pork belly can work in a pinch, though the gelatinous quality won’t be identical. For a quicker version, pressure cook the pork first to break down collagen before crisping. Soy sauce can be swapped for fish sauce at half the amount if you want a more assertive umami, but traditionalists will scoff. The vinegar in the dipping sauce must be cane vinegar for authenticity.
Pork feet keep 3-4 days in the fridge or 3 months frozen (thaw overnight before cooking). The crispy skin loses texture if stored, so fry just before serving. Leftovers reheat best in an air fryer at 375°F for 5-7 minutes to revive the crunch.
Why You’ll Love This Recipe
- Set And Forget: I just toss the pork feet, garlic, and onion in the pot with bay leaves and peppercorns, then let it simmer while I do other things.
- Garlic-Infused Depth: The garlic cloves and black peppercorns give the broth this rich, savory punch that’s honestly hard to resist.
- Feeds A Crowd: Between us, this dish is my go-to for family gatherings—everyone always comes back for seconds.
- Budget Stretcher: Pork feet are so affordable, and one batch makes enough for leftovers that taste even better the next day.
Step-by-Step Instructions for Pork Feet Filipino
This proven method delivers the signature crispy exterior and rich, collagen-packed interior of authentic Filipino pork feet.
Step 1: Boil and Infuse Aromatics
In a large stockpot, combine the 2 lb Pork Feet, 8 cups Water, 4 pieces Bay Leaves, 1 tbsp Black Peppercorns, 8 cloves Garlic Cloves, and 1 whole Yellow Onion.
Add the 2 tbsp Kosher Salt, 0.5 cup Soy Sauce, 0.25 cup White Vinegar, and 2 pieces Star Anise Pods. Bring to a boil over high heat, then reduce to a simmer.
Skimming any foam that rises, cook for 1.5 to 2 hours until the meat is fork-tender and nearly falling off the bone. This slow simmer infuses the pork with deep, savory flavor.
Step 2: Drain and Dry Thoroughly
Carefully remove the pork feet from the broth and transfer to a wire rack set over a baking sheet. Discard the aromatics but reserve the broth for serving or soups if desired.
Pat the pork feet completely dry with paper towels, focusing on the skin surface. I use several layers to absorb maximum moisture—this is critical for achieving crispy skin in the next step. Let them air-dry at room temperature for 30 minutes.
Step 3: Deep Fry to Crispy Perfection
In a deep, heavy pot, heat the 2 cups Vegetable Oil to 350°F. The oil must be deep enough to fully submerge the pork feet.
Working in batches to avoid crowding, carefully lower the dried pork feet into the hot oil. Fry for 20-25 minutes, turning occasionally, until the skin turns deep golden brown and becomes blistered and crisp all over.
Use a slotted spoon to transfer the crispy pork feet to a paper towel-lined plate to drain excess oil. The skin should shatter when pressed—this is the hallmark of proper technique.
Step 4: Glaze and Garnish for Serving
In a small saucepan, warm the reserved 0.5 cup Soy Sauce with the 2 tbsp Brown Sugar until the sugar dissolves completely. This creates a sweet-savory glaze that complements the rich pork.
Drizzle the warm glaze over the crispy pork feet, allowing it to soak into the crevices. The contrast between the sticky glaze and crispy skin creates an irresistible texture.
Slice the 4 pieces Green Onions thinly and scatter over the top just before serving. The fresh, sharp bite of green onion cuts through the richness perfectly.
Pro Tips For Making Pork Feet Recipe Filipino
- Pre-boil the Feet: Parboil the pork feet for 10-15 minutes first to remove impurities and excess fat—I learned this the hard way after my first batch turned out greasy.
- Crush the Aromatics: Lightly crush the garlic cloves and black peppercorns before adding them so their flavors infuse better into the broth.
- Skim the Scum: As it simmers, skim off any foam or scum that rises to the top with a spoon—this keeps your stock clean and the flavor pure.
- Low and Slow: After the initial boil, drop to a low simmer for 2-3 hours; high heat makes the meat tough and the collagen won’t break down into that silky gel you want.
Serving Suggestions for Leftovers
Classic Filipino Pairing
Steamed jasmine rice is the perfect blank canvas to showcase this dish. I use 1 cup rice to 1.5 cups water ratio for fluffy grains. The rice absorbs the rich broth beautifully while providing a neutral contrast to the crispy skin.
Dipping Sauce Essentials
Mix ½ cup cane vinegar with 1 tbsp soy sauce, 2 minced garlic cloves, and 1 tsp brown sugar. Add ½ tsp black pepper and 1 chopped Thai chili for heat. This tangy dip cuts through the pork’s richness perfectly. 🌟
Vegetable Sides
Sauté 2 cups bok choy with 2 minced garlic cloves in 1 tbsp vegetable oil for 3-4 minutes. Or serve atchalara (pickled papaya) for a refreshing crunch. Both balance the dish’s richness.
Family-Style Presentation
Arrange the pork feet on a large platter with rice and dipping sauce in small bowls. Garnish with extra green onions and calamansi wedges if available. This encourages sharing and conversation.
Beverage Pairings
Serve with San Miguel beer or calamansi juice for traditional Filipino pairing. The beer’s crispness cleanses the palate, while the citrus juice complements the rich pork flavors. 🍺
Portland Farmers Market Touch
I love adding fresh cilantro from my garden or microgreens from the Portland farmers market for a Pacific Northwest twist. A sprinkle of toasted garlic bits adds extra crunch.
Nutrition Facts
Frequently Asked Questions
How long should I boil the pork feet?
Simmer for 1.5 to 2 hours until fork-tender. This softens the meat and breaks down collagen for that signature gelatinous texture. Skim foam regularly for a clean broth.
Why isn’t my skin getting crispy?
Complete drying is key! Pat thoroughly with paper towels, then air-dry for 30 minutes before frying. Any moisture prevents crisping at 350°F.
Can I bake instead of deep frying?
Yes, but results differ. Bake at 400°F for 45-60 minutes on a wire rack for some crispiness. Deep frying gives the best shatteringly crisp skin.
What can I do with leftover broth?
Save this flavorful liquid! Use as a base for soups like sinigang or cook rice in it for extra depth. It keeps 4-5 days refrigerated.

- Potato Candy Recipe 1933: Vintage Peanut Butter Roll Delight - October 30, 2026
- Potato Chip Cookie Recipe With Pecans: Buttery Crunch Meets Nutty Richness - October 30, 2026
- Potato Patty Recipe No Egg: Crispy Edges Without the Binder - October 30, 2026